A modular chess set exploring layered metal forms inspired by machined components and industrial textures.

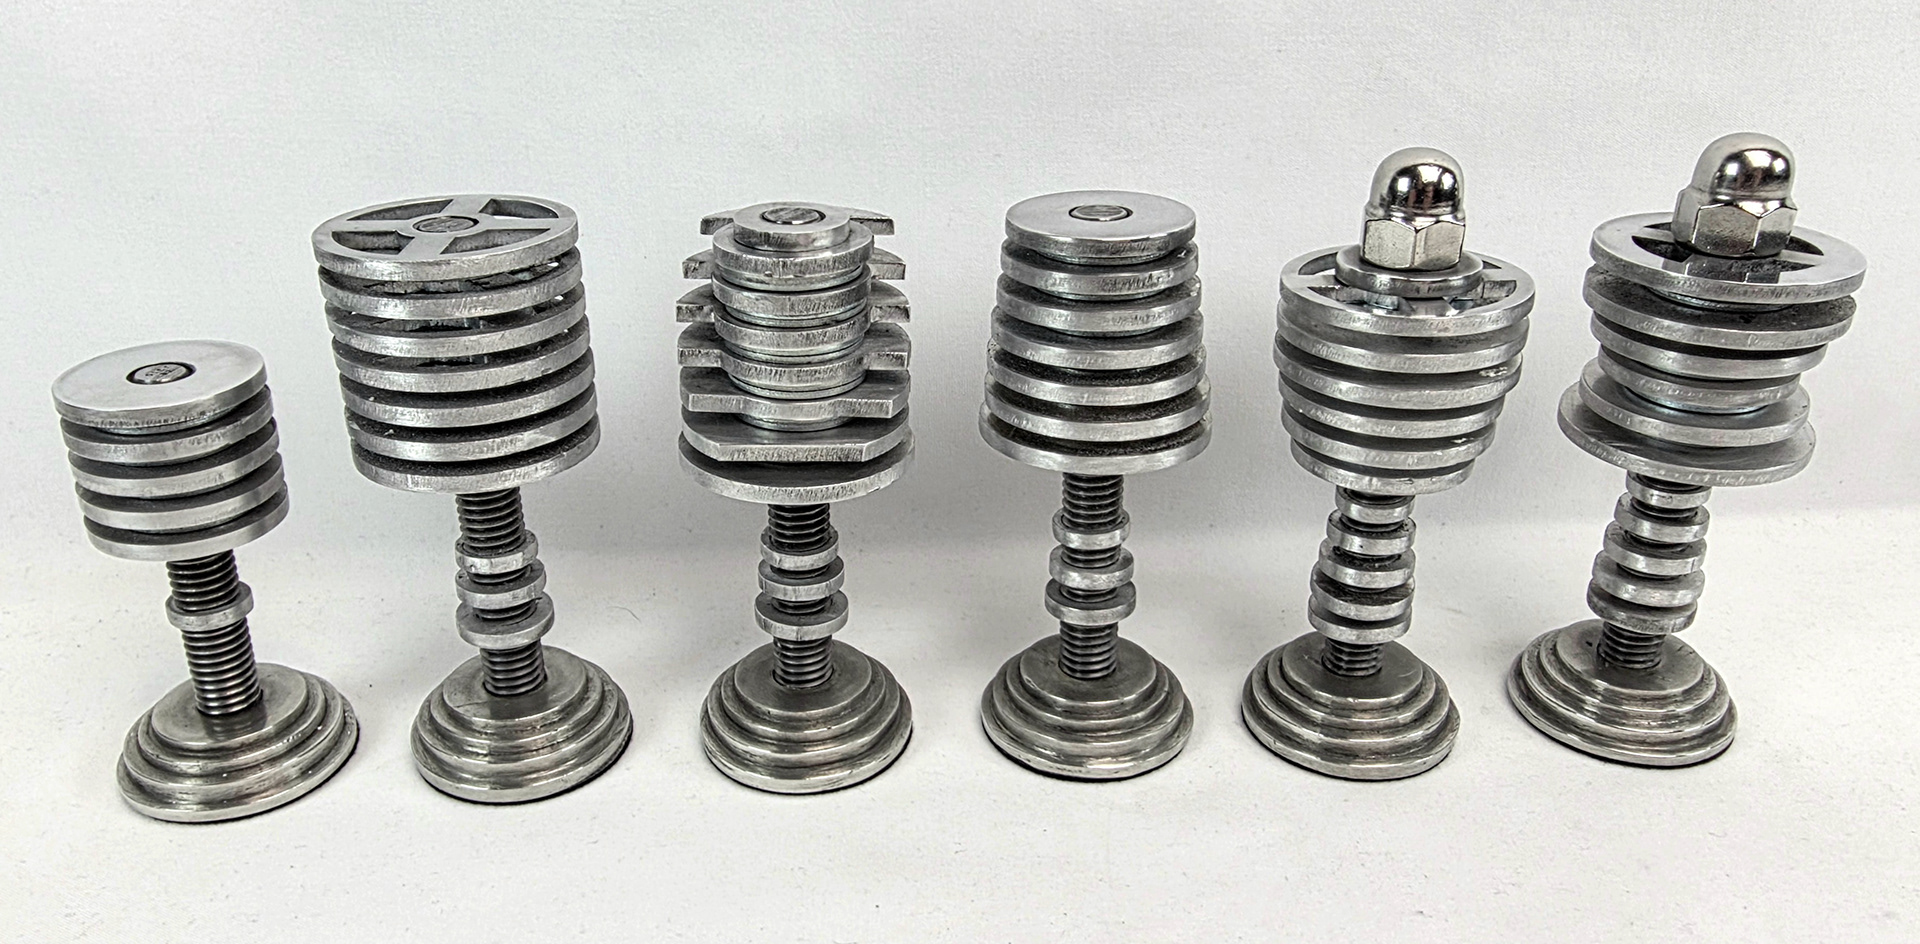
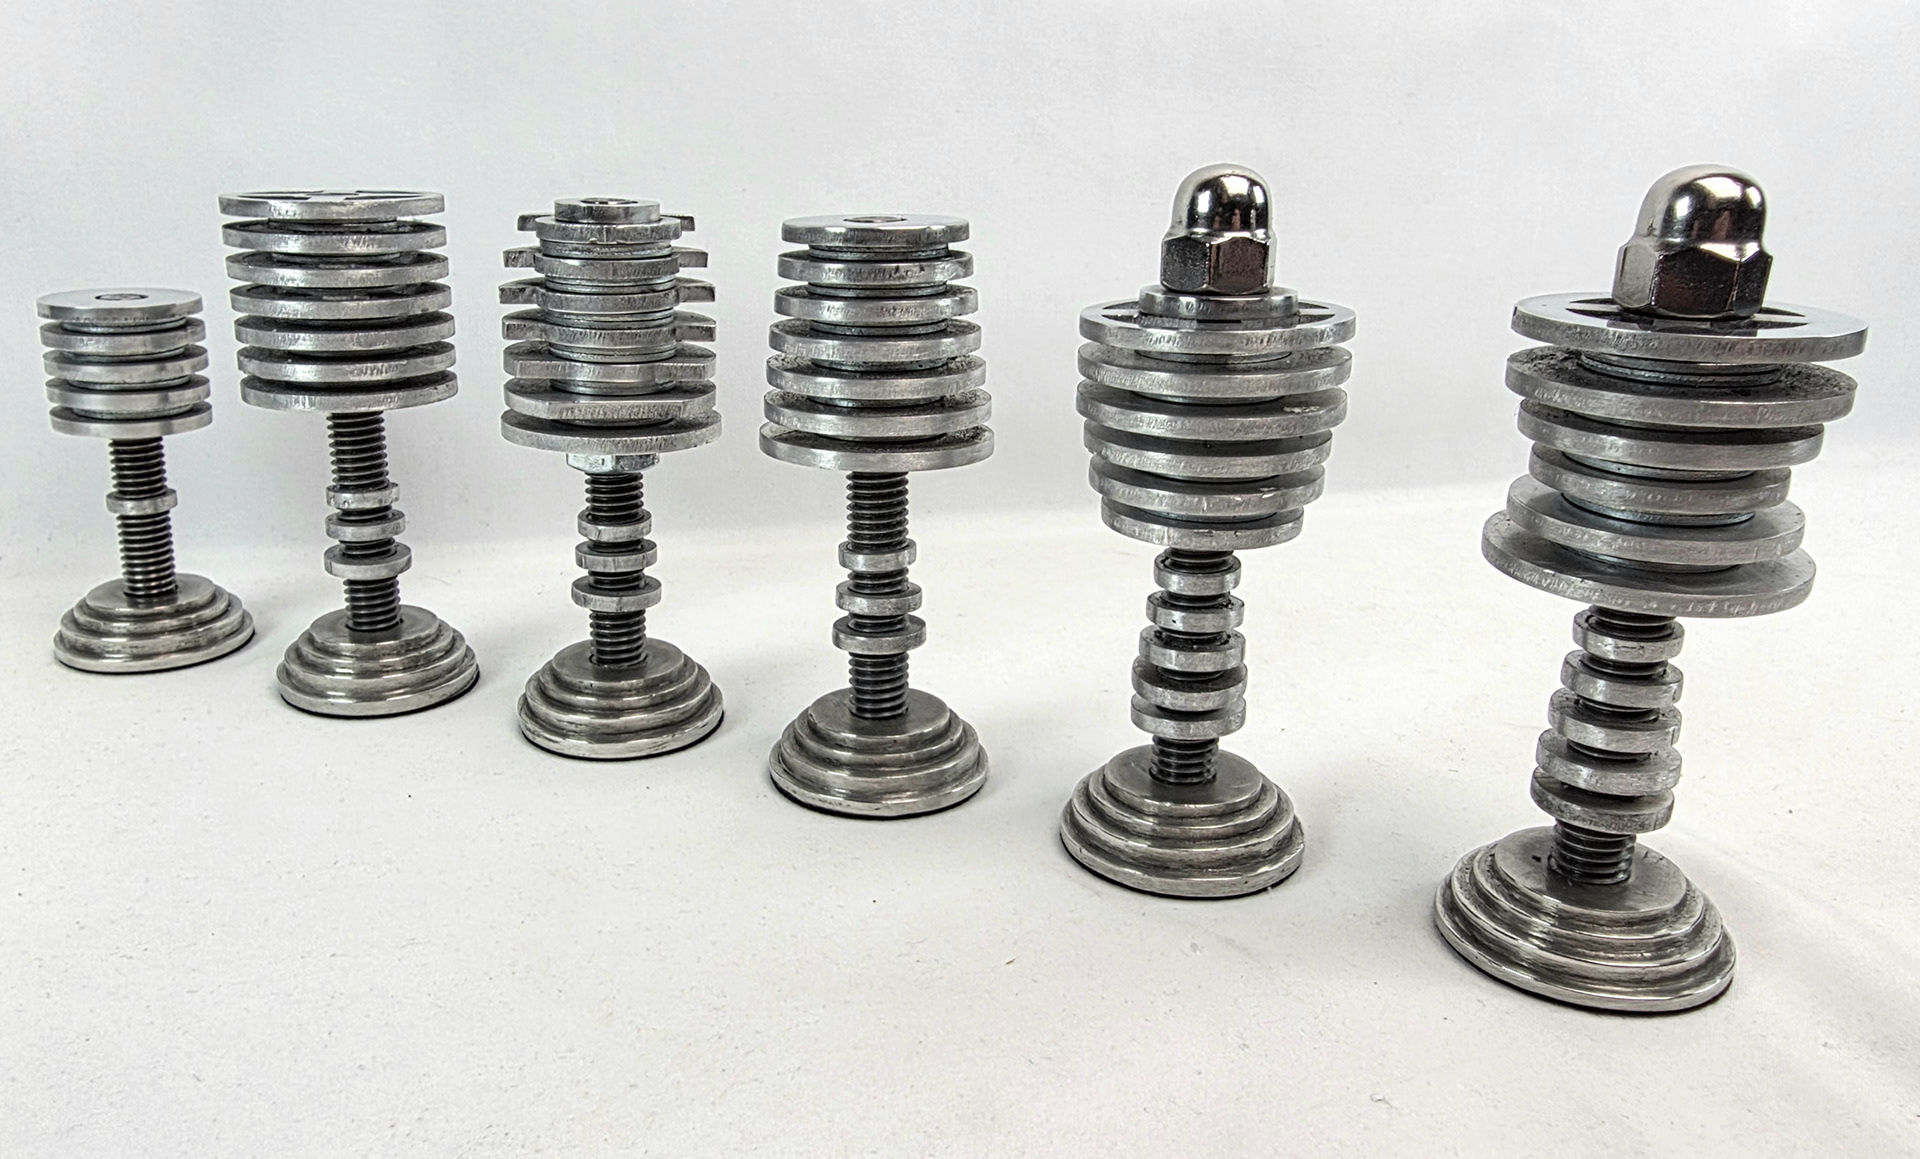
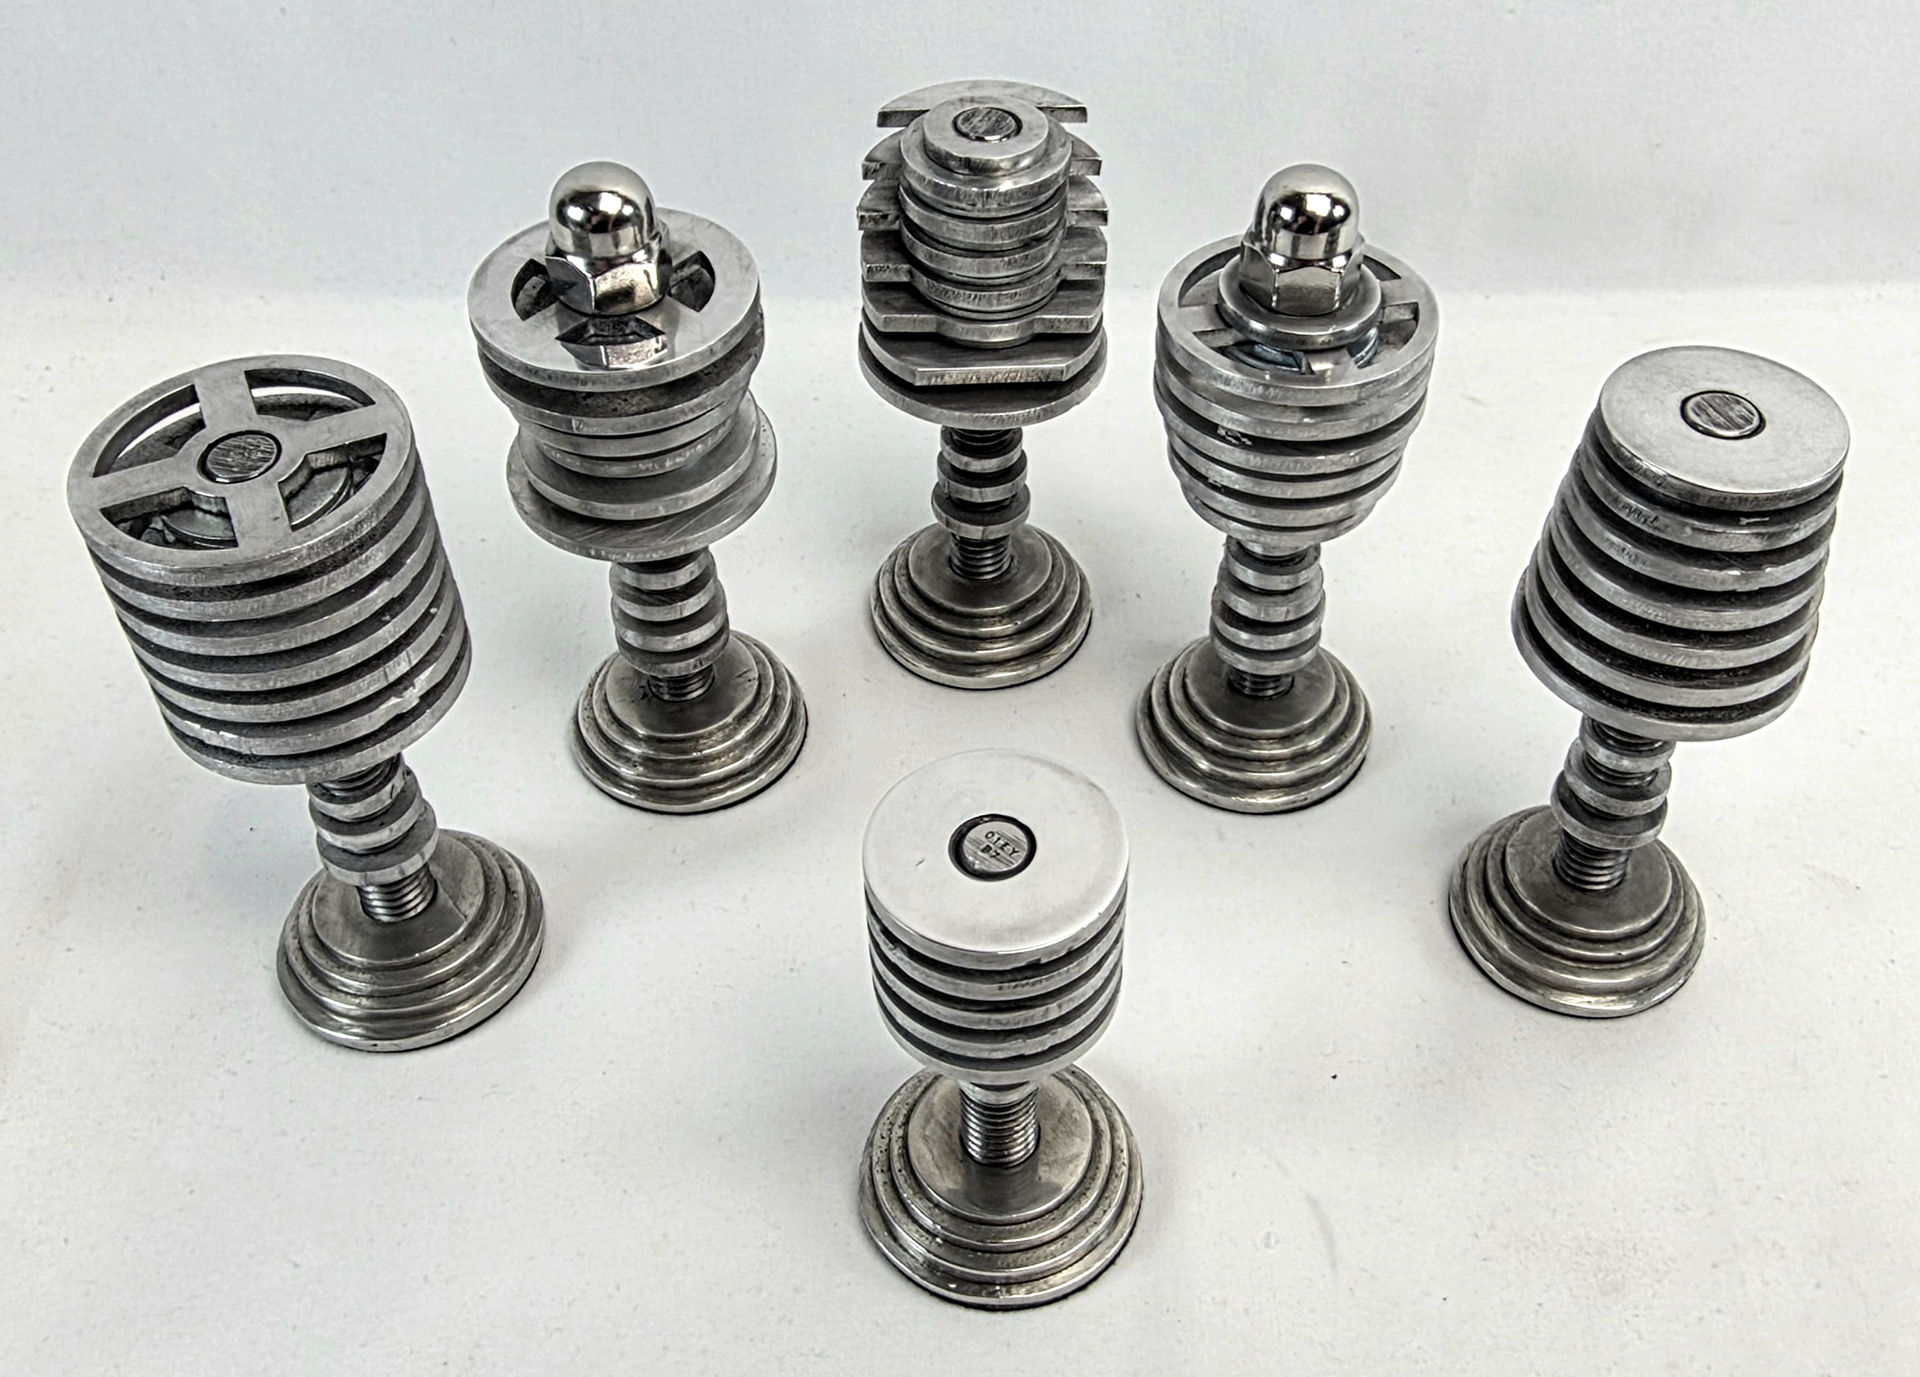
Fully Completed Set
This project explores the design and fabrication of a cohesive chess set built around layered, modular forms. Inspired by machined components such as engine pistons, the pieces emphasize repetition, rhythm, and material contrast.
Through sketching, physical prototyping, CAD modeling, and metal fabrication, the project evolved from abstract form studies into a fully realized and functional set.
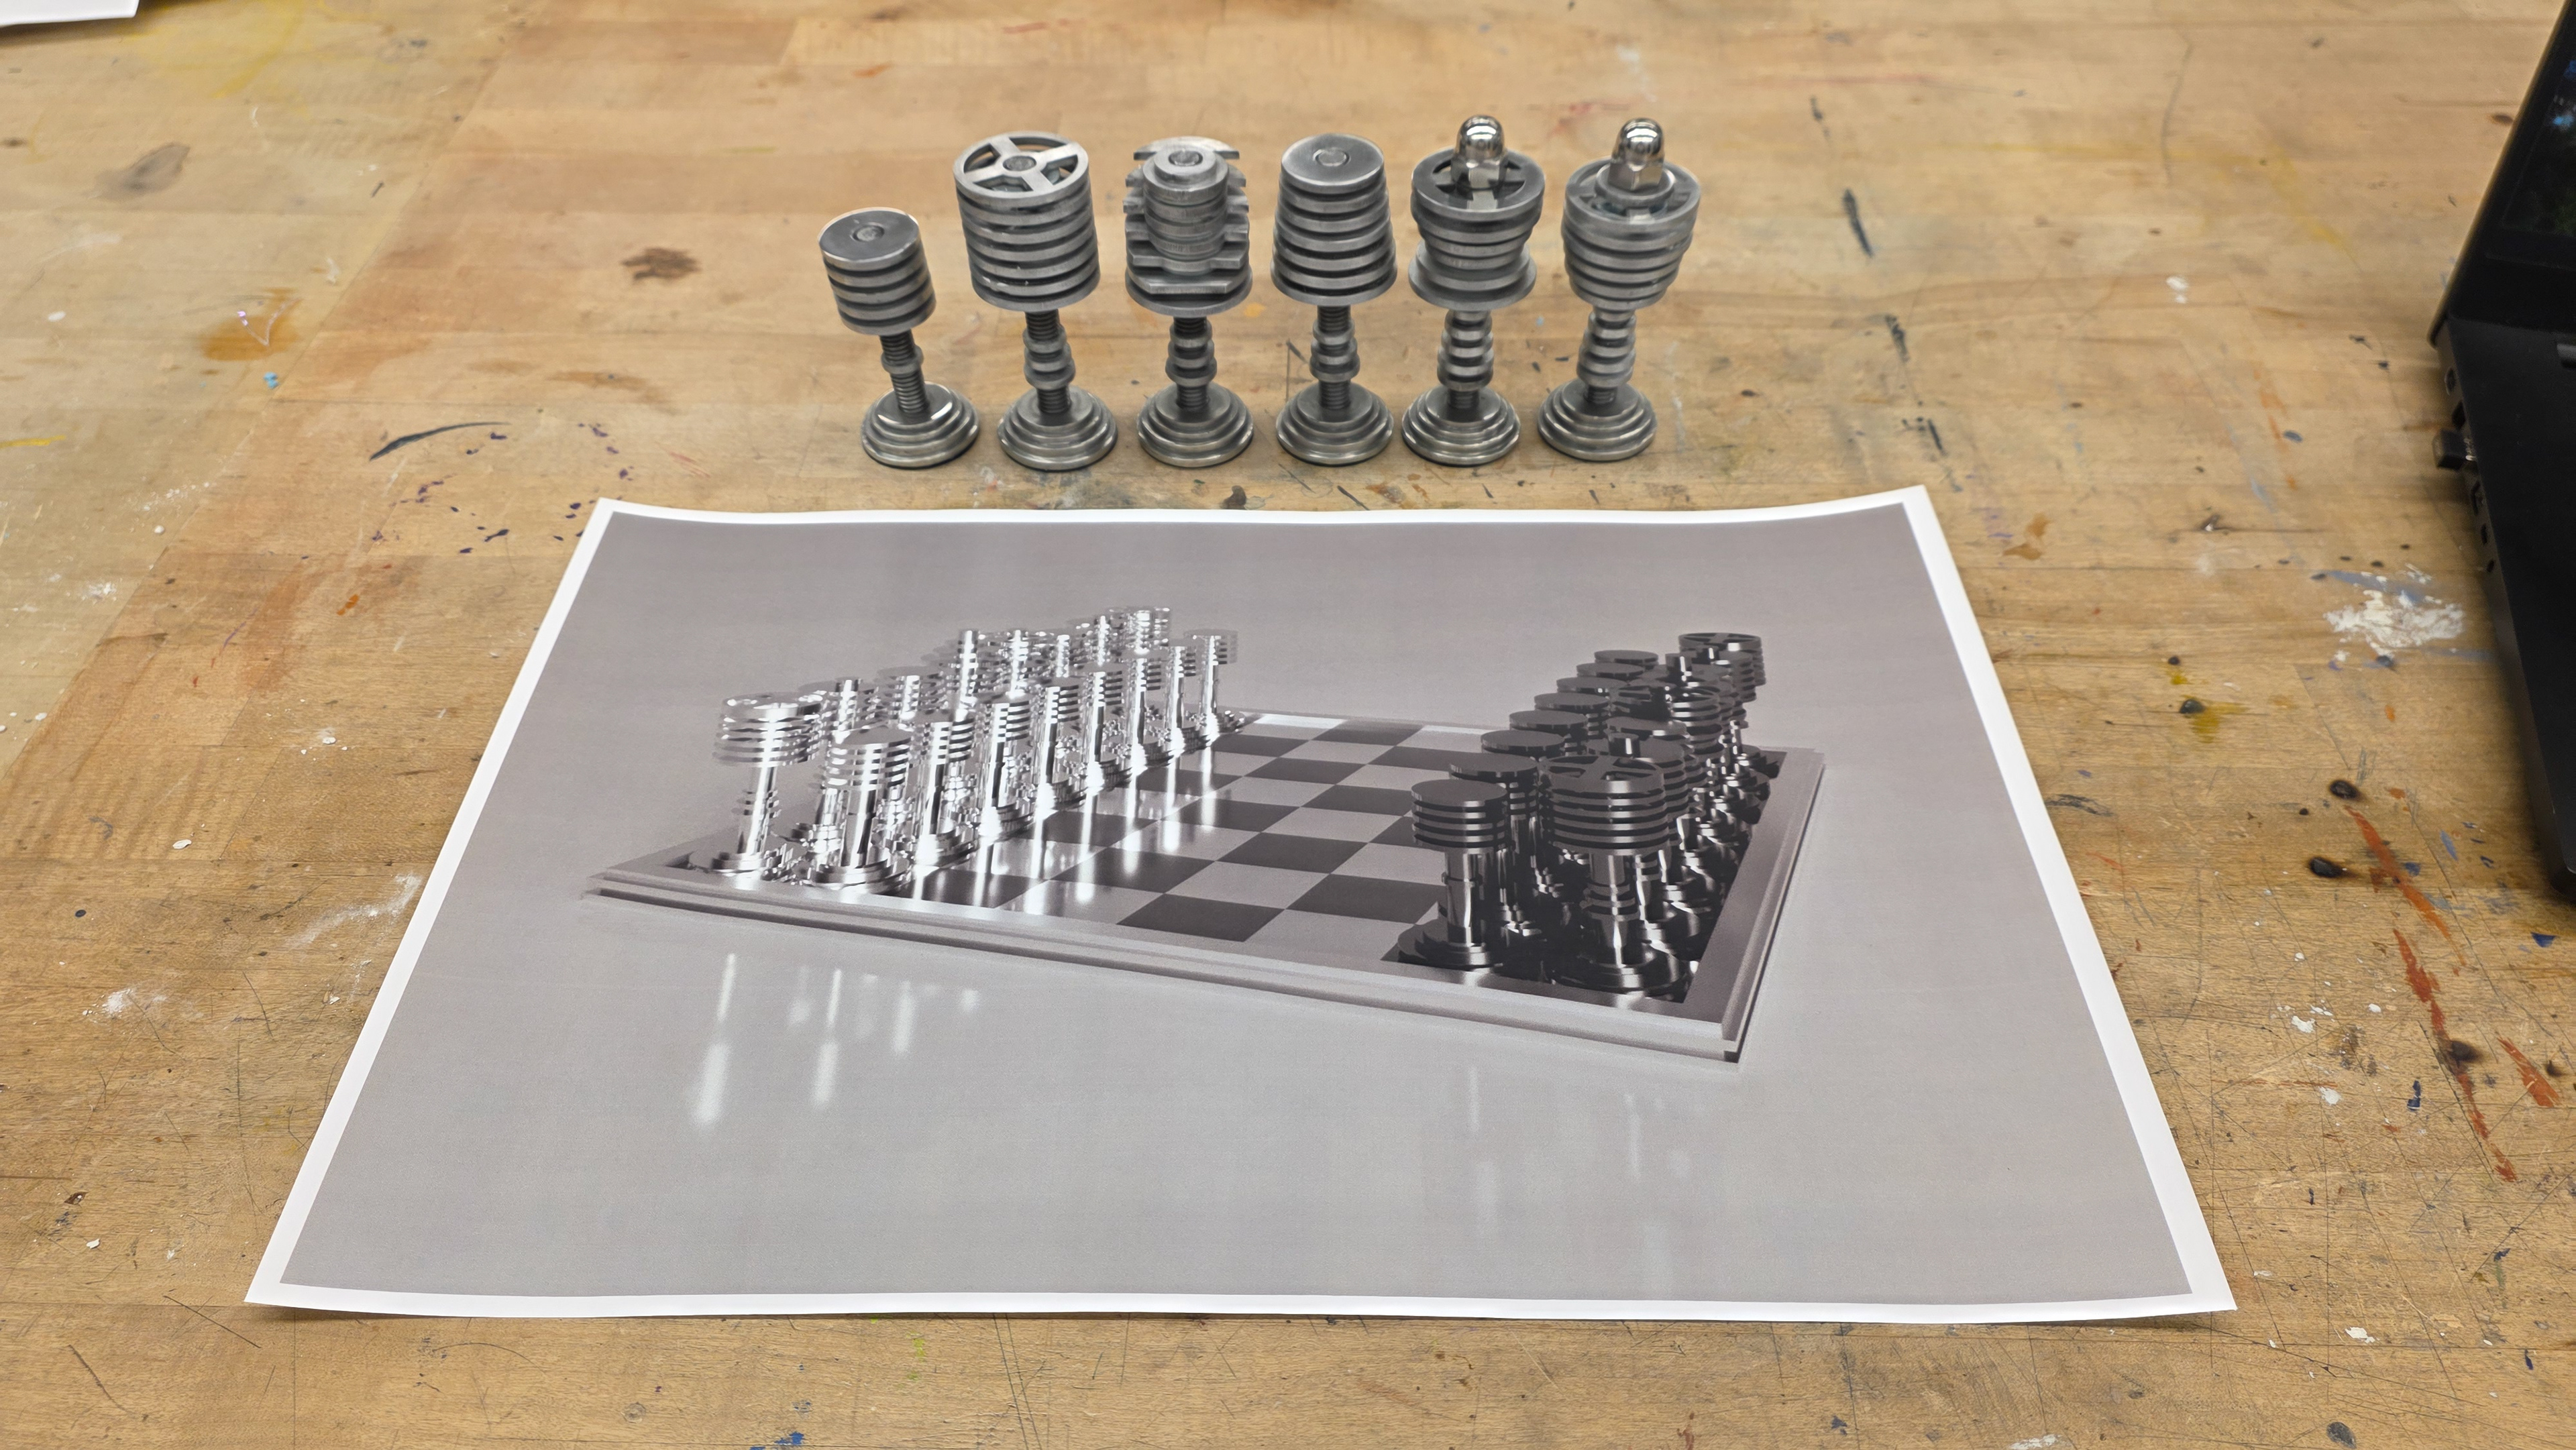
Fully Completed Set and Render on Display for Final Critique
The process began with a visual search for inspiring forms and material textures. I was primarily inspired by layered or sliced vertical forms, especially manufactured and machined parts such as engine pistons. This ultimately helped me settle on metal as my primary material.
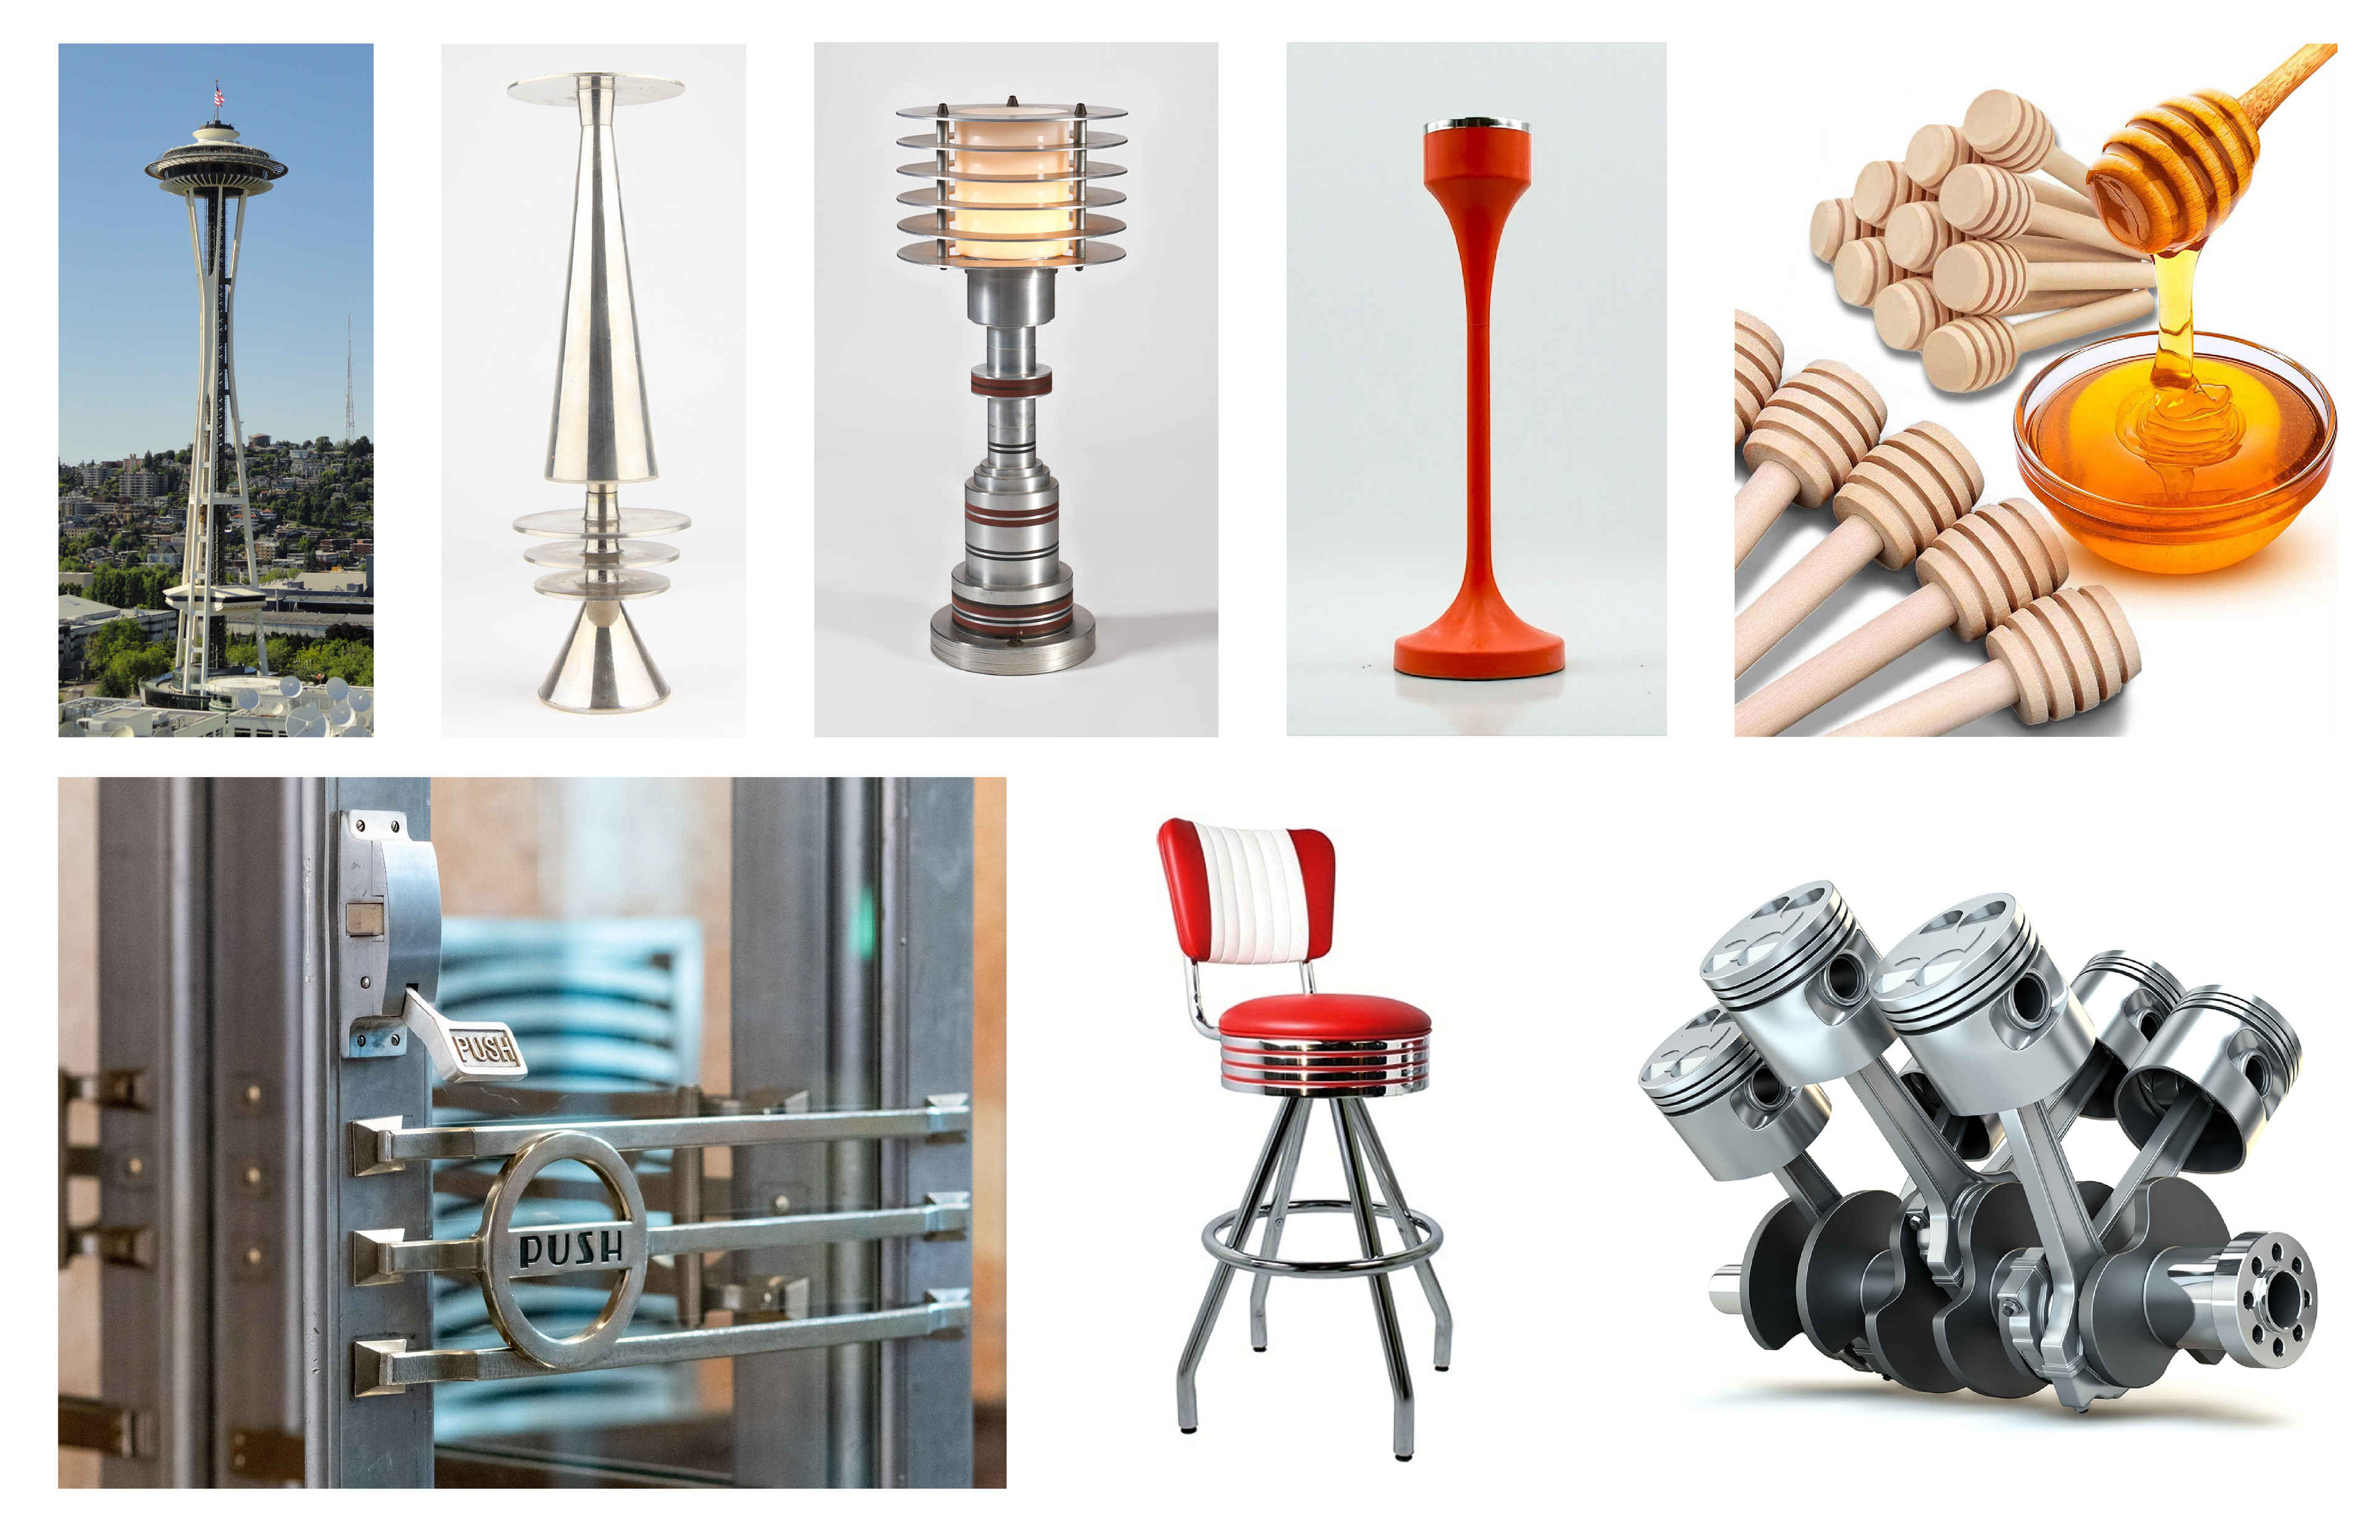
Form Inspiration
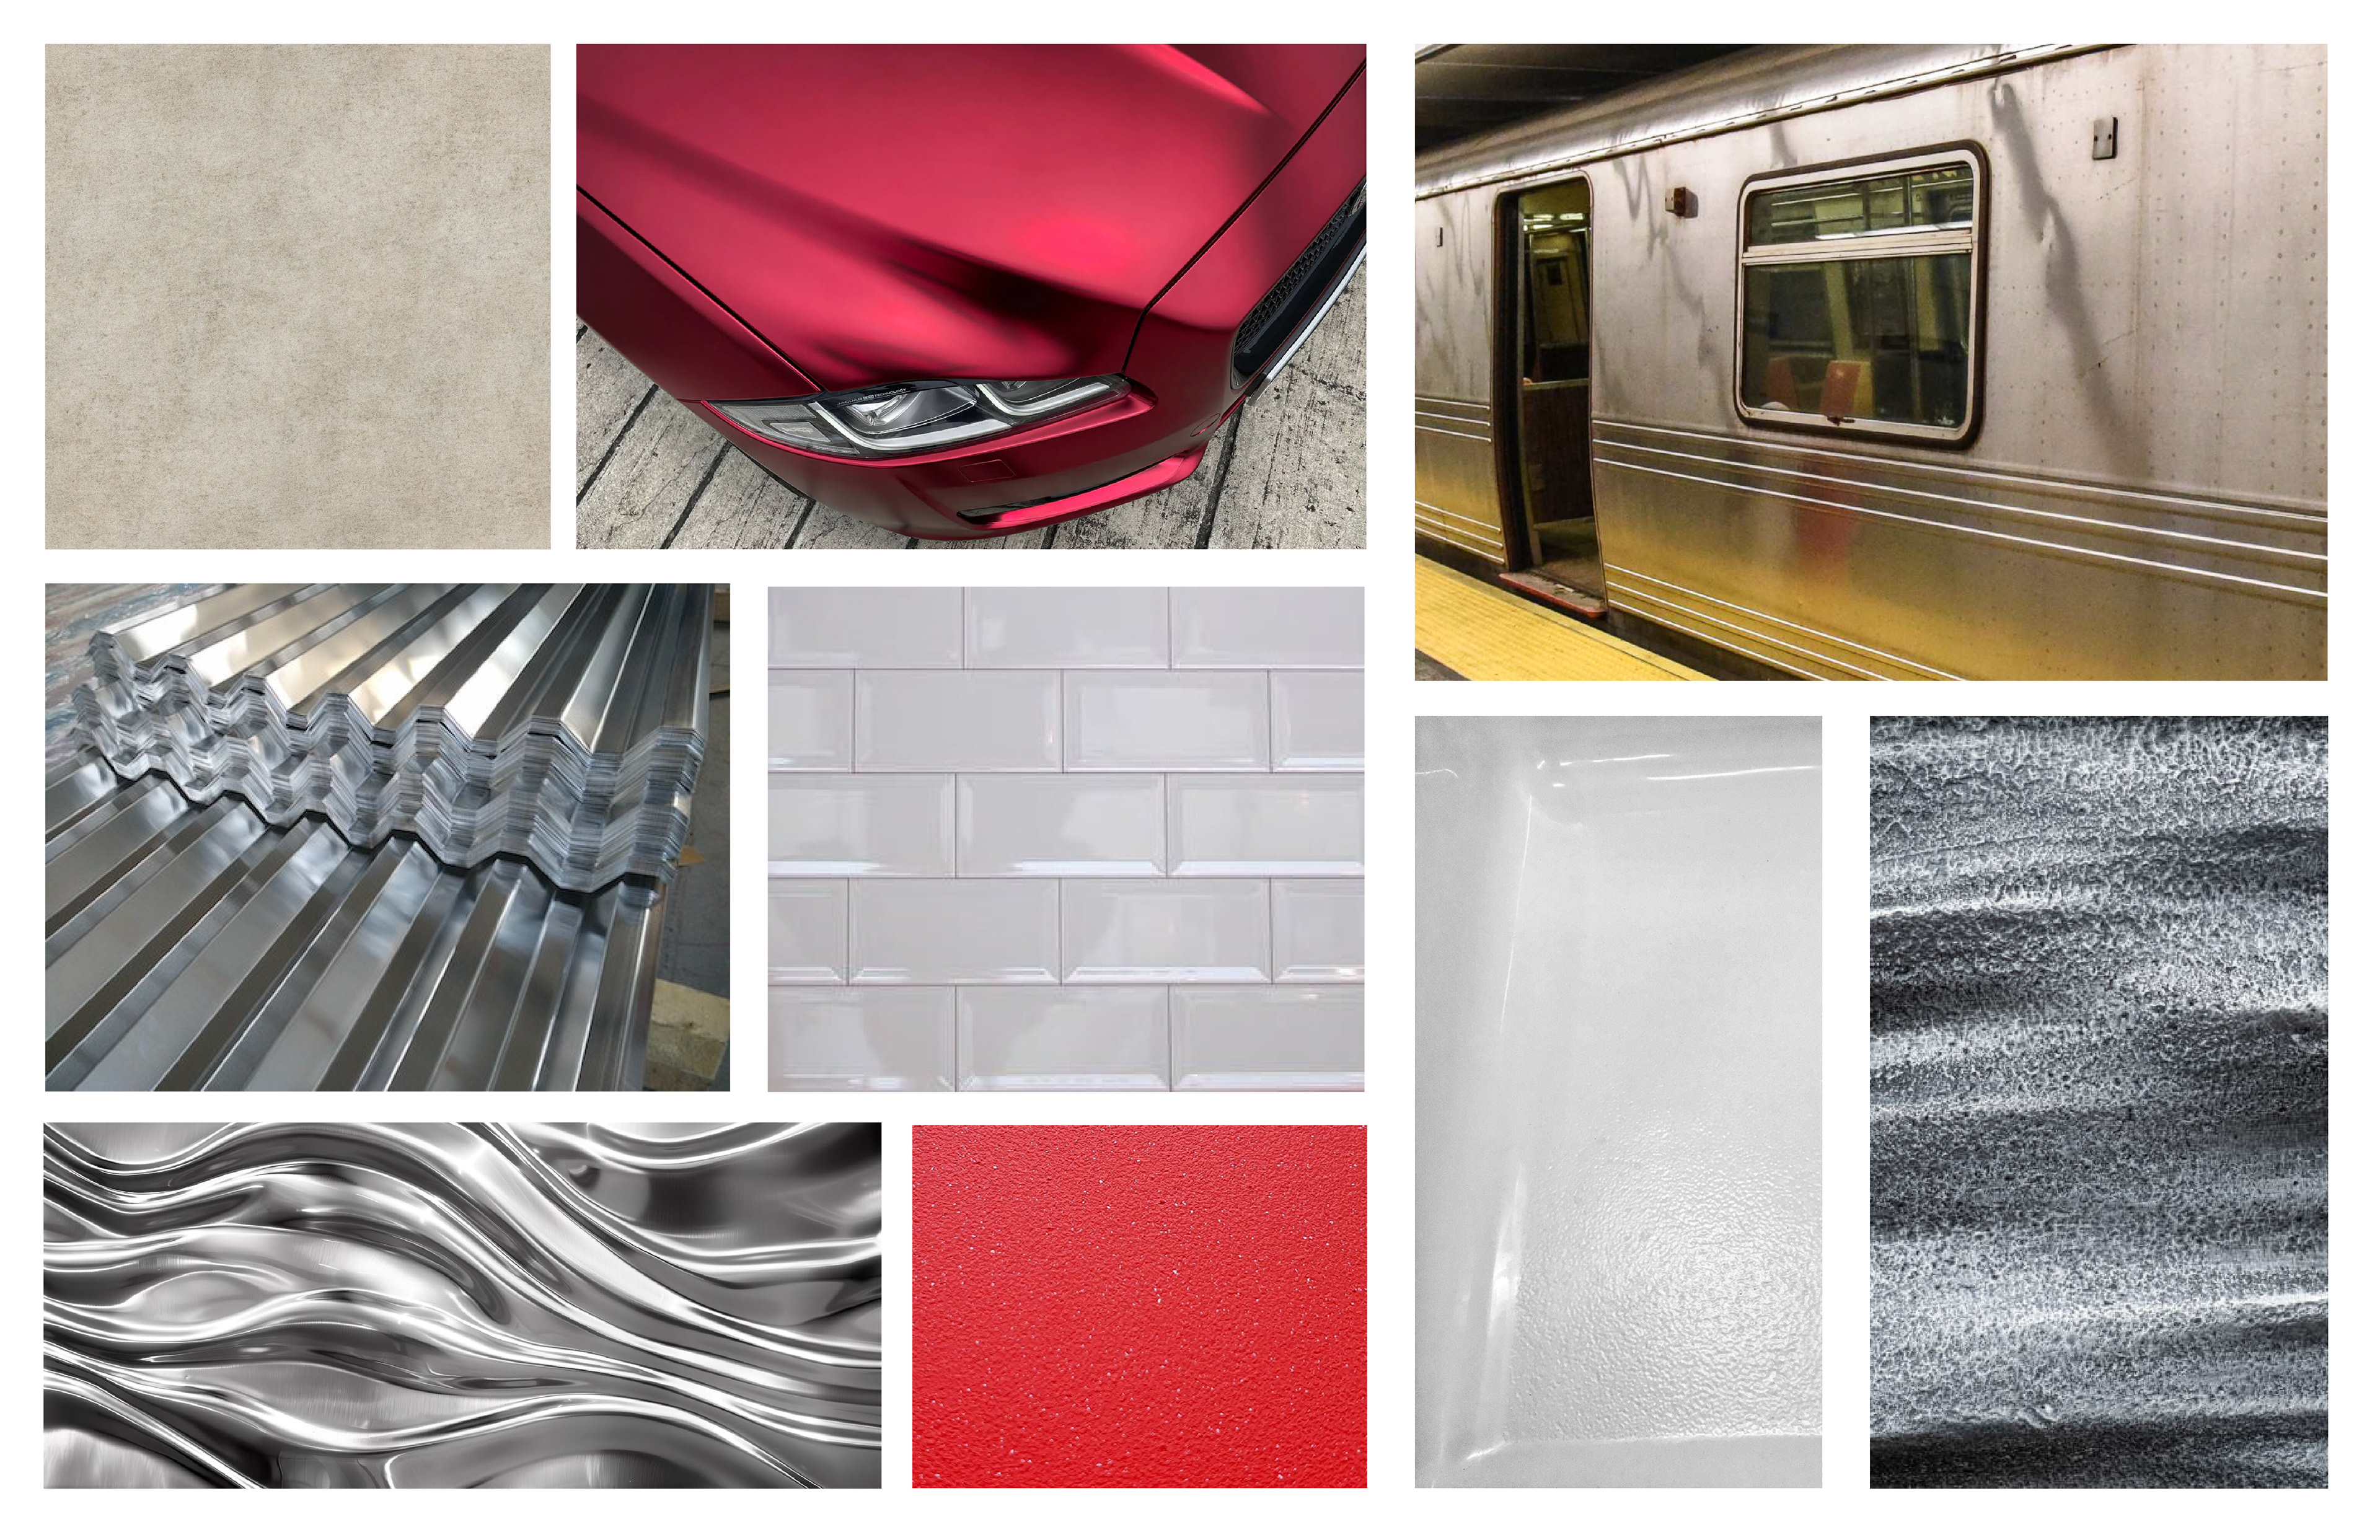
Surface Texture Inspiration
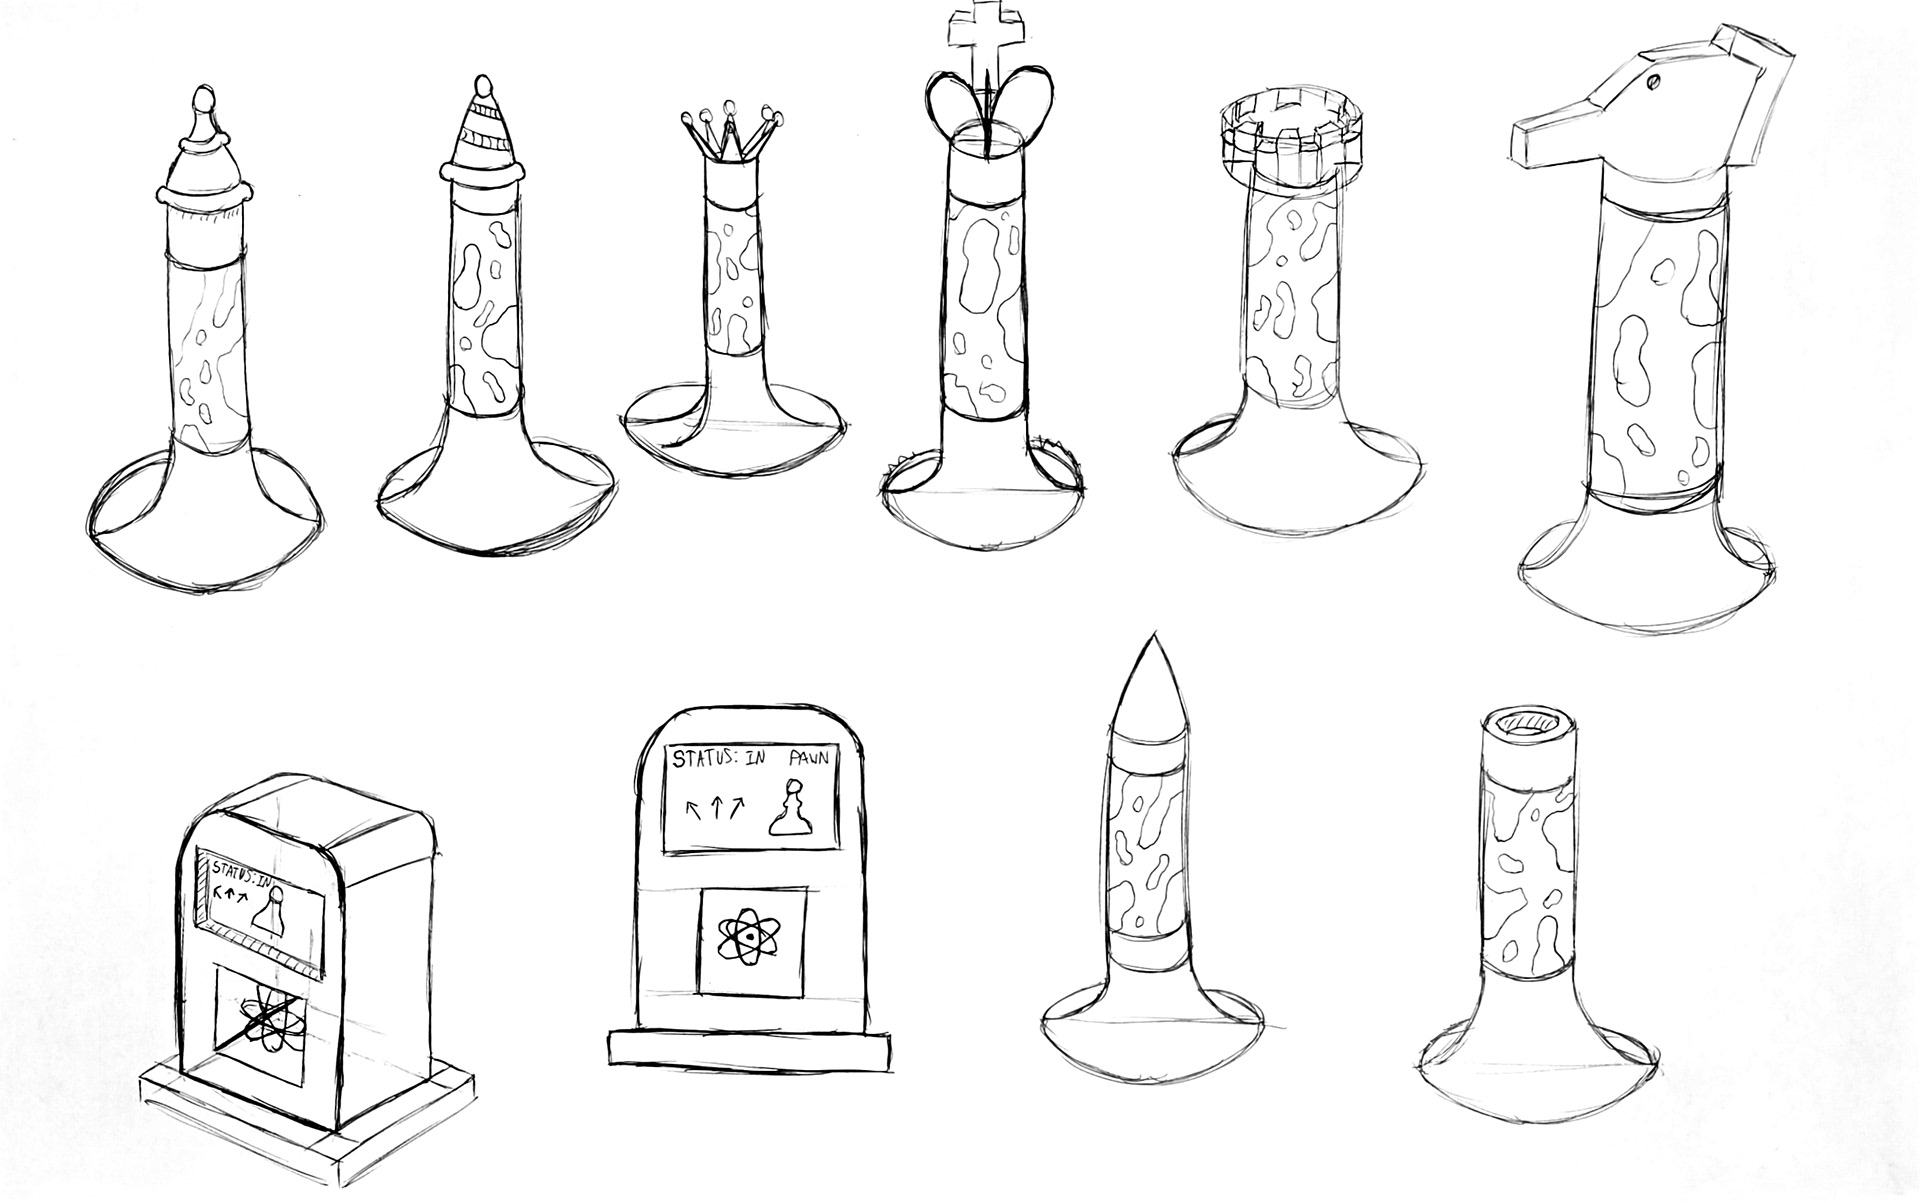
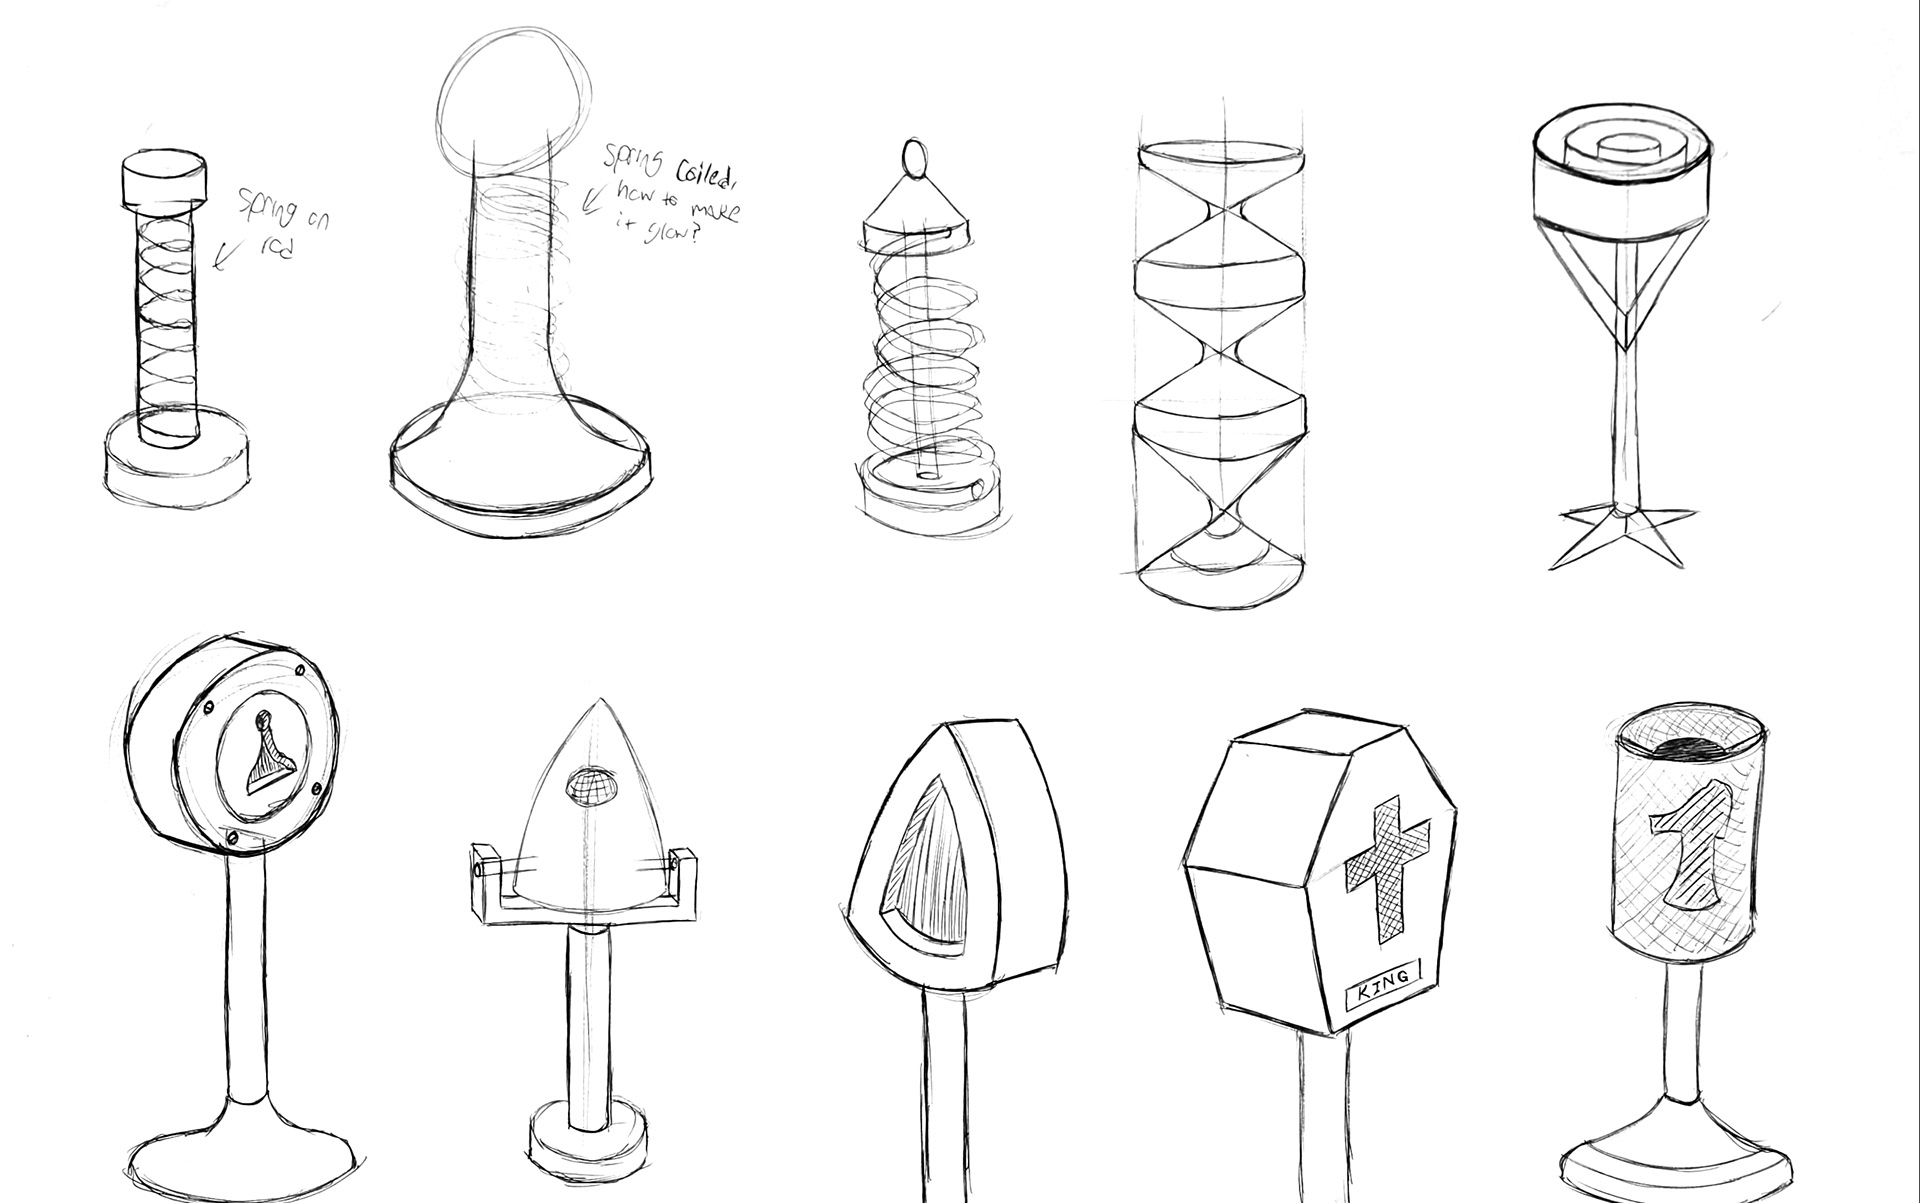
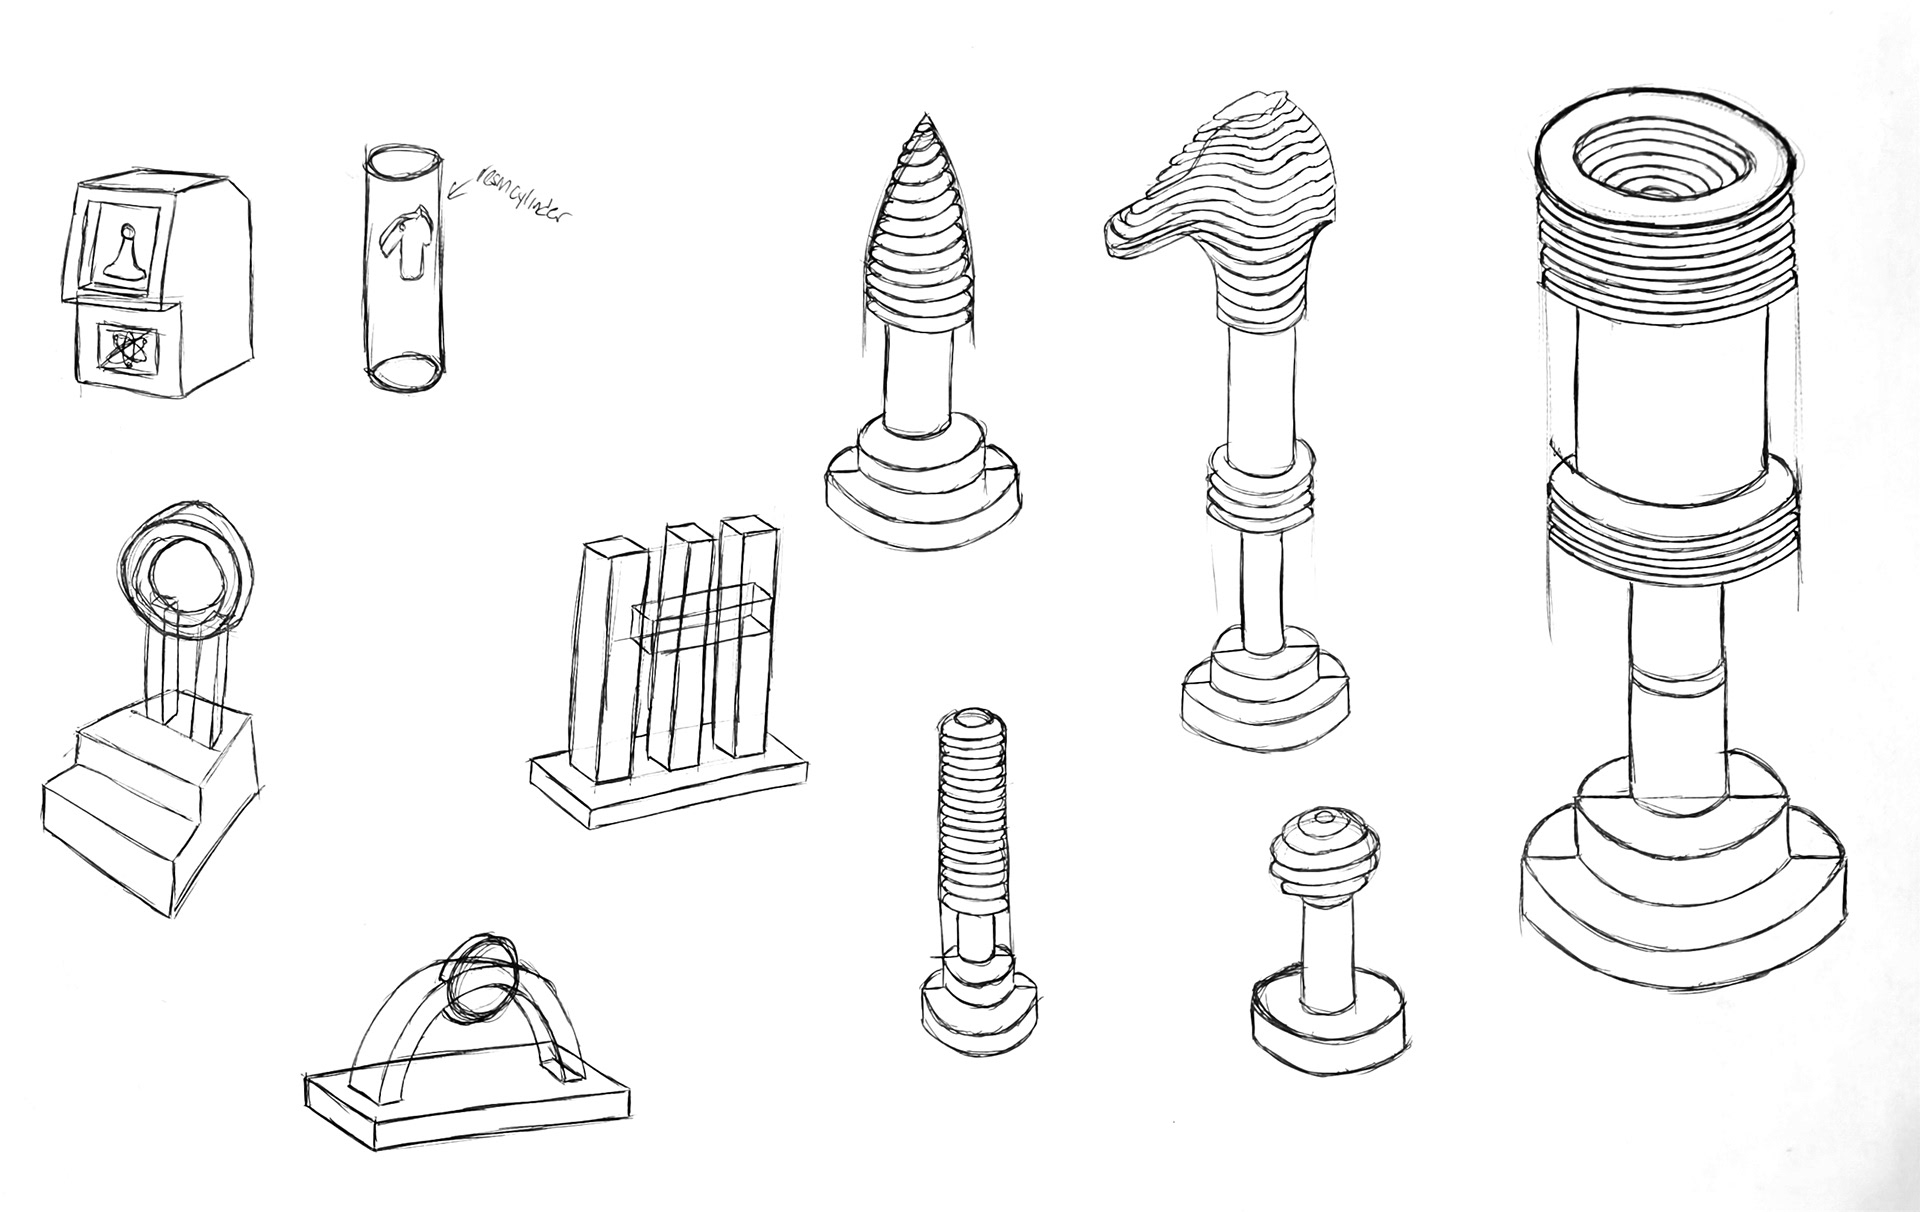
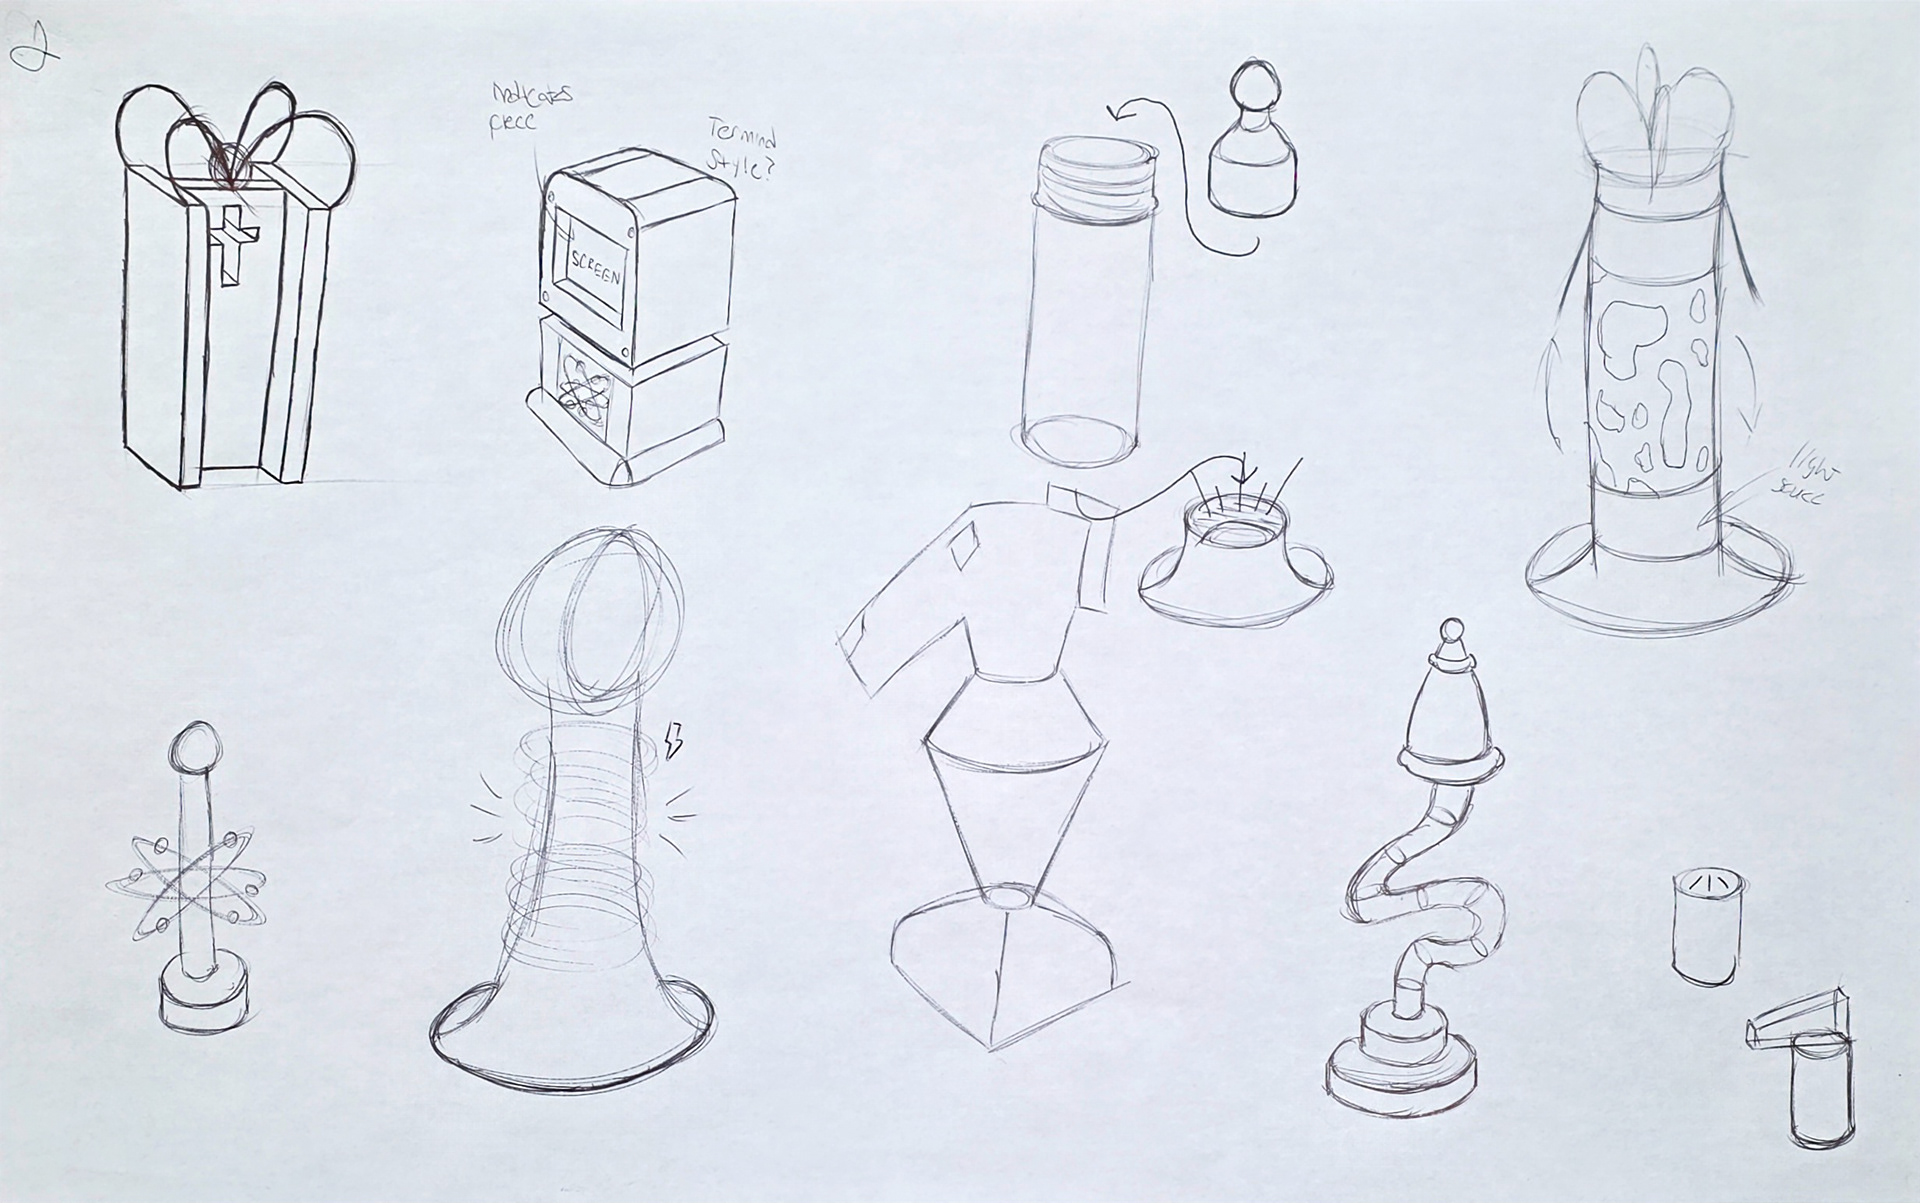
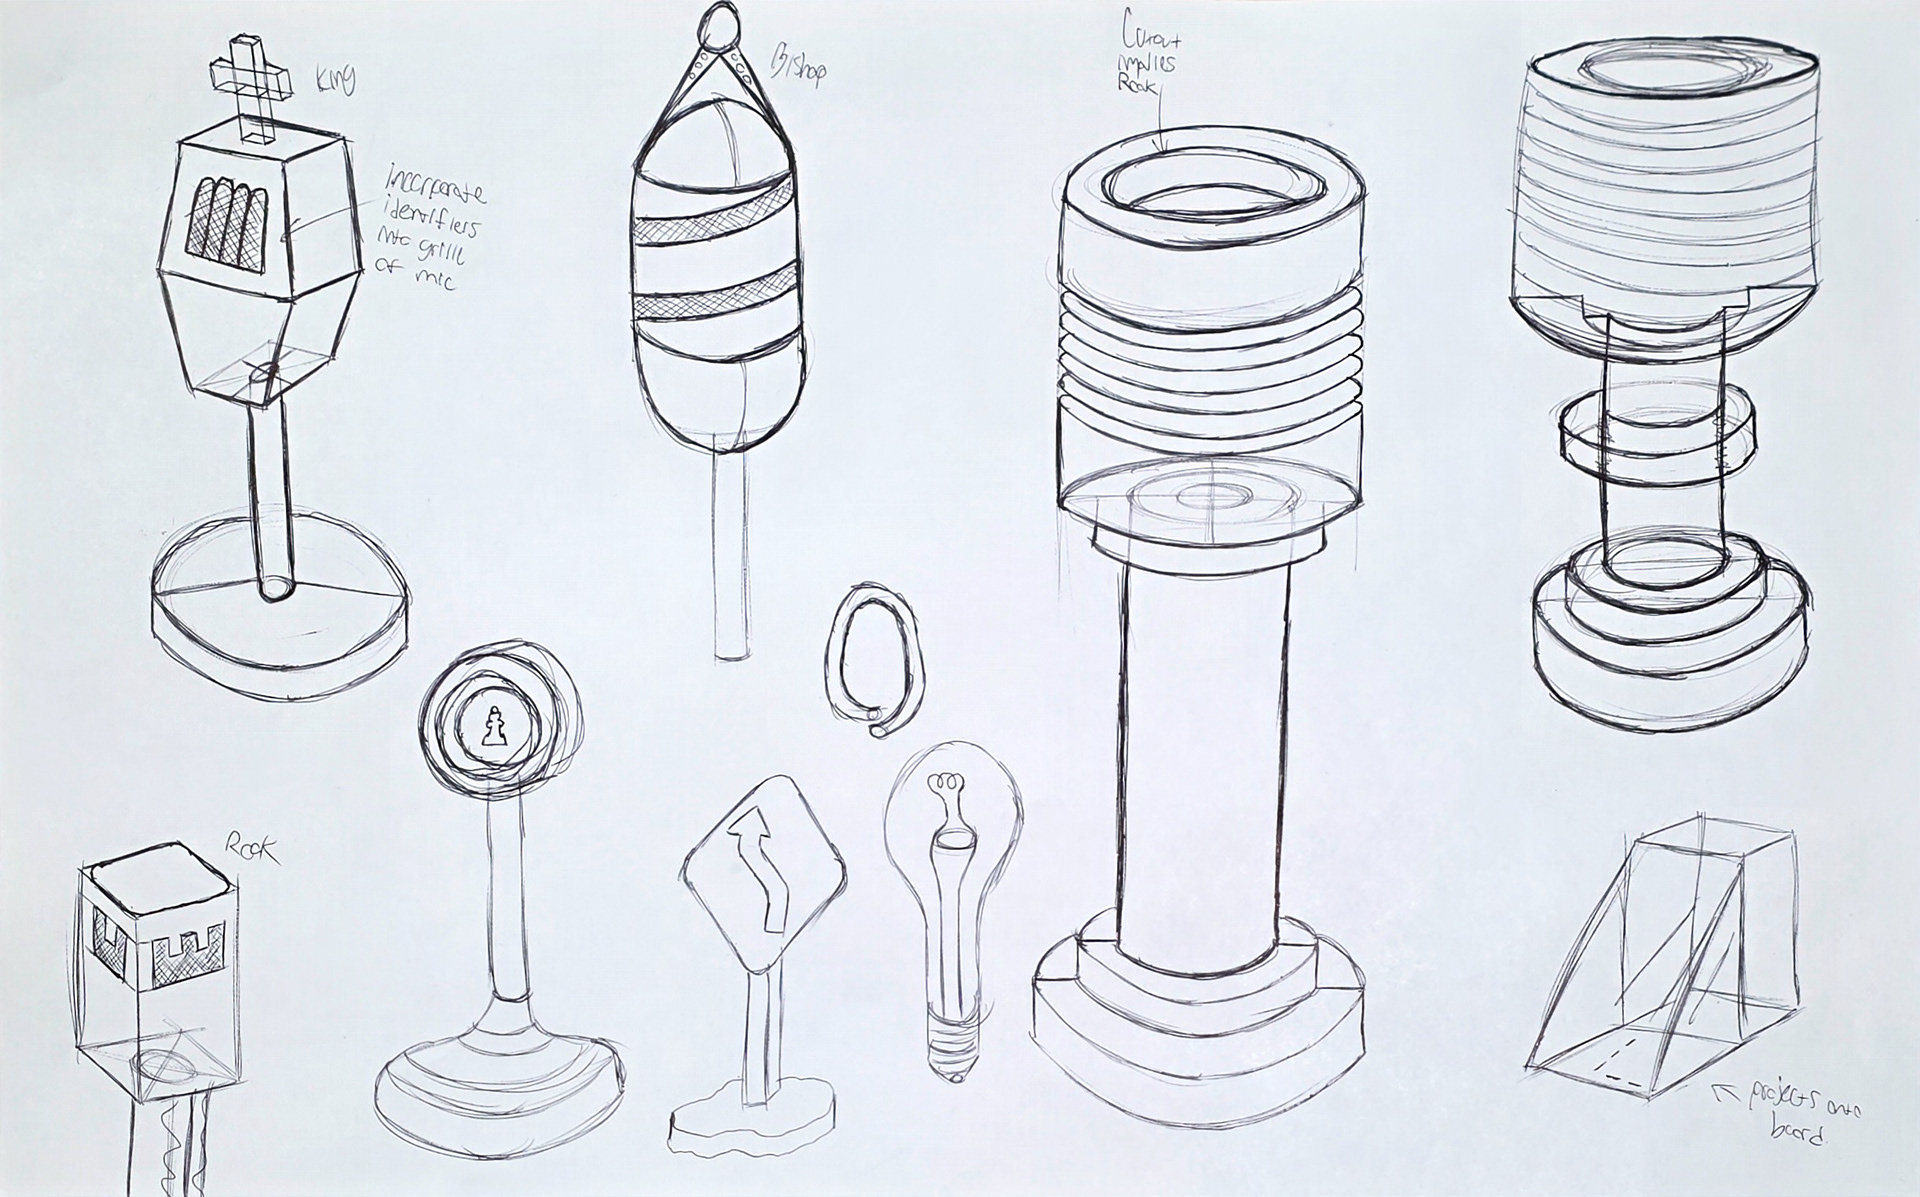
After exploring and settling on a few form and surface styles, I began ideating through many different forms including lava lamps, microphones, lamps, monolithic forms, and even terminal-style forms with digital integrations.

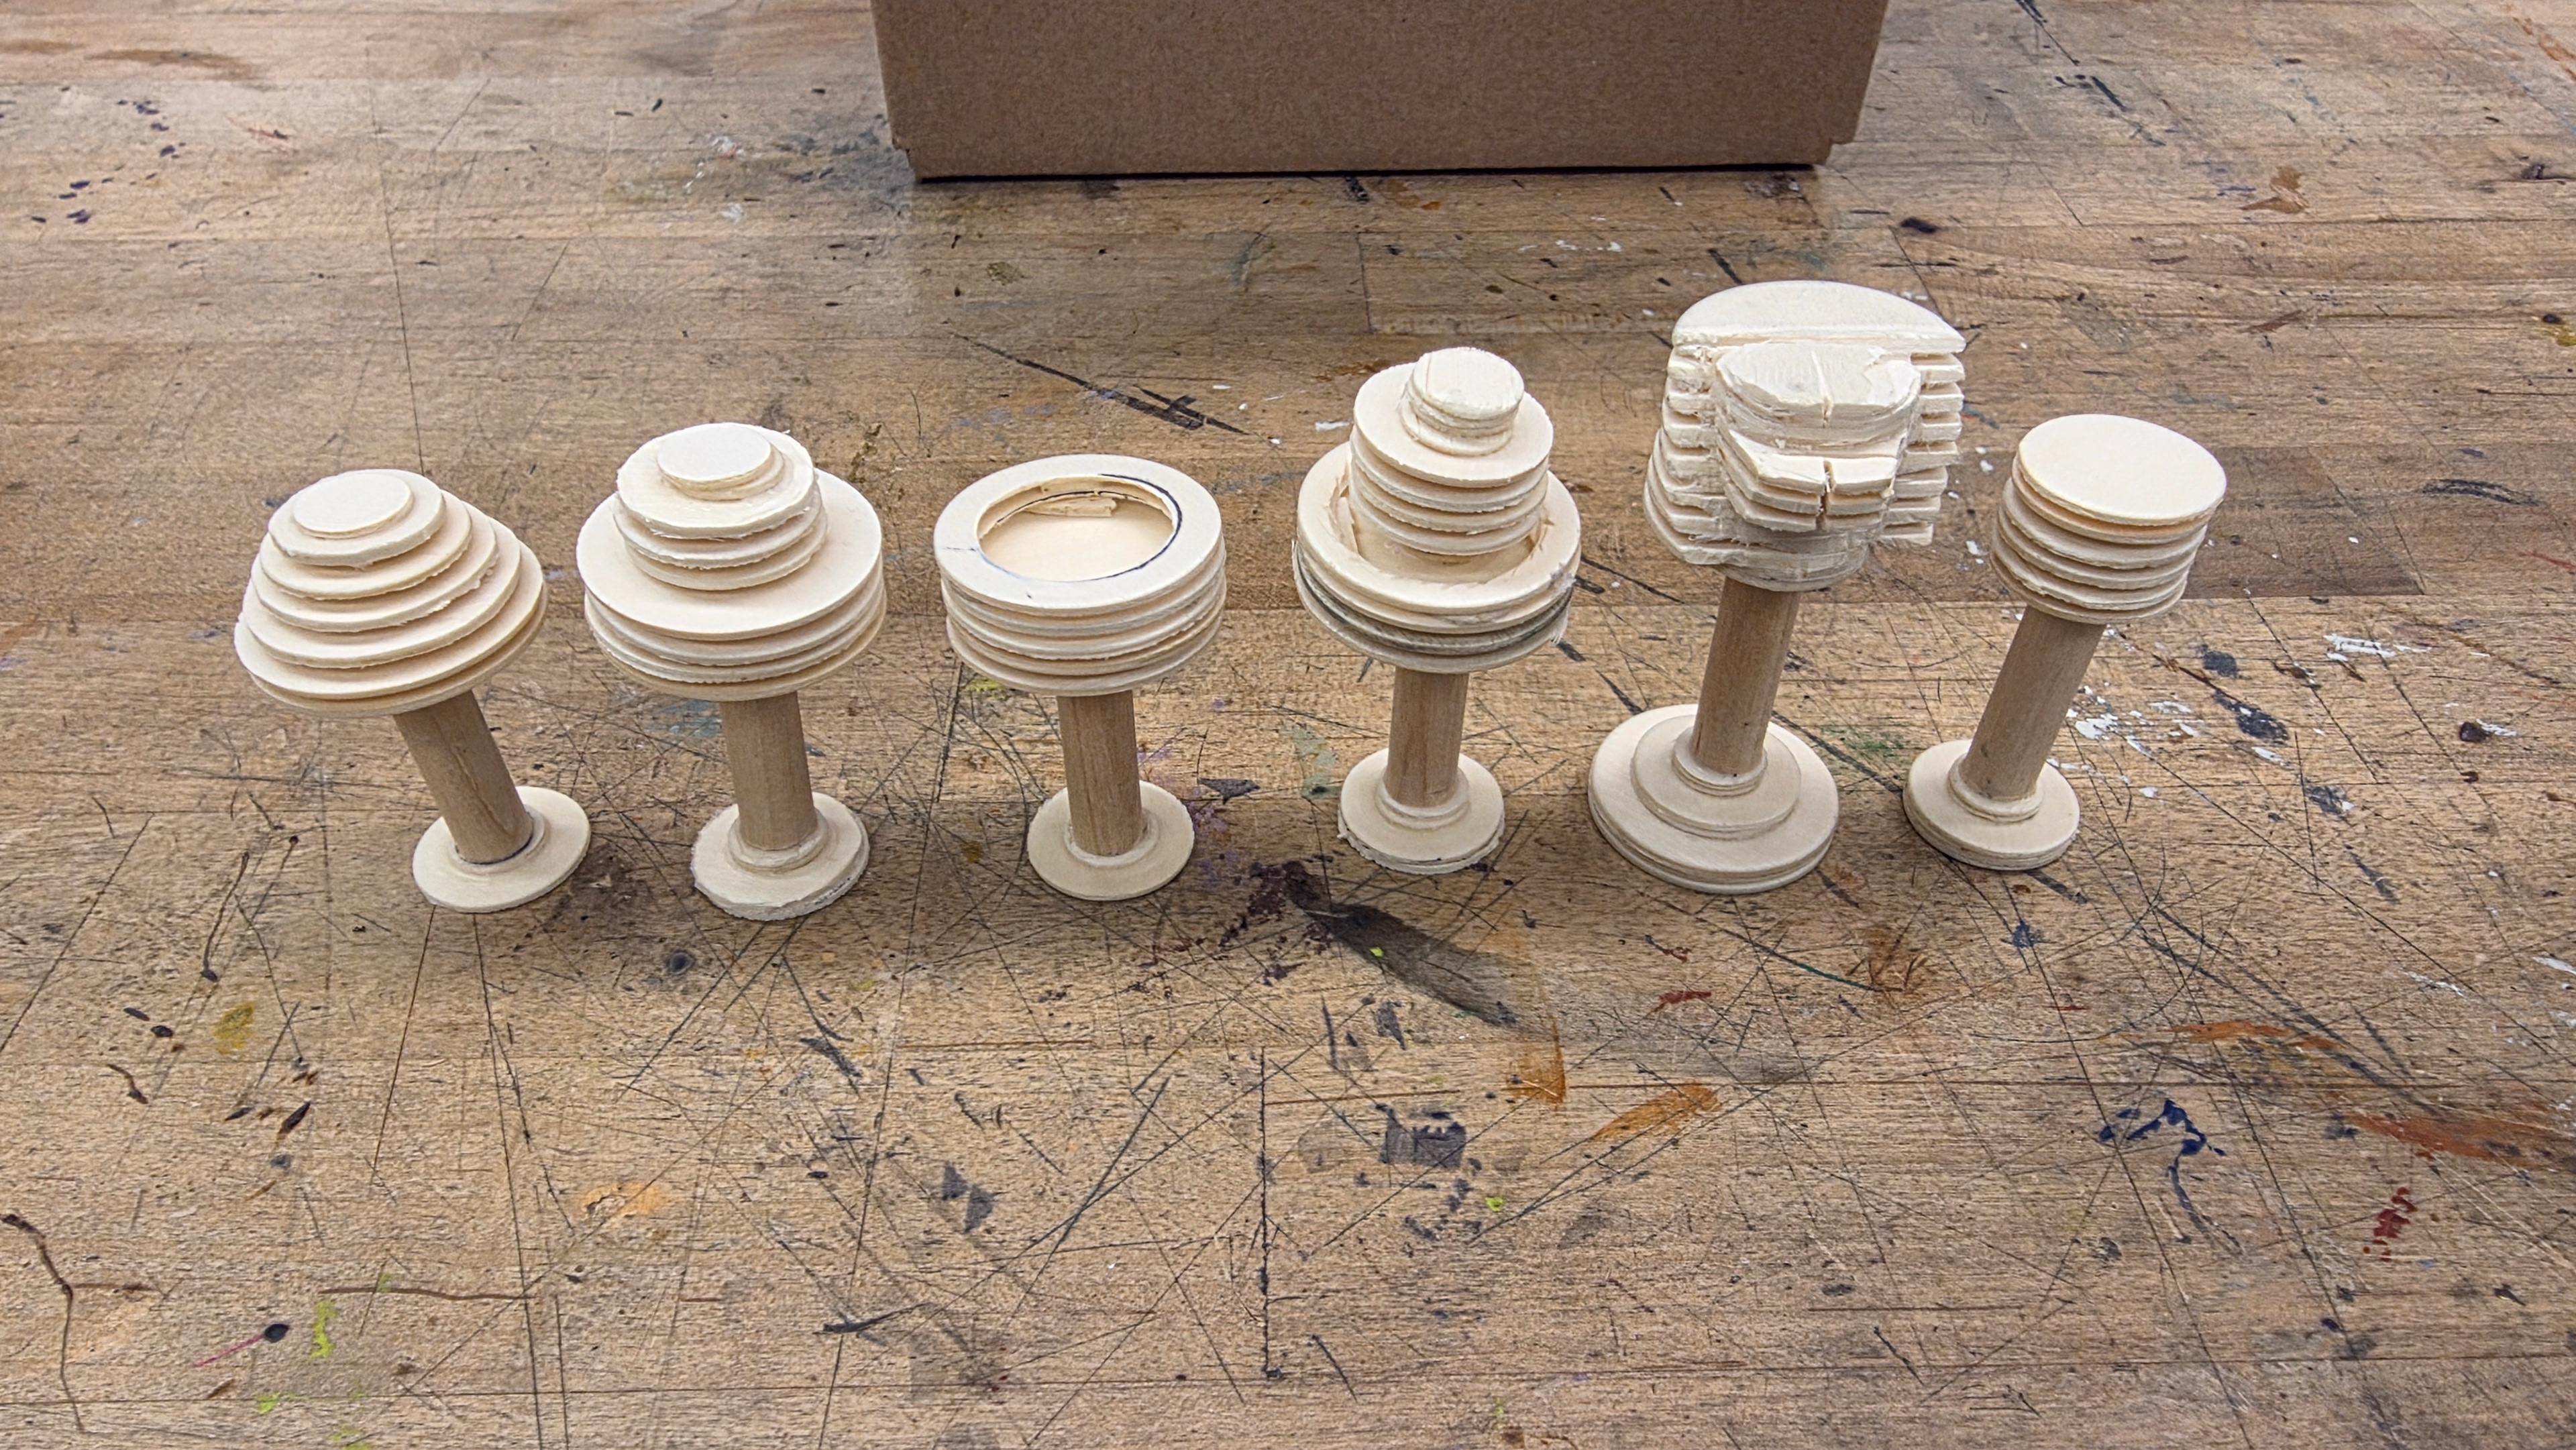
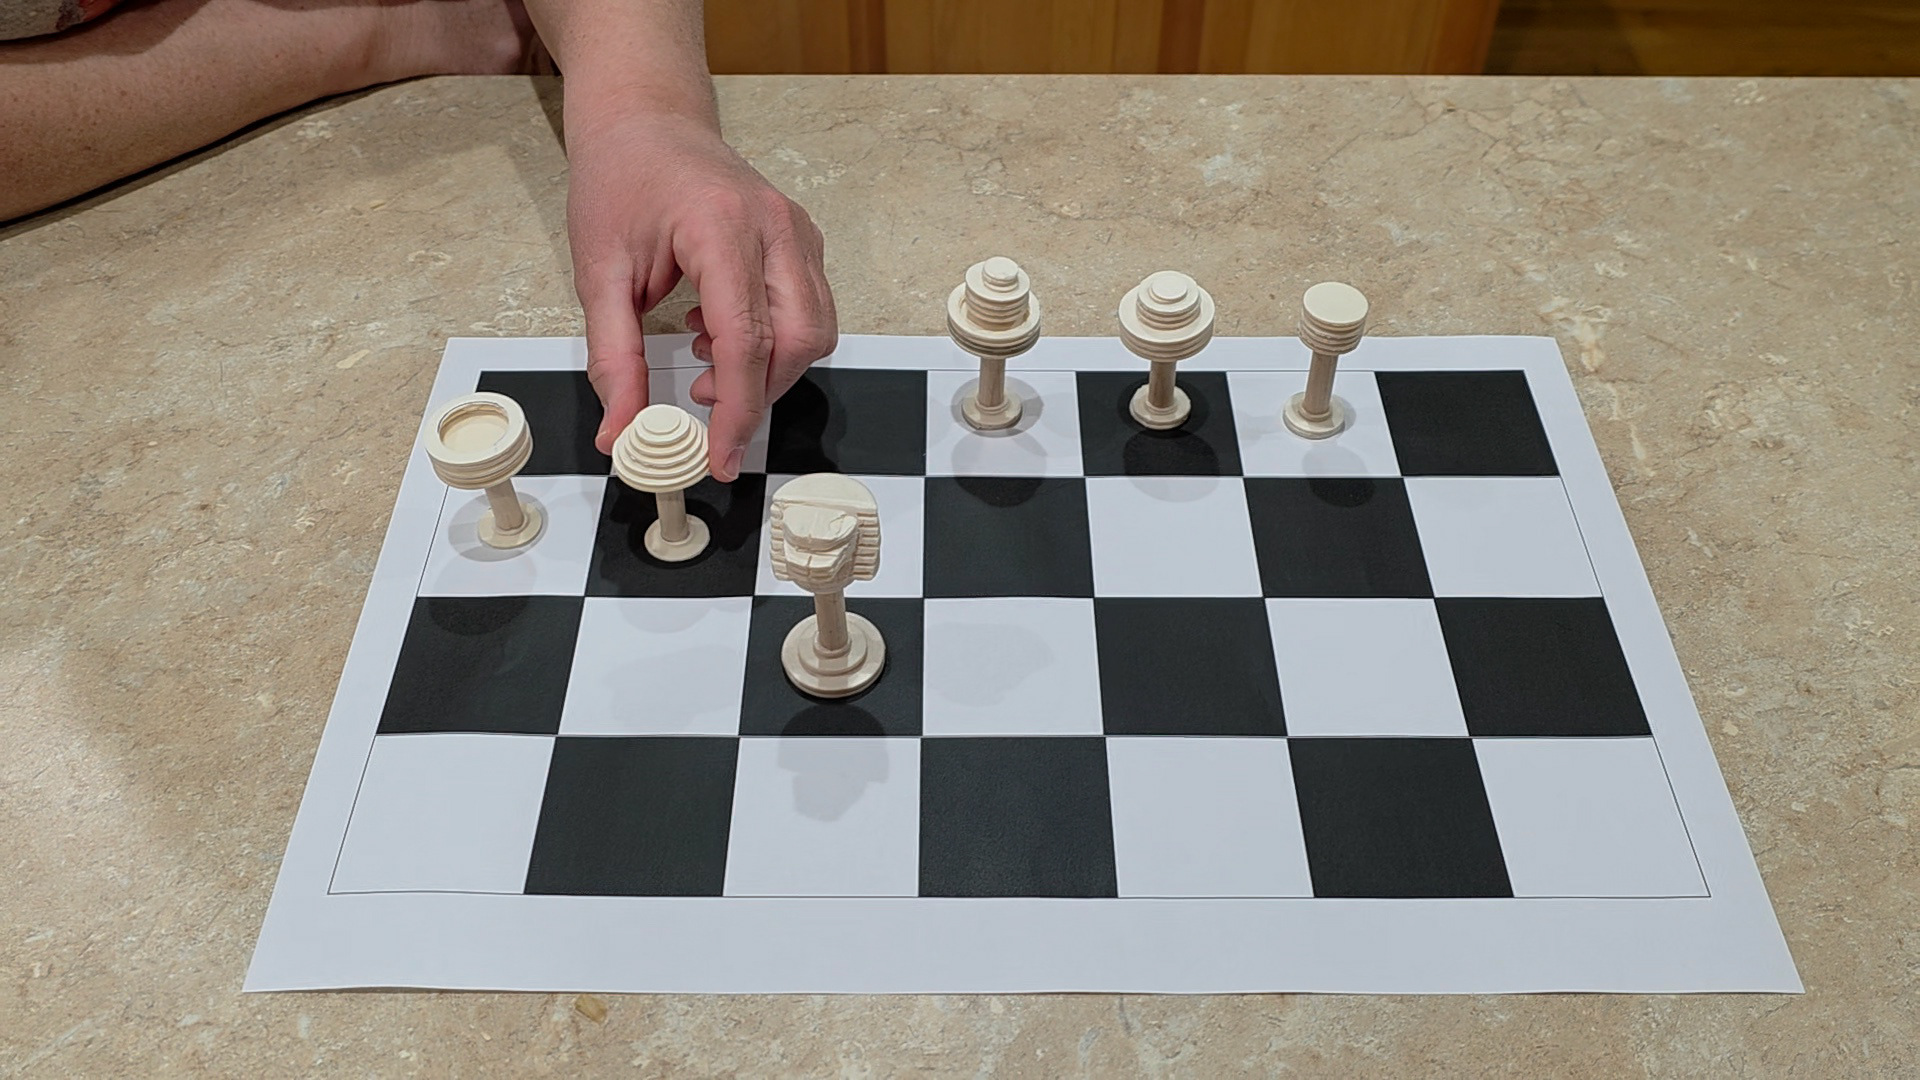
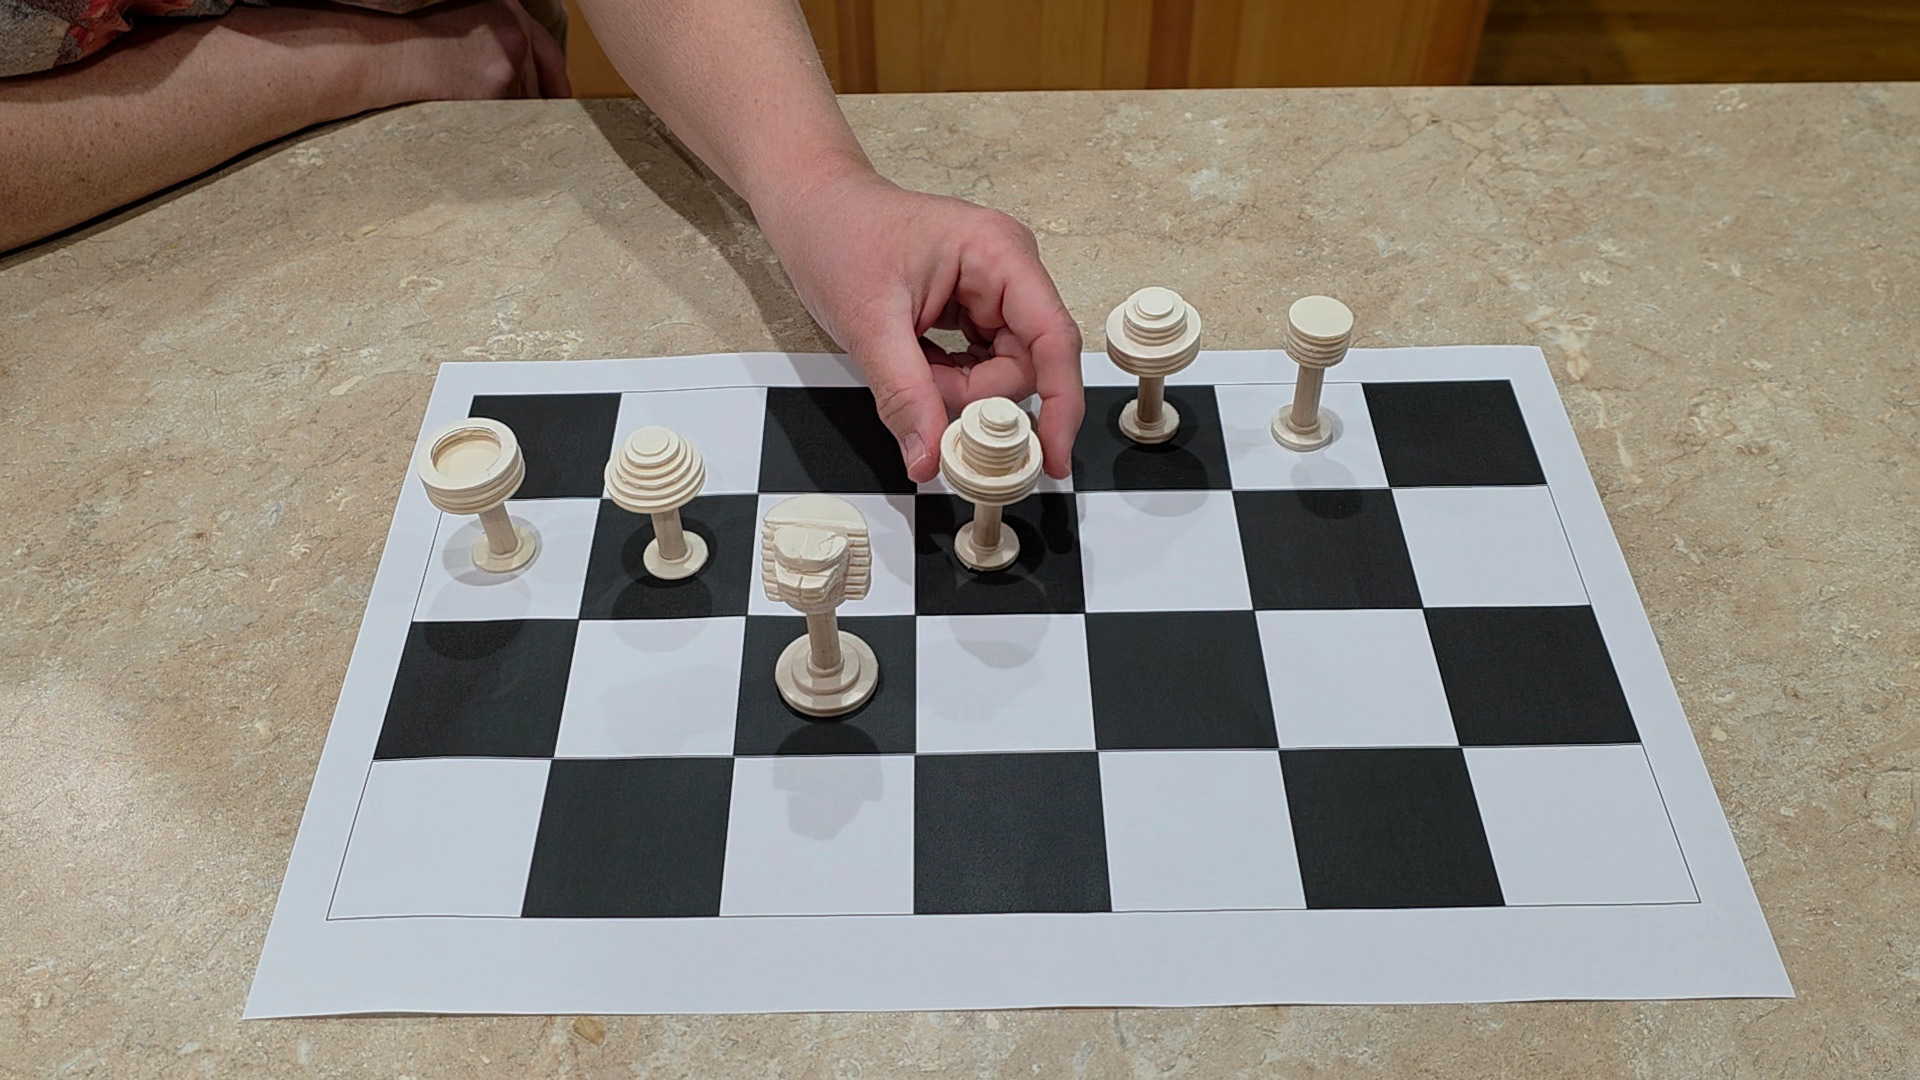
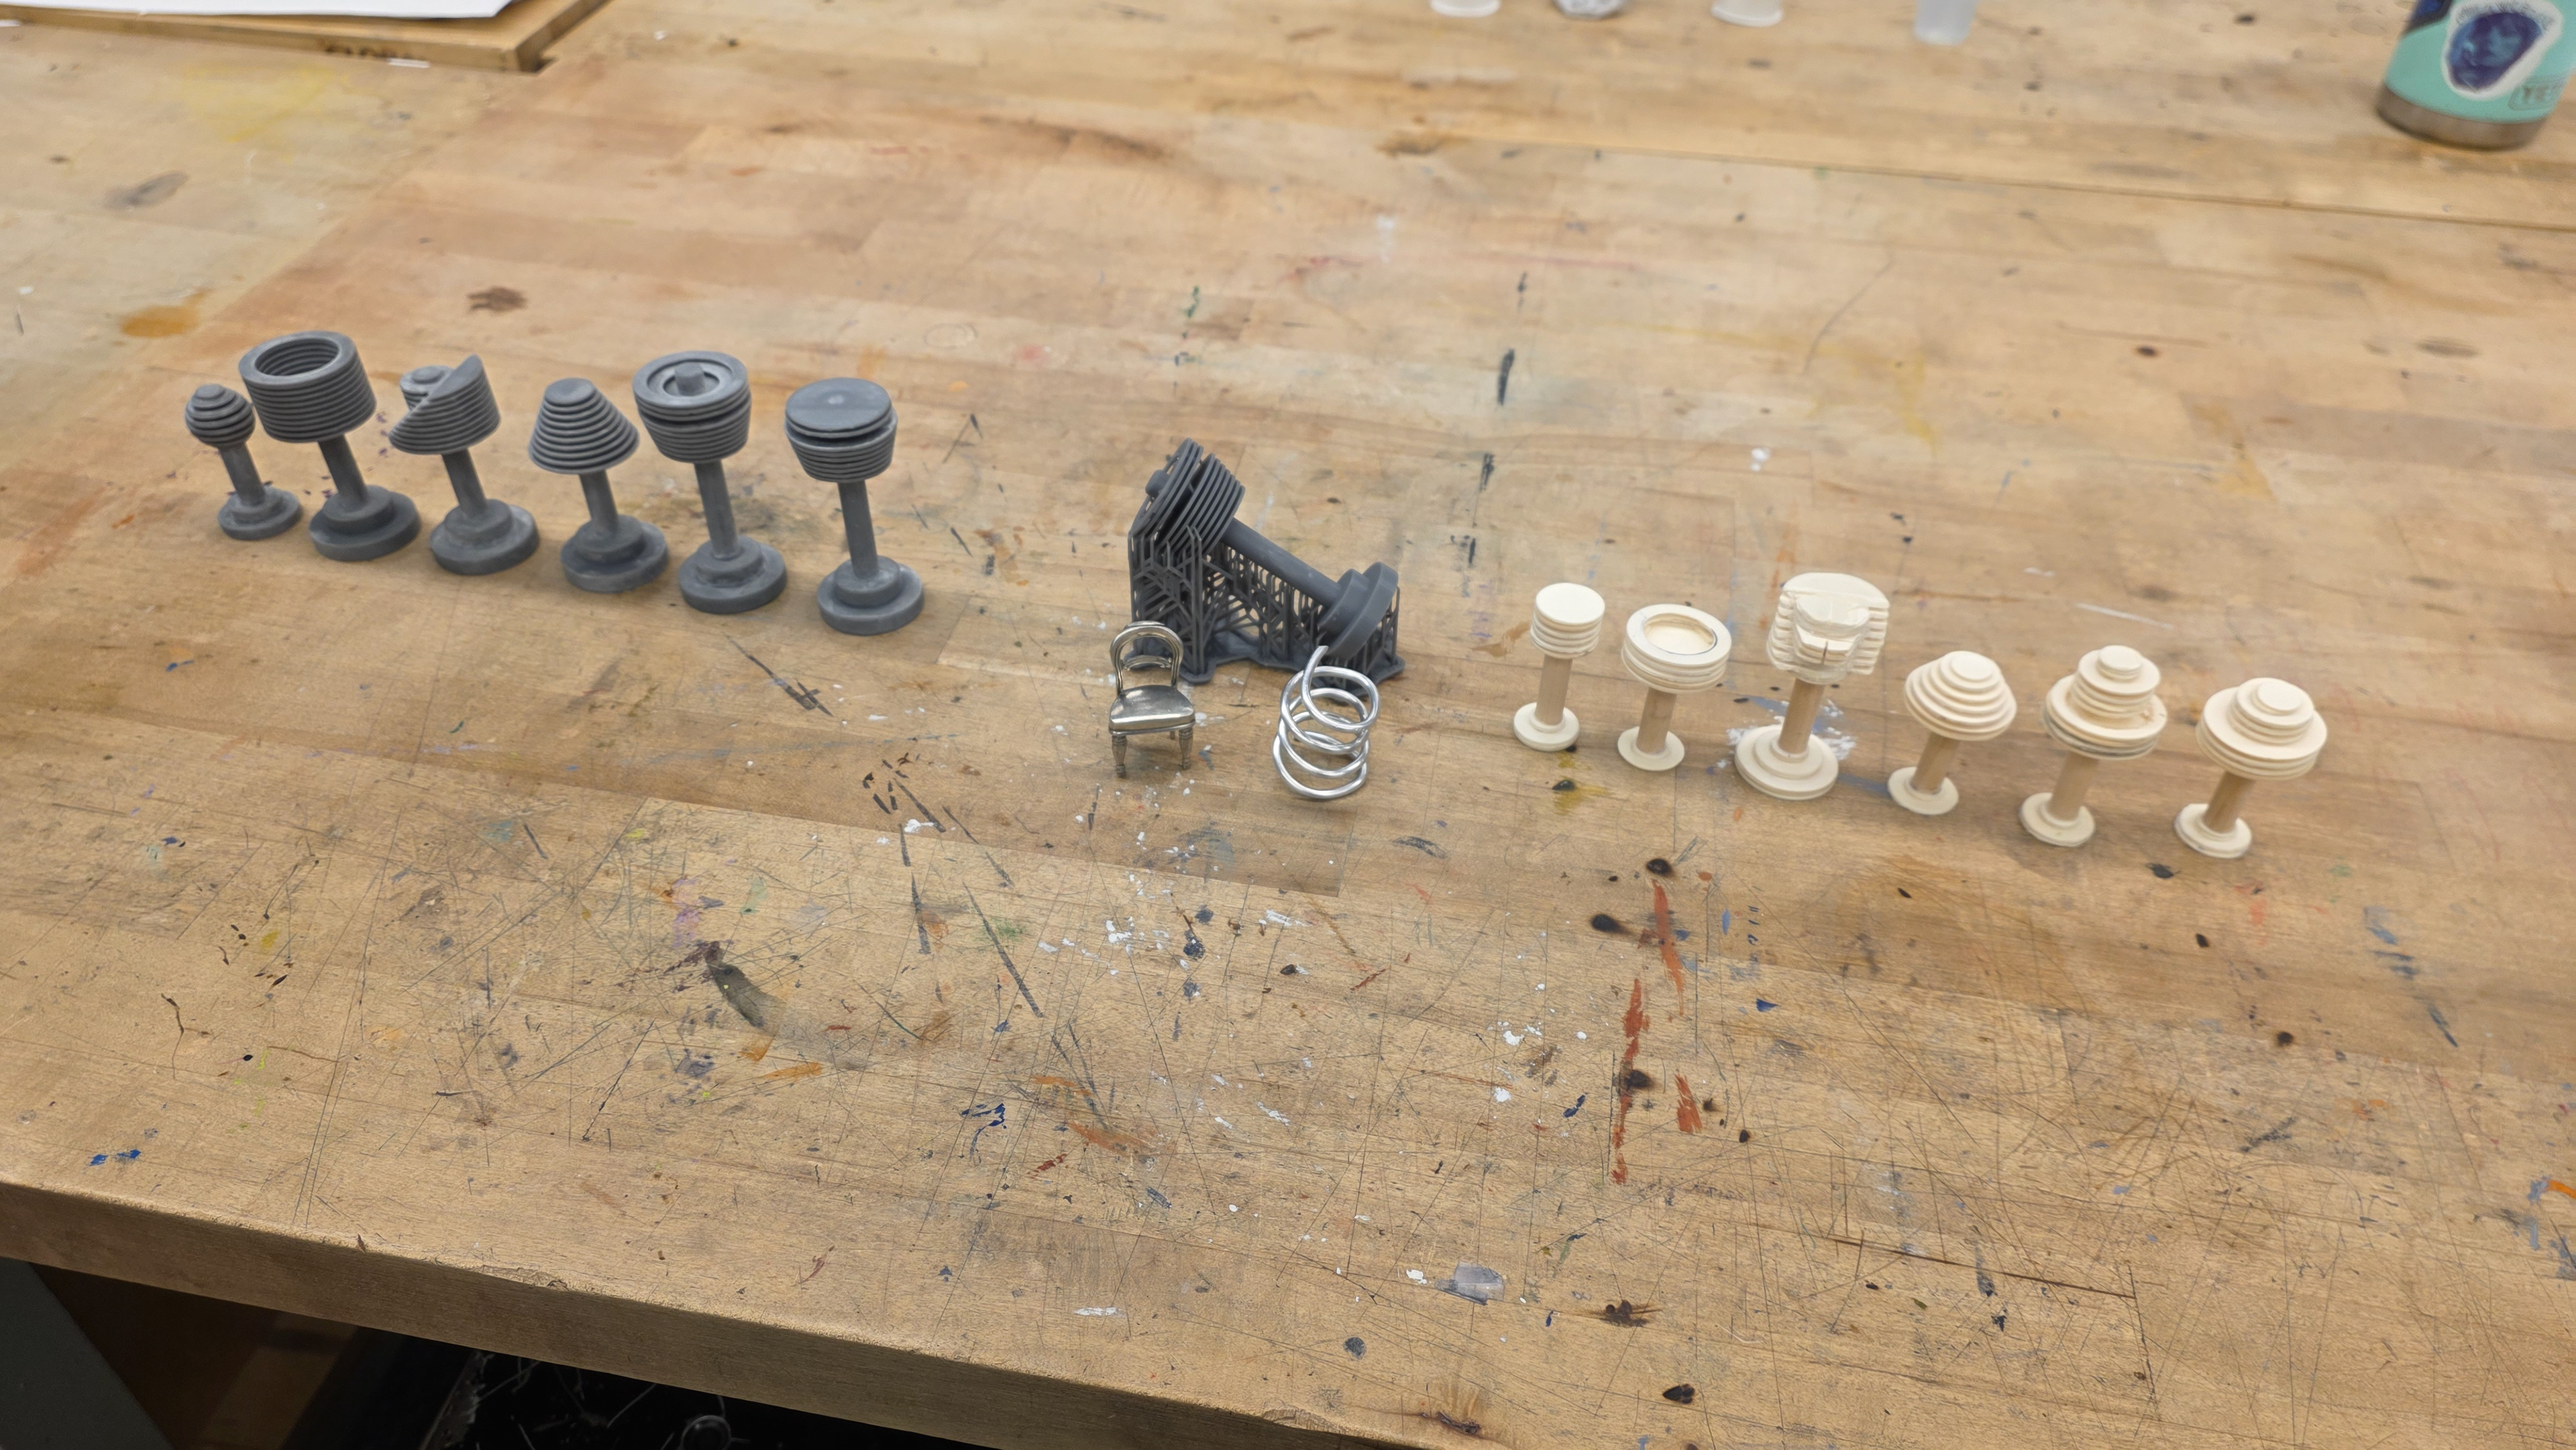
After thoroughly exploring my ideas through sketches, I moved on to exploring through physical form. I created two different pieces from three different form families to determine what shapes and appearances were most interesting. I made these models with clay, wire, pre-cut wood circles, dowel rod, glue, and a Dremel.
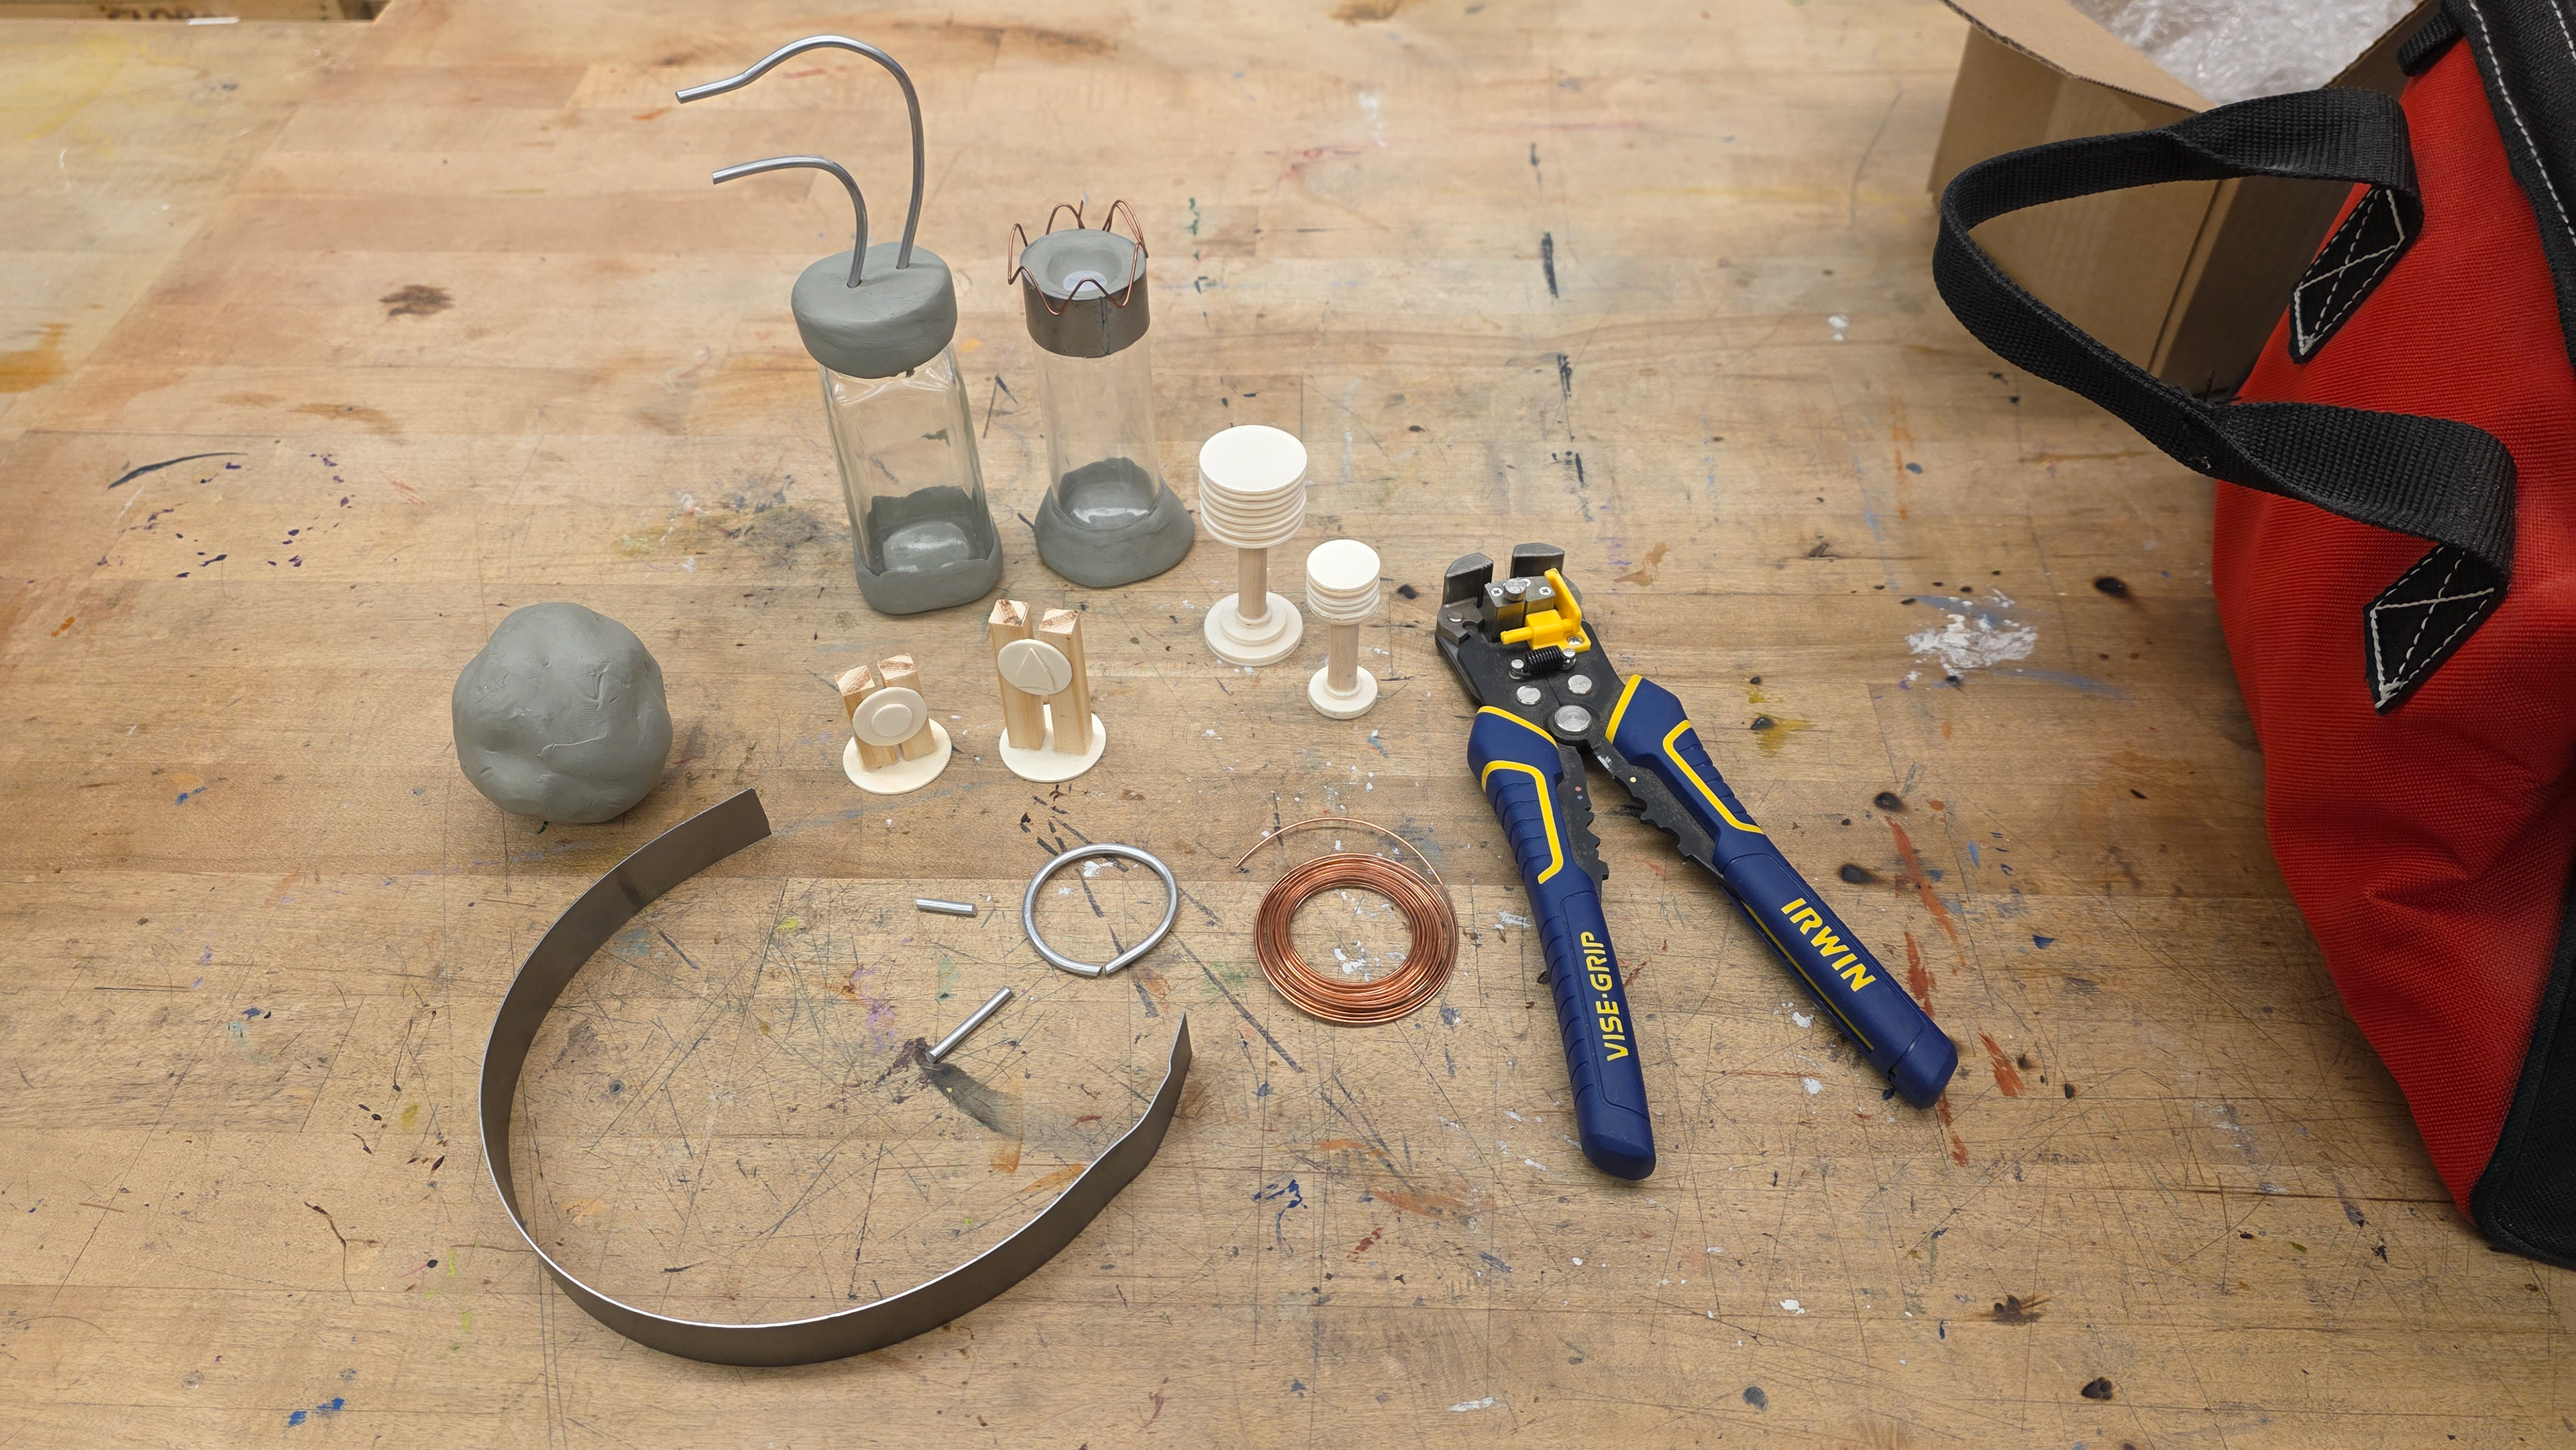
Low Fidelity Model Materials
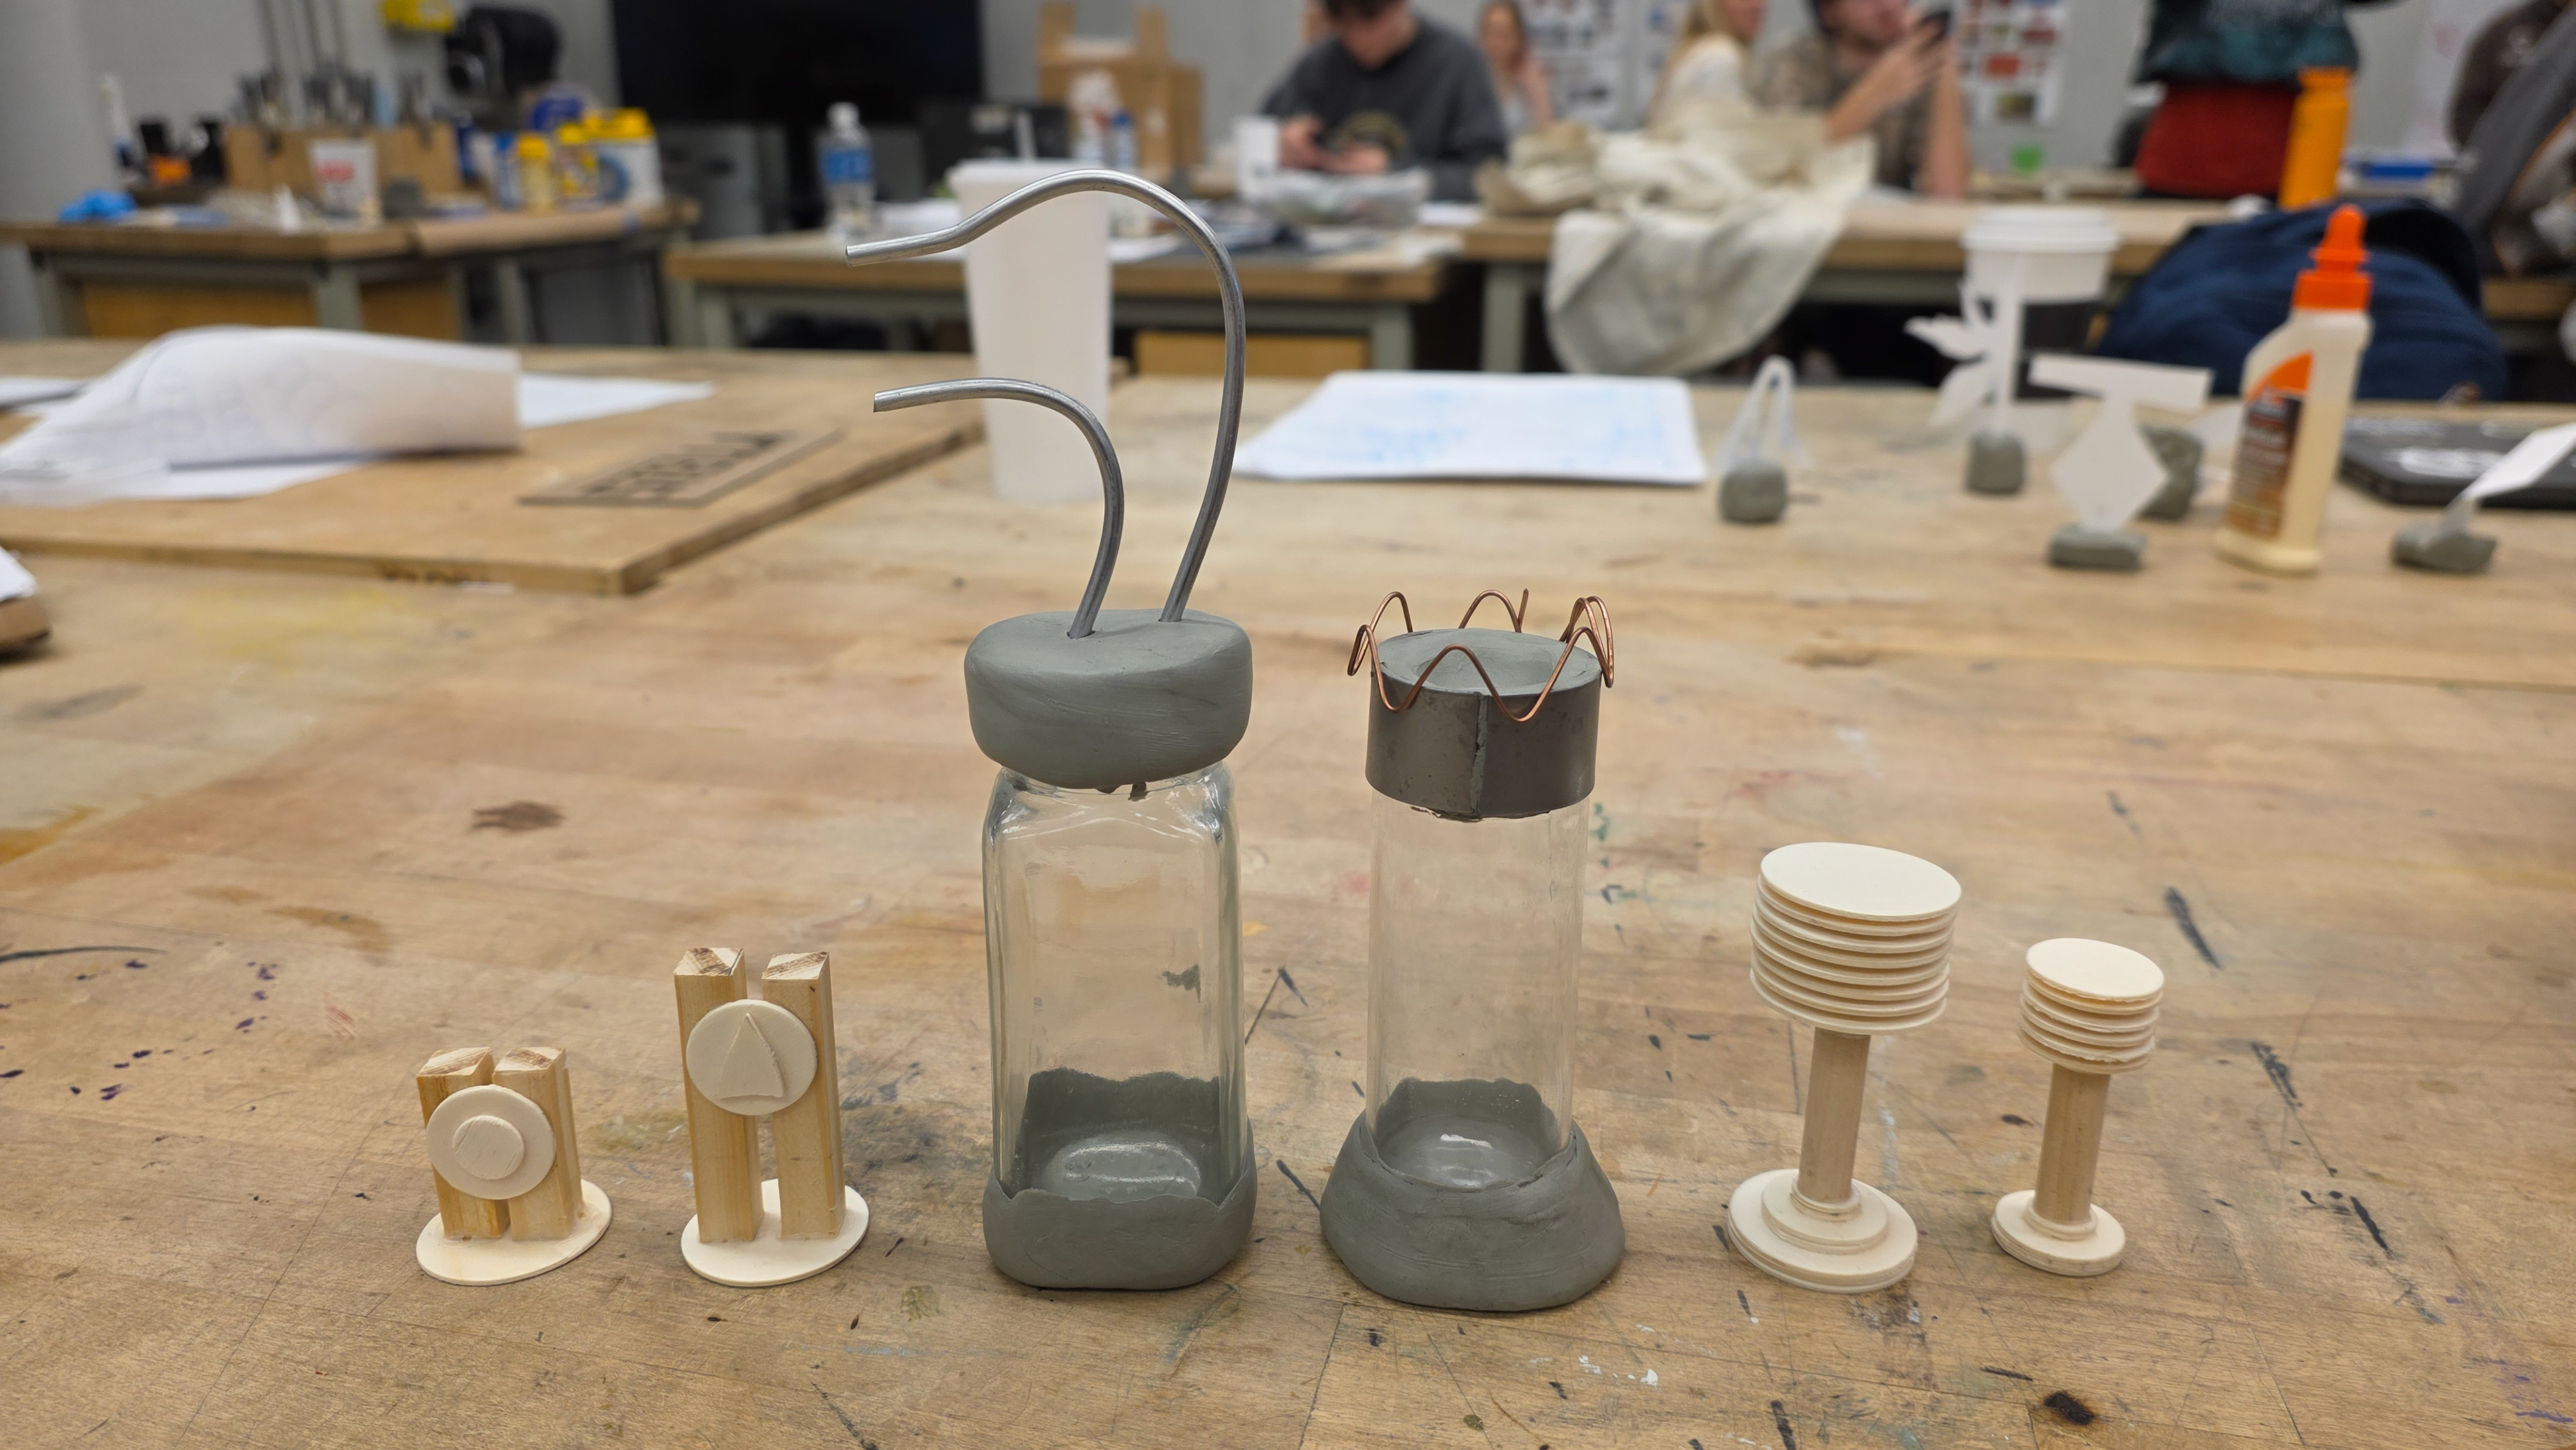
Low Fidelity Models
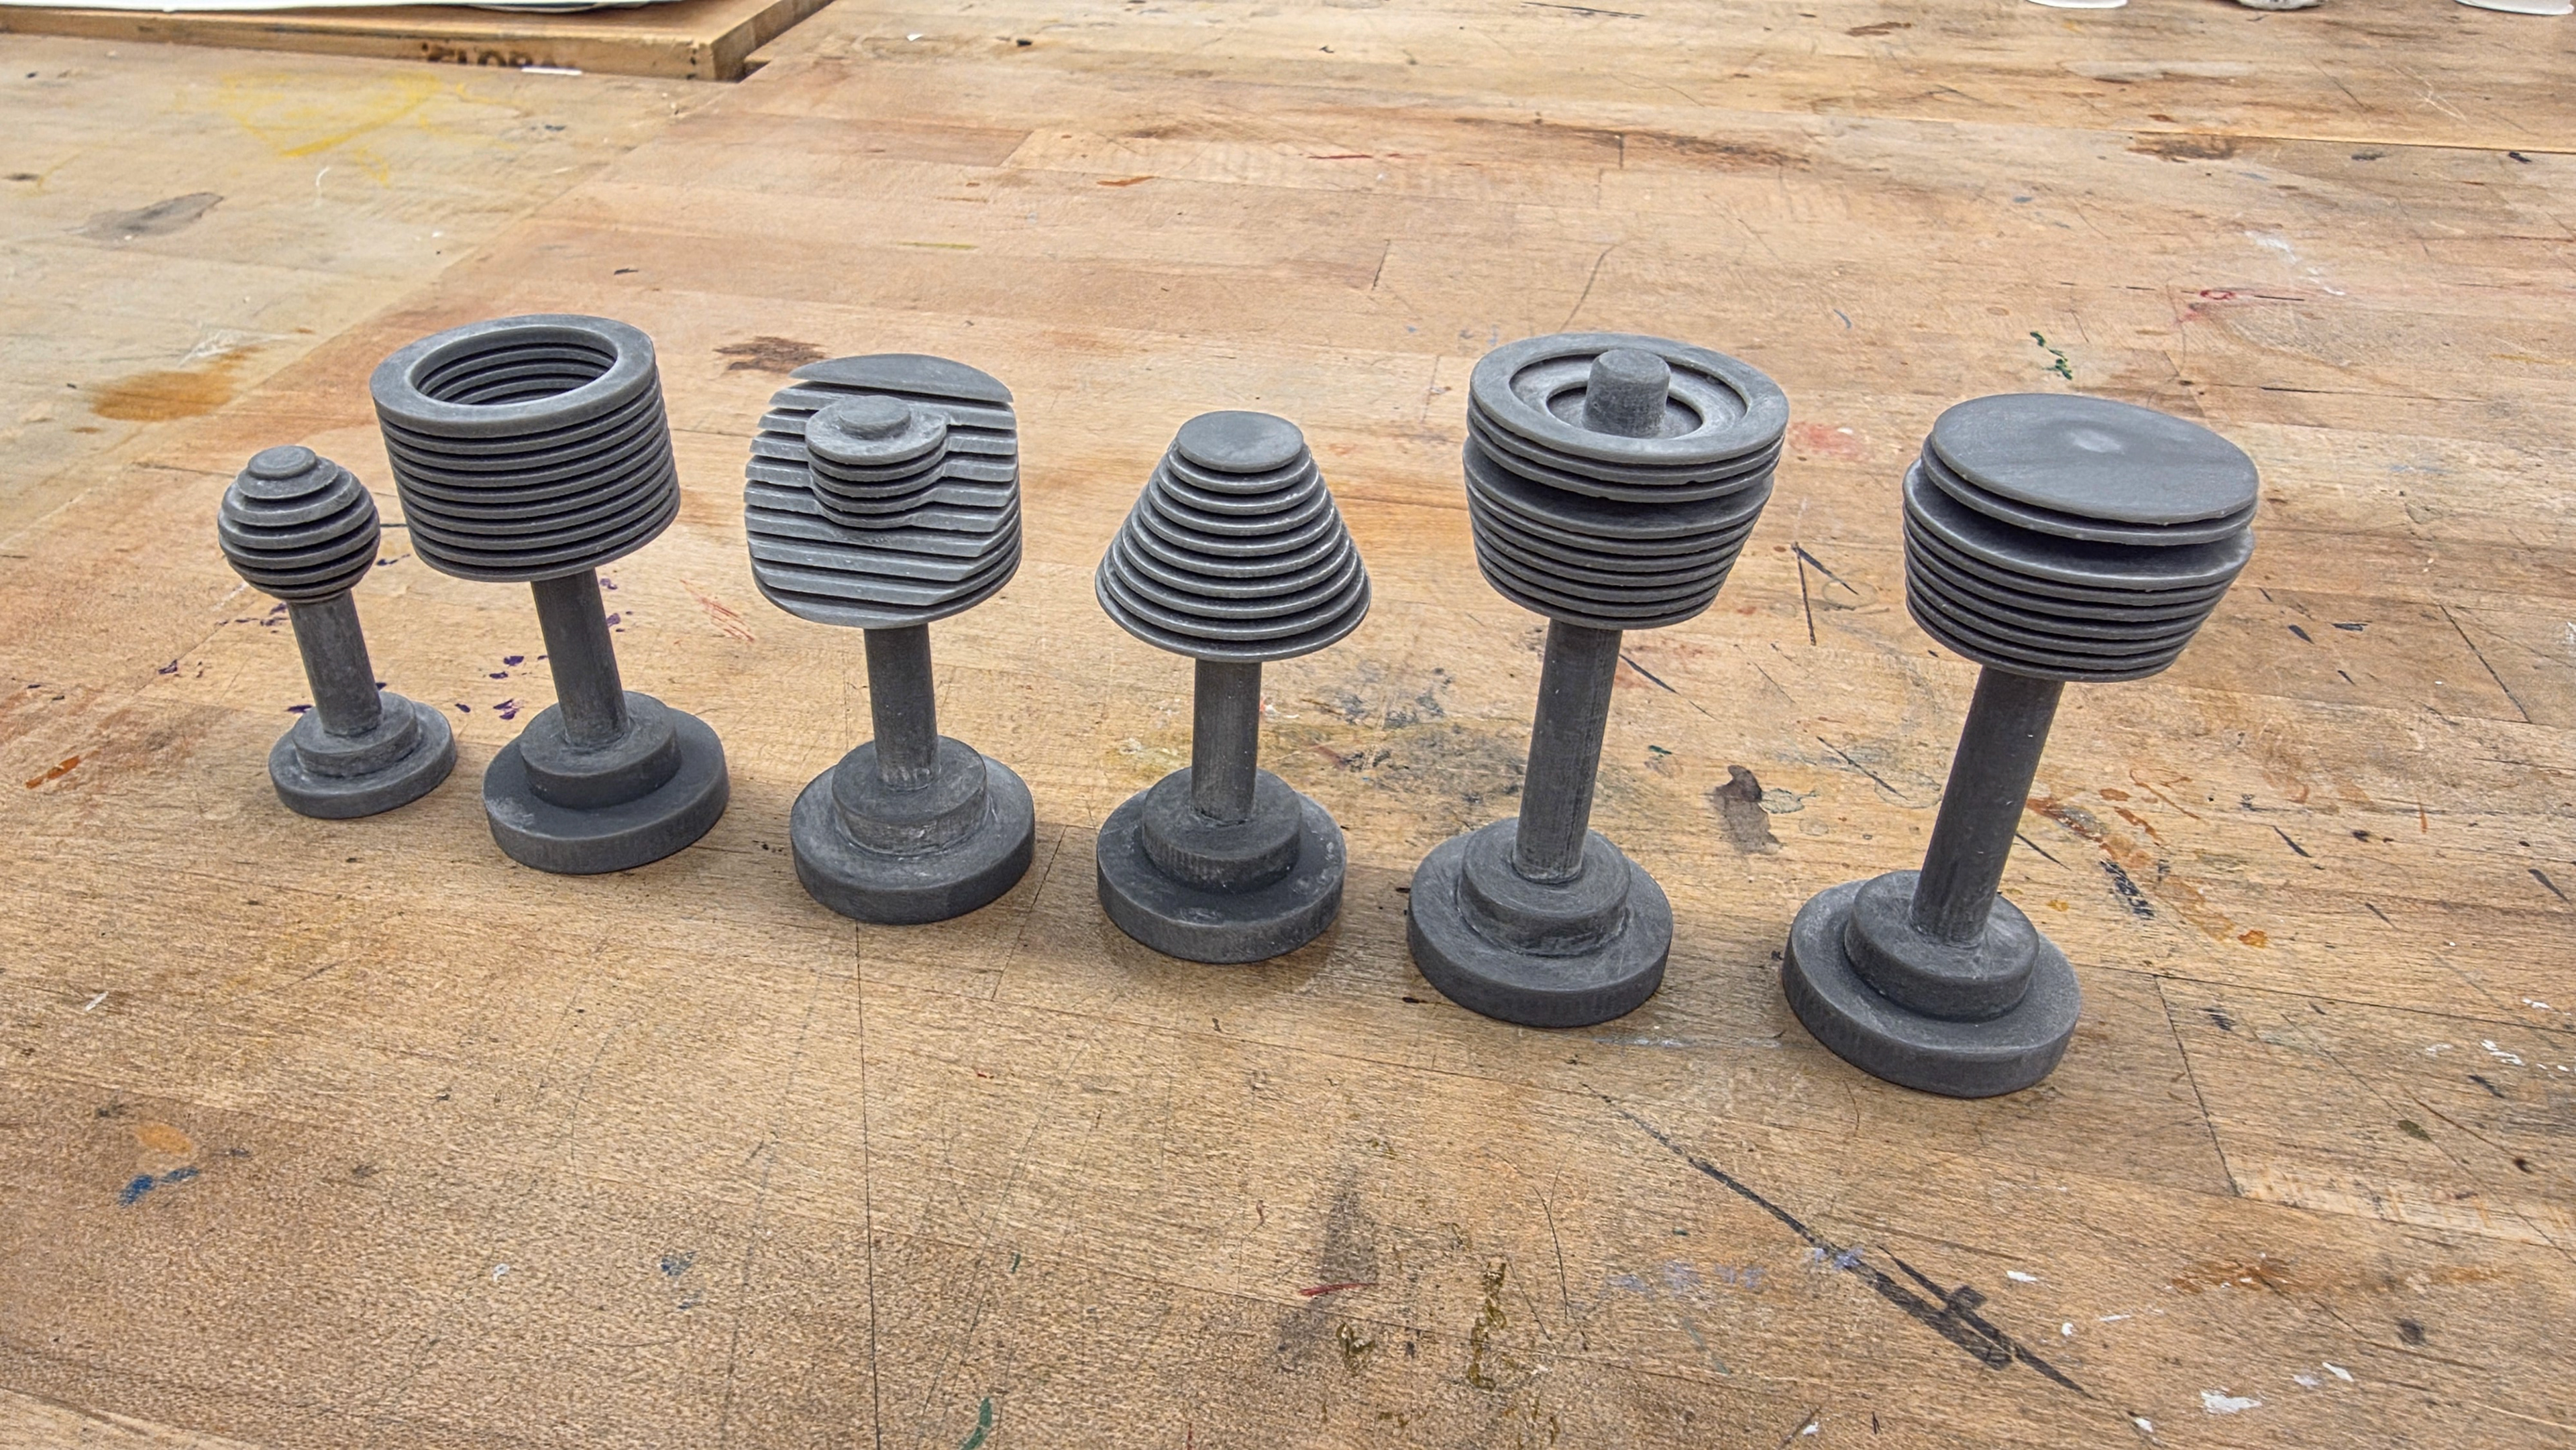
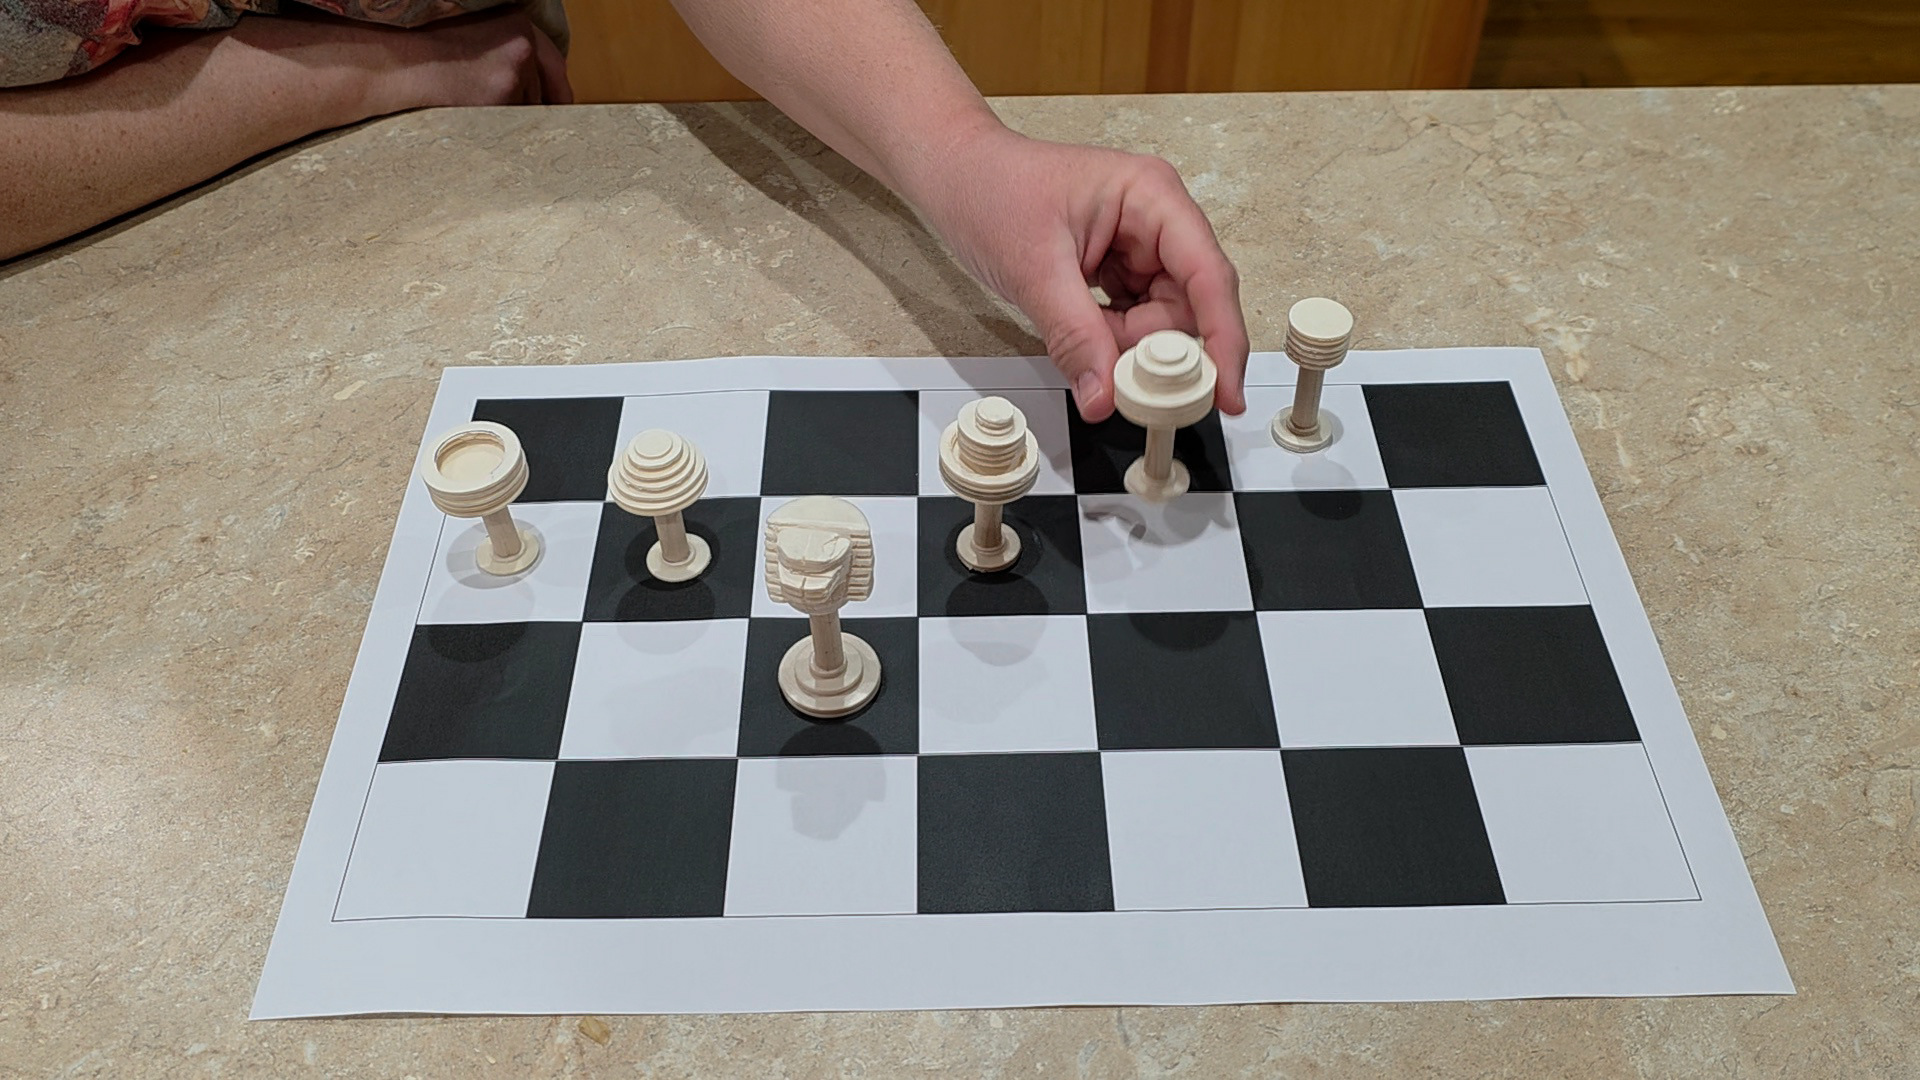
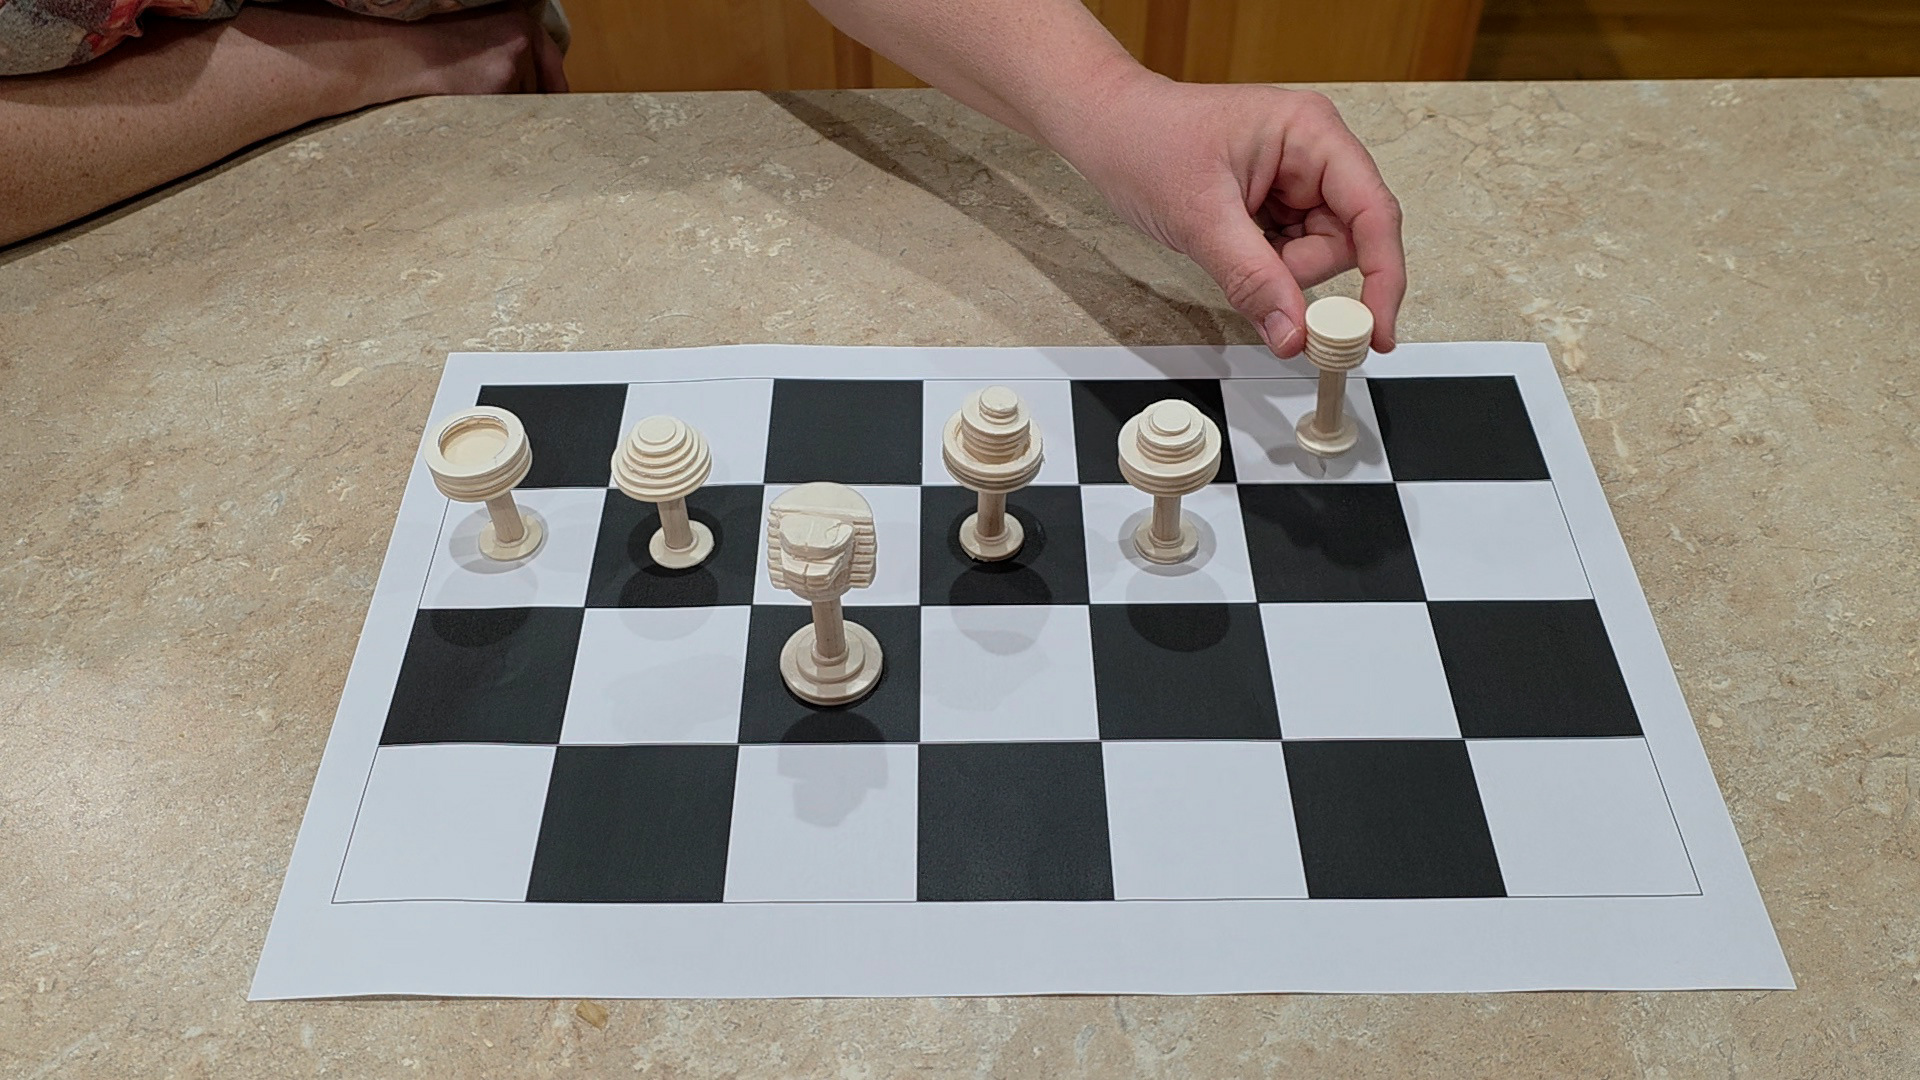
After exploring physical models of multiple sets, I fell in love with the features of the layered models. The forms were practical, interesting, and infinitely modular. These characteristics made the choice to pursue this form family further an easy one. I made these models with pre-cut wood circles, dowel rod, glue, and a Dremel.
Completed Low-fidelity Form Family Models
Completed Mid-fidelity Form Family Models
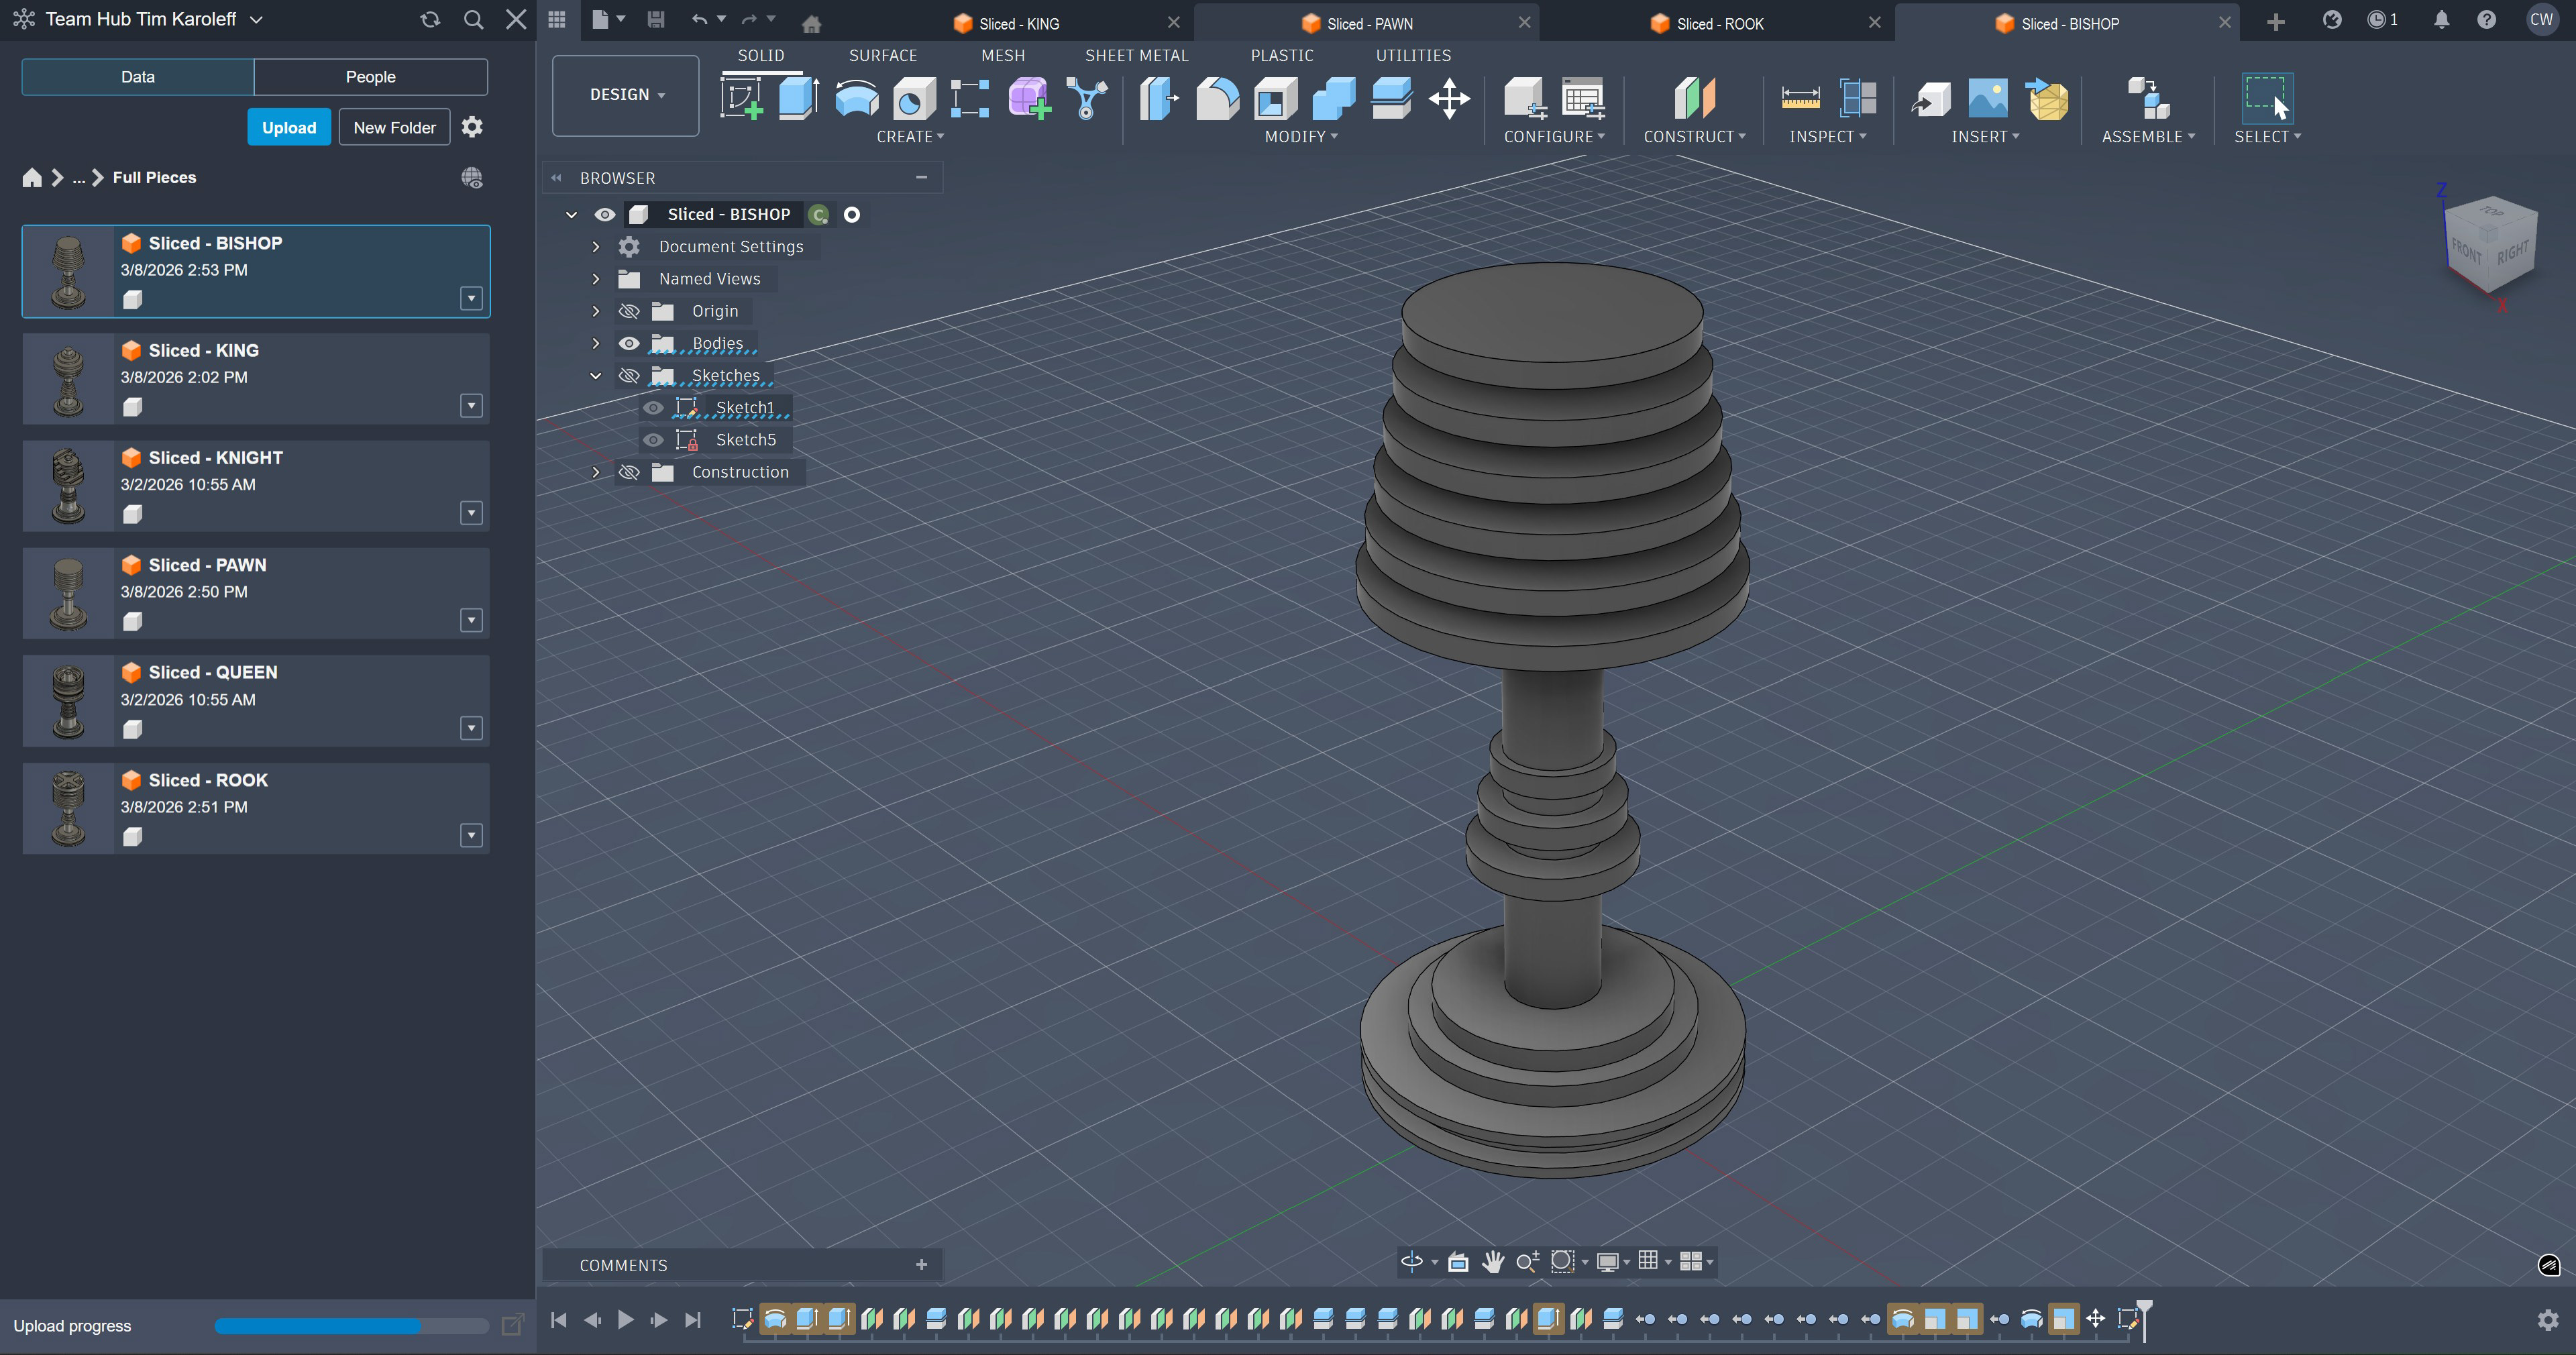
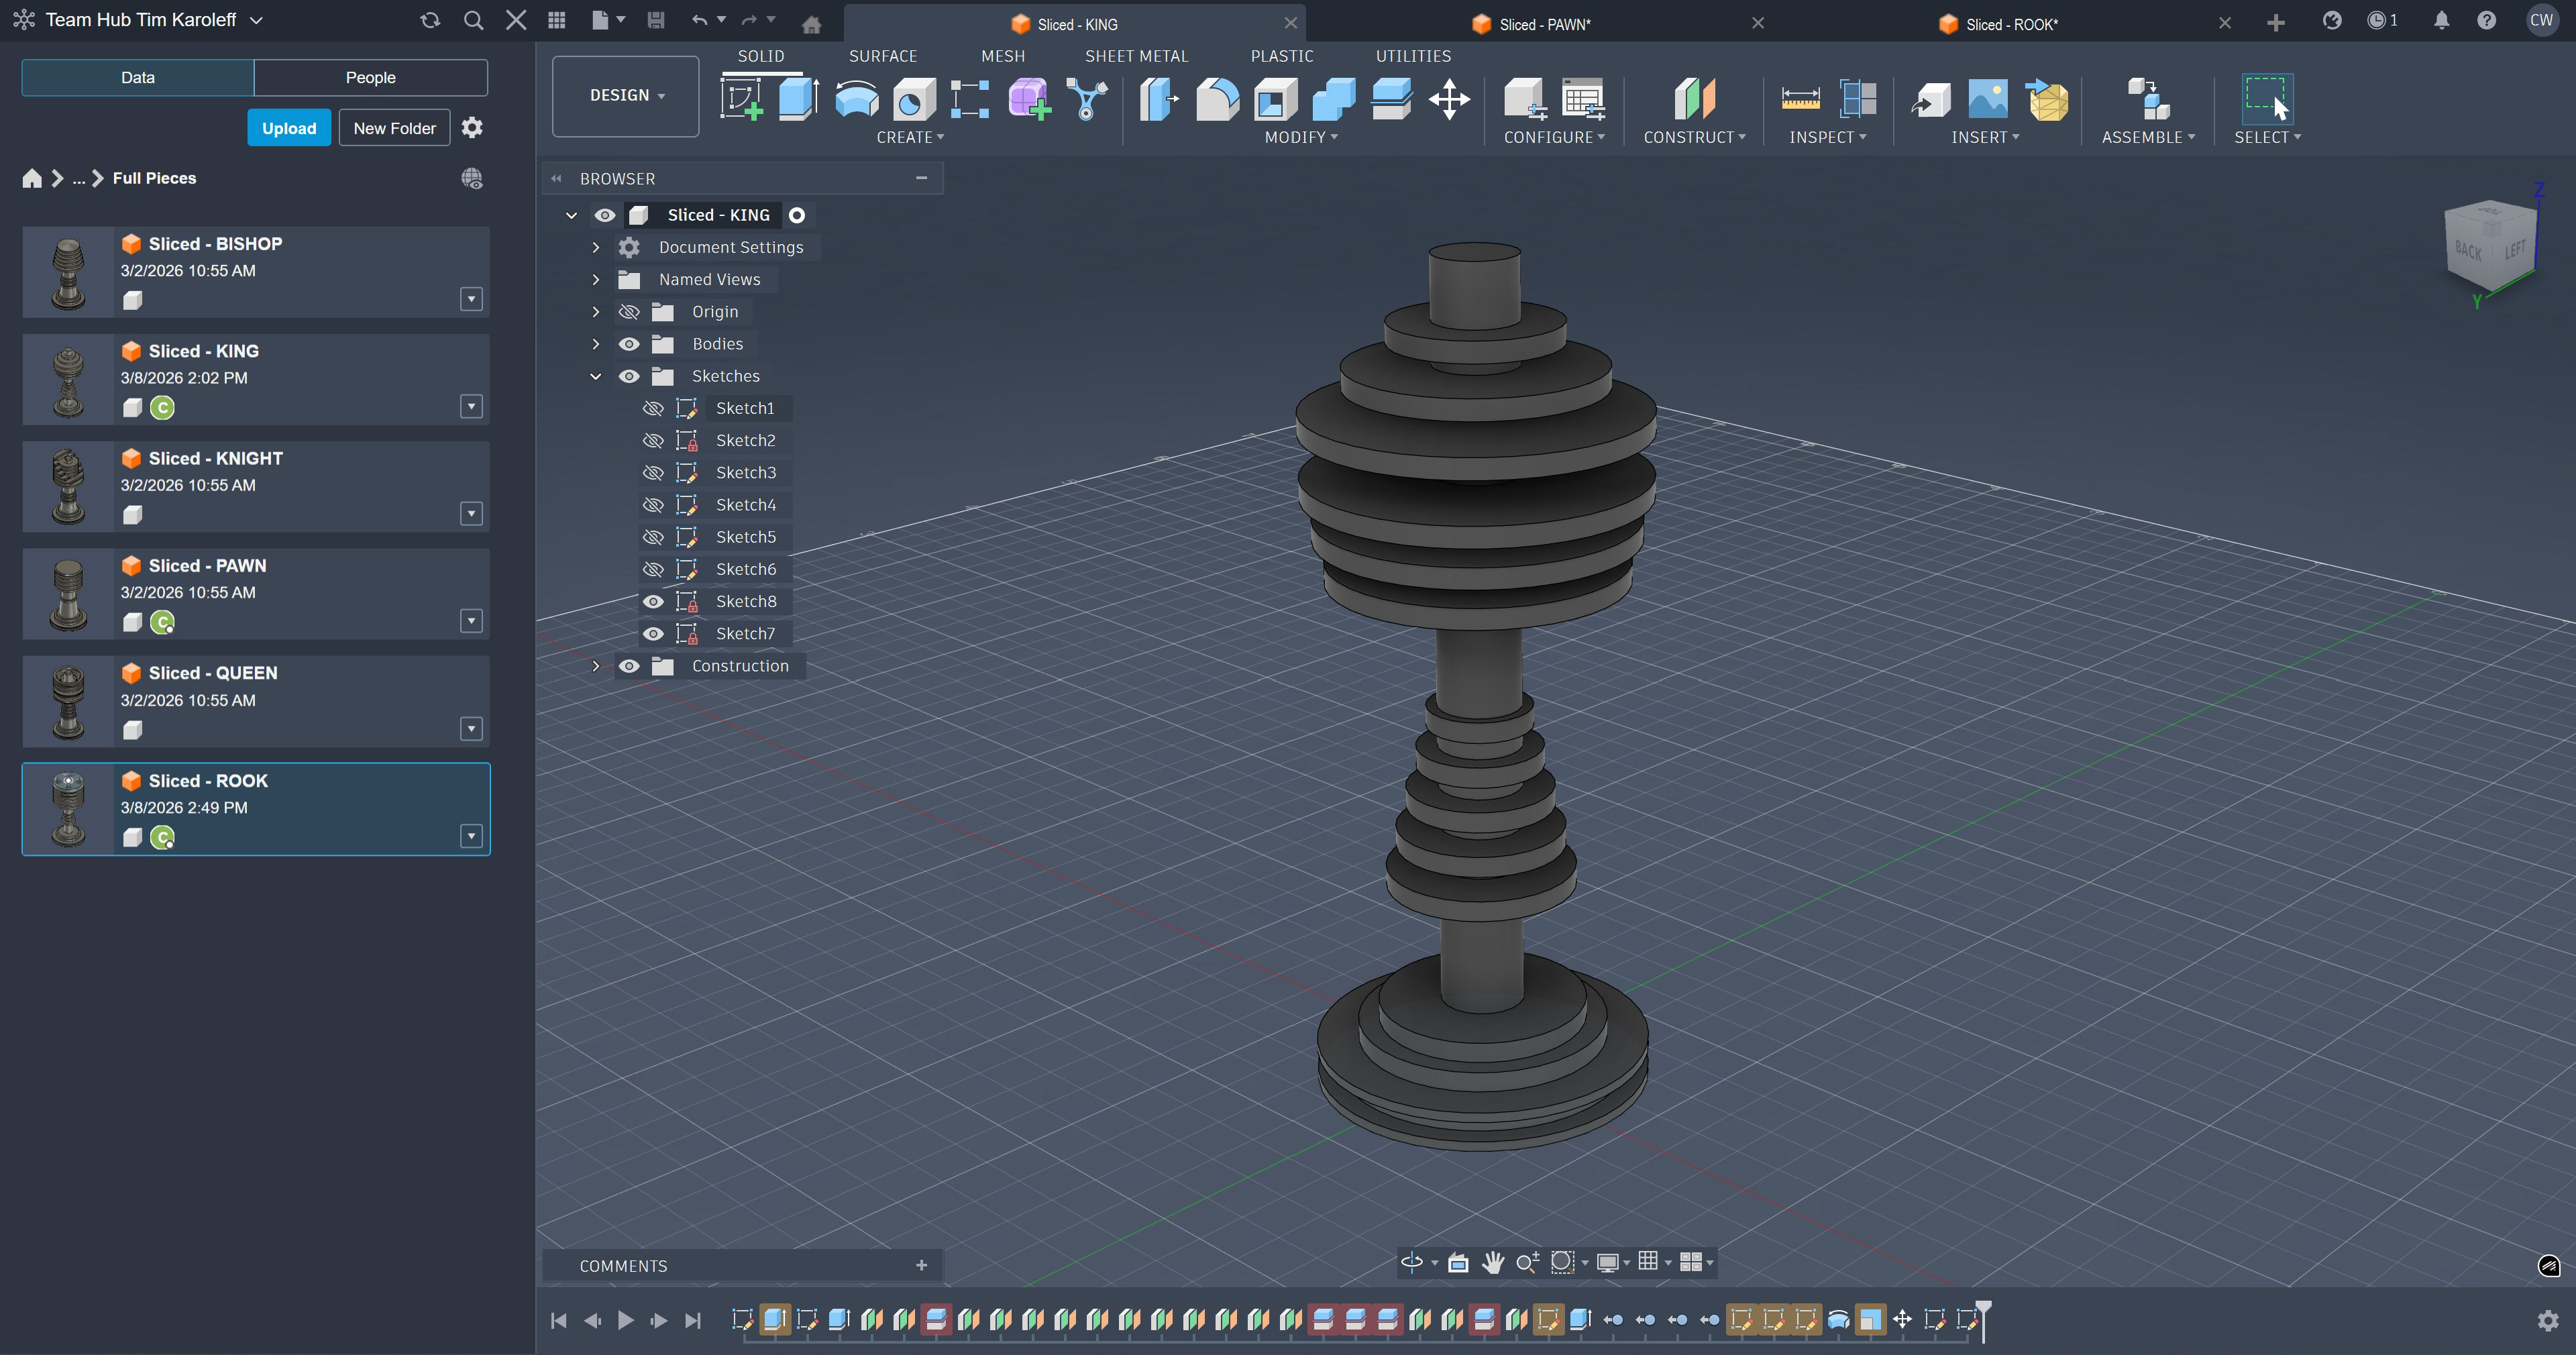
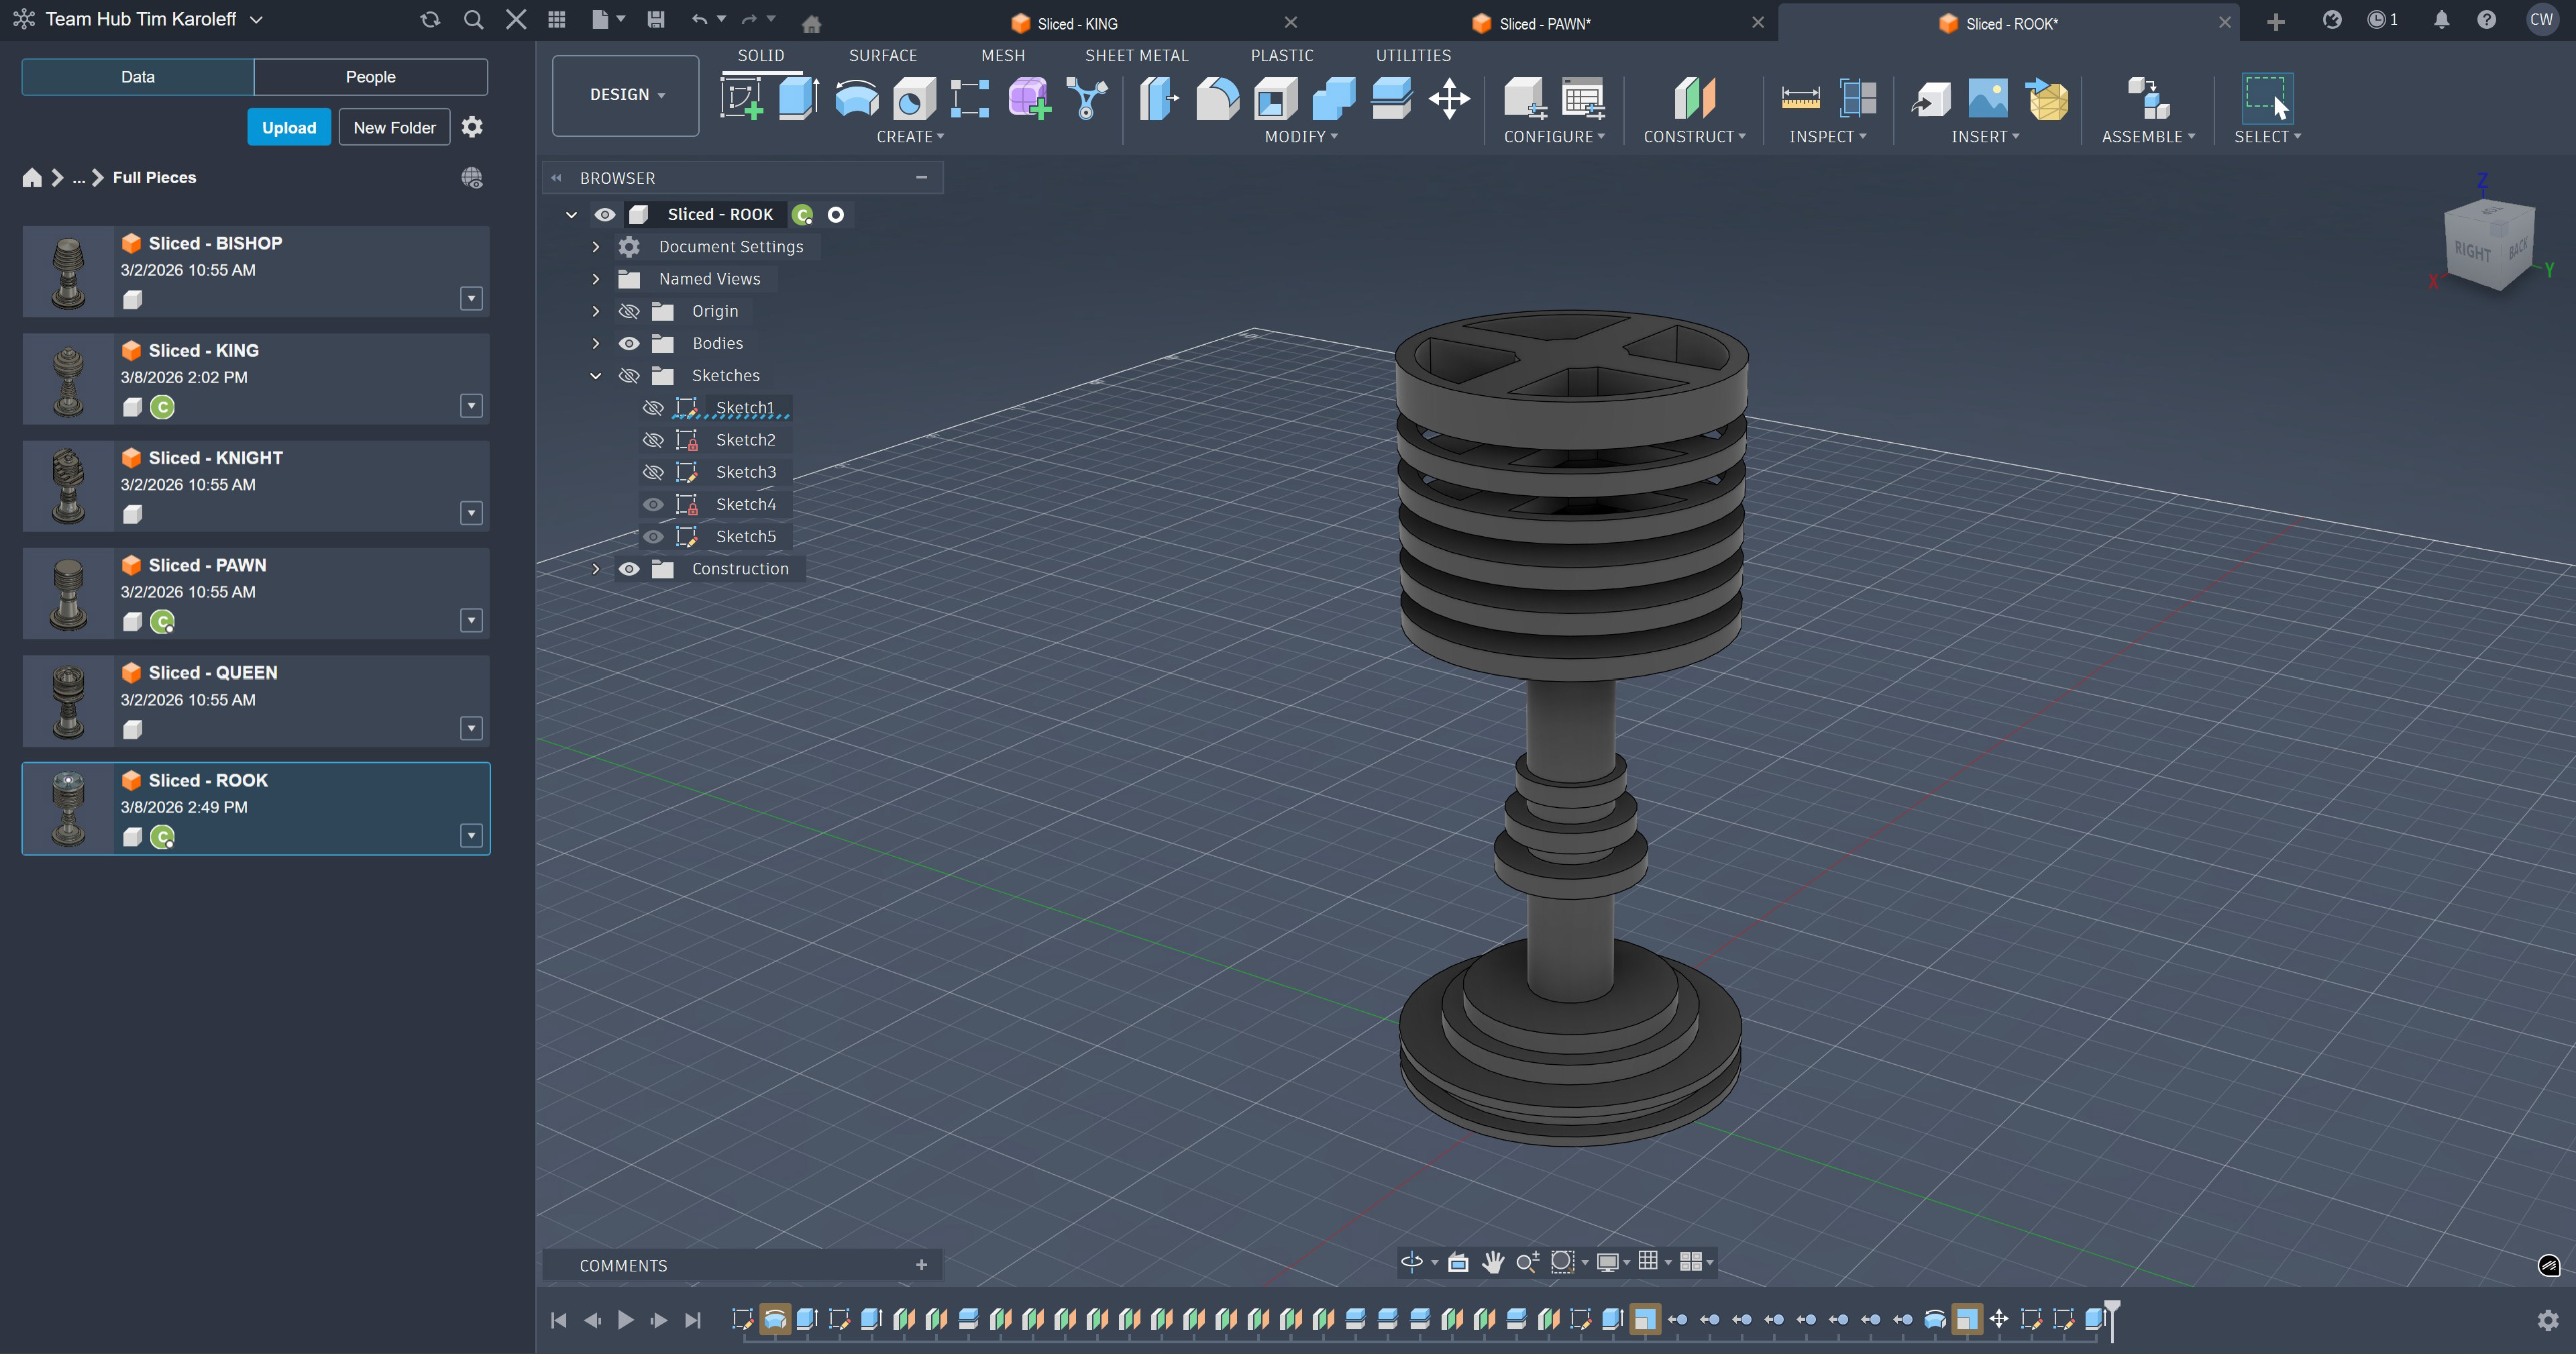
I iterated from the initial wood models into Fusion 360 models. I made these models much more precise and intentional since I was no longer limited by pre-cut material. I had these models 3D resin printed.
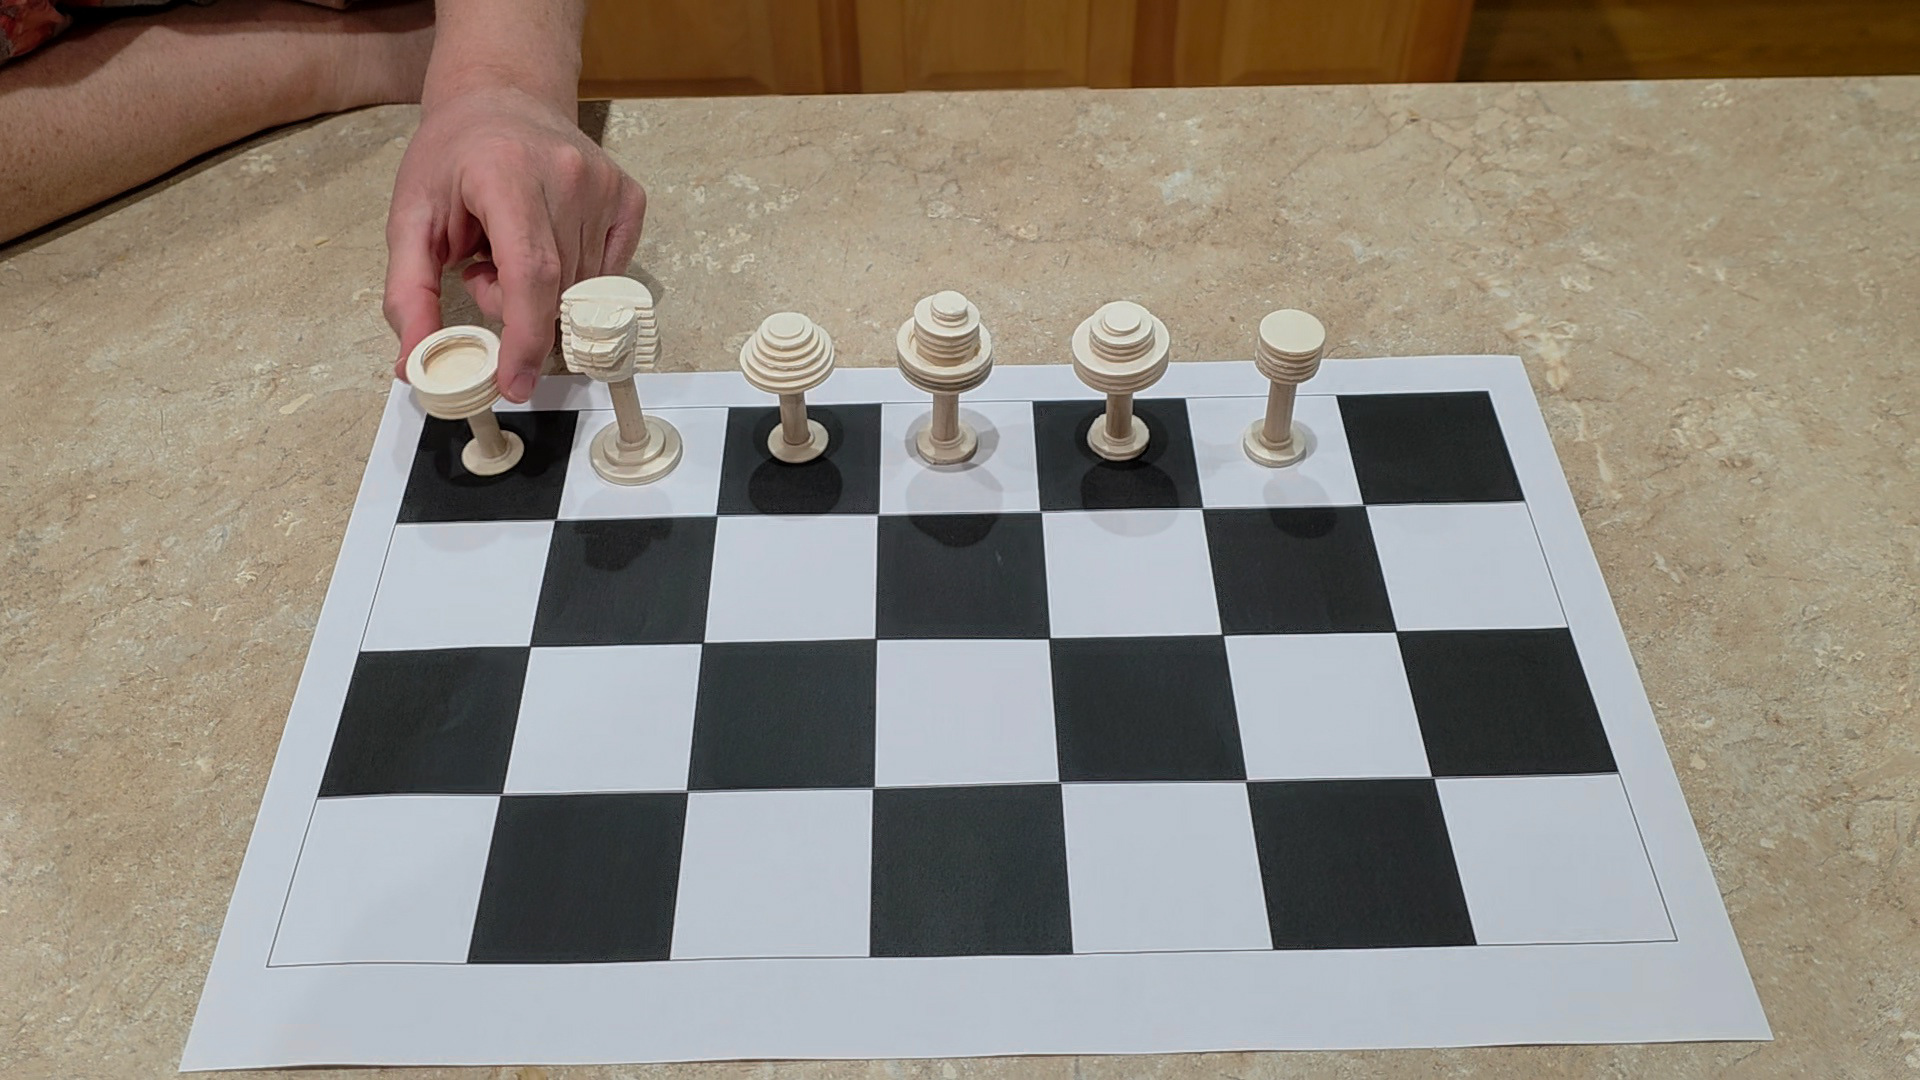
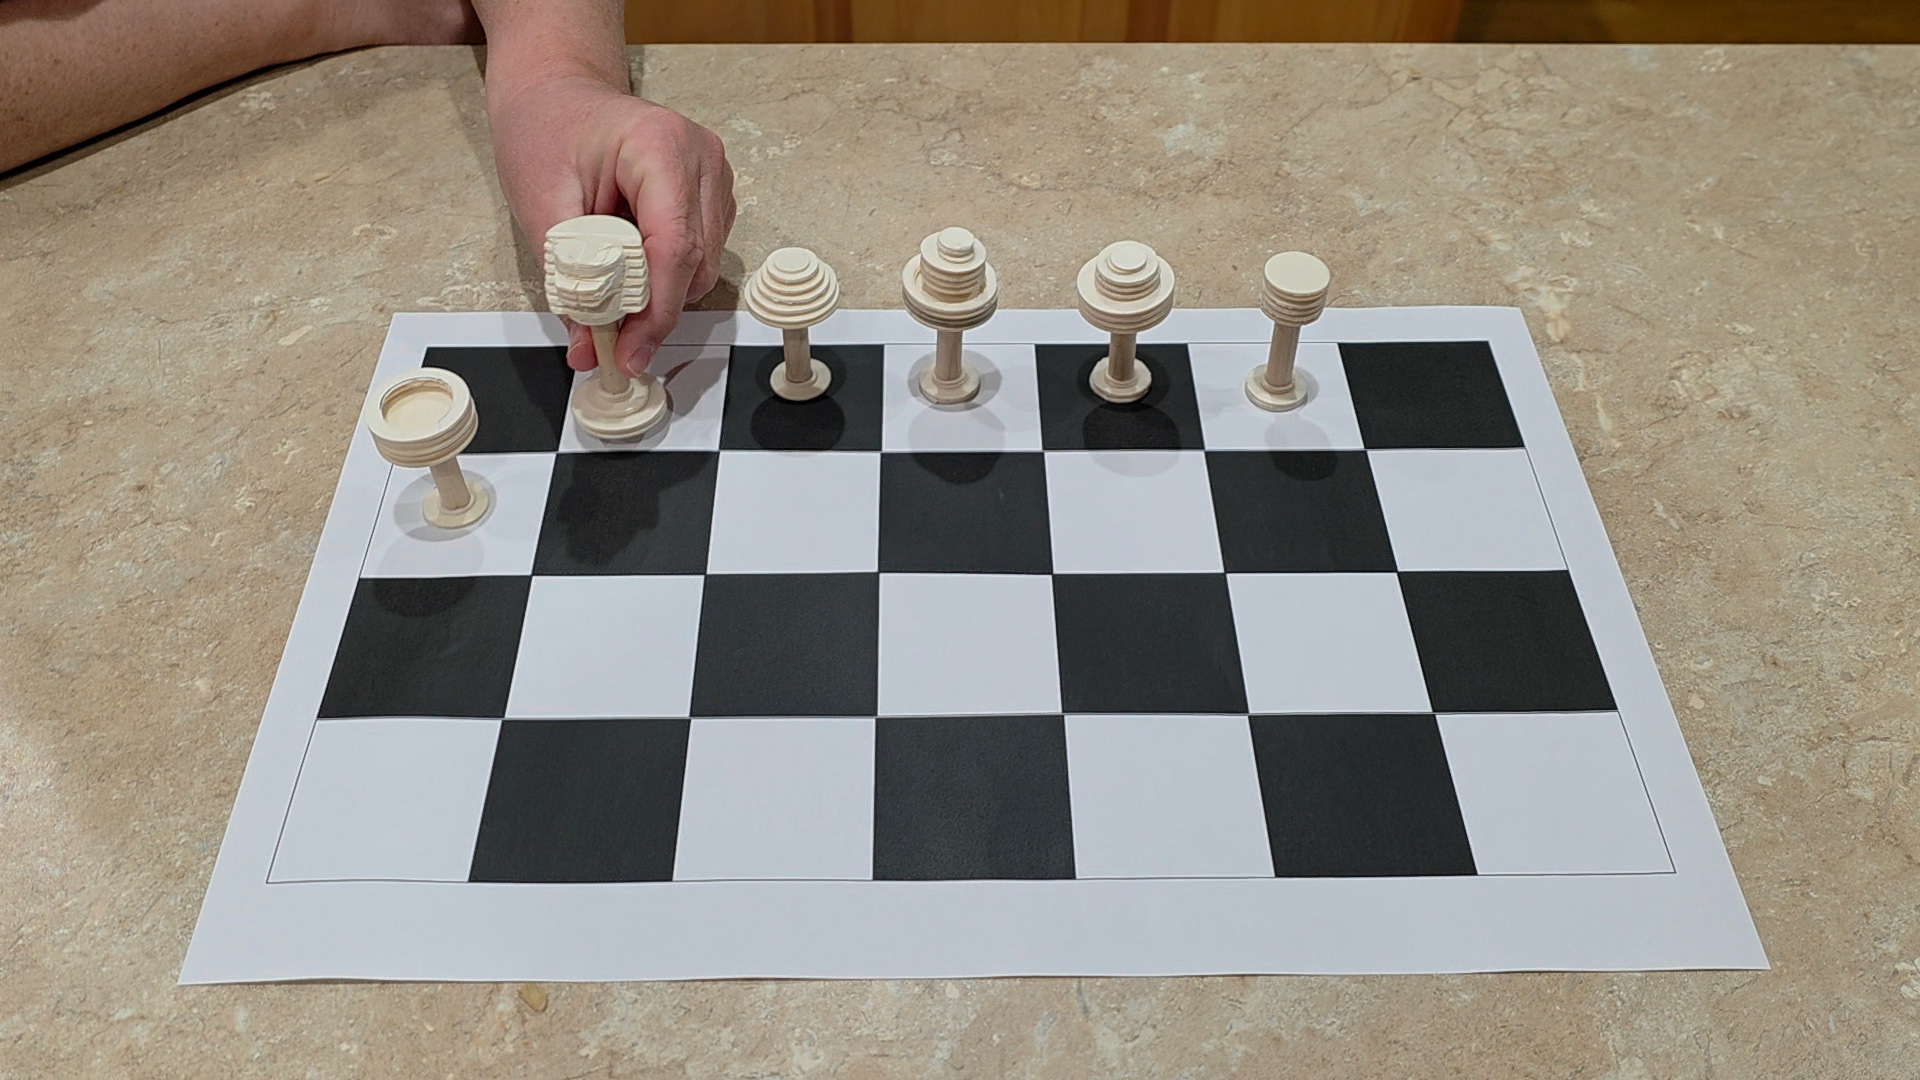
After settling on a single form family to pursue, I assessed human factors related to the use of the pieces. This allowed me to ensure that they would be natural and comfortable to grab, hold, and move on the board. The pieces were received well in this area.
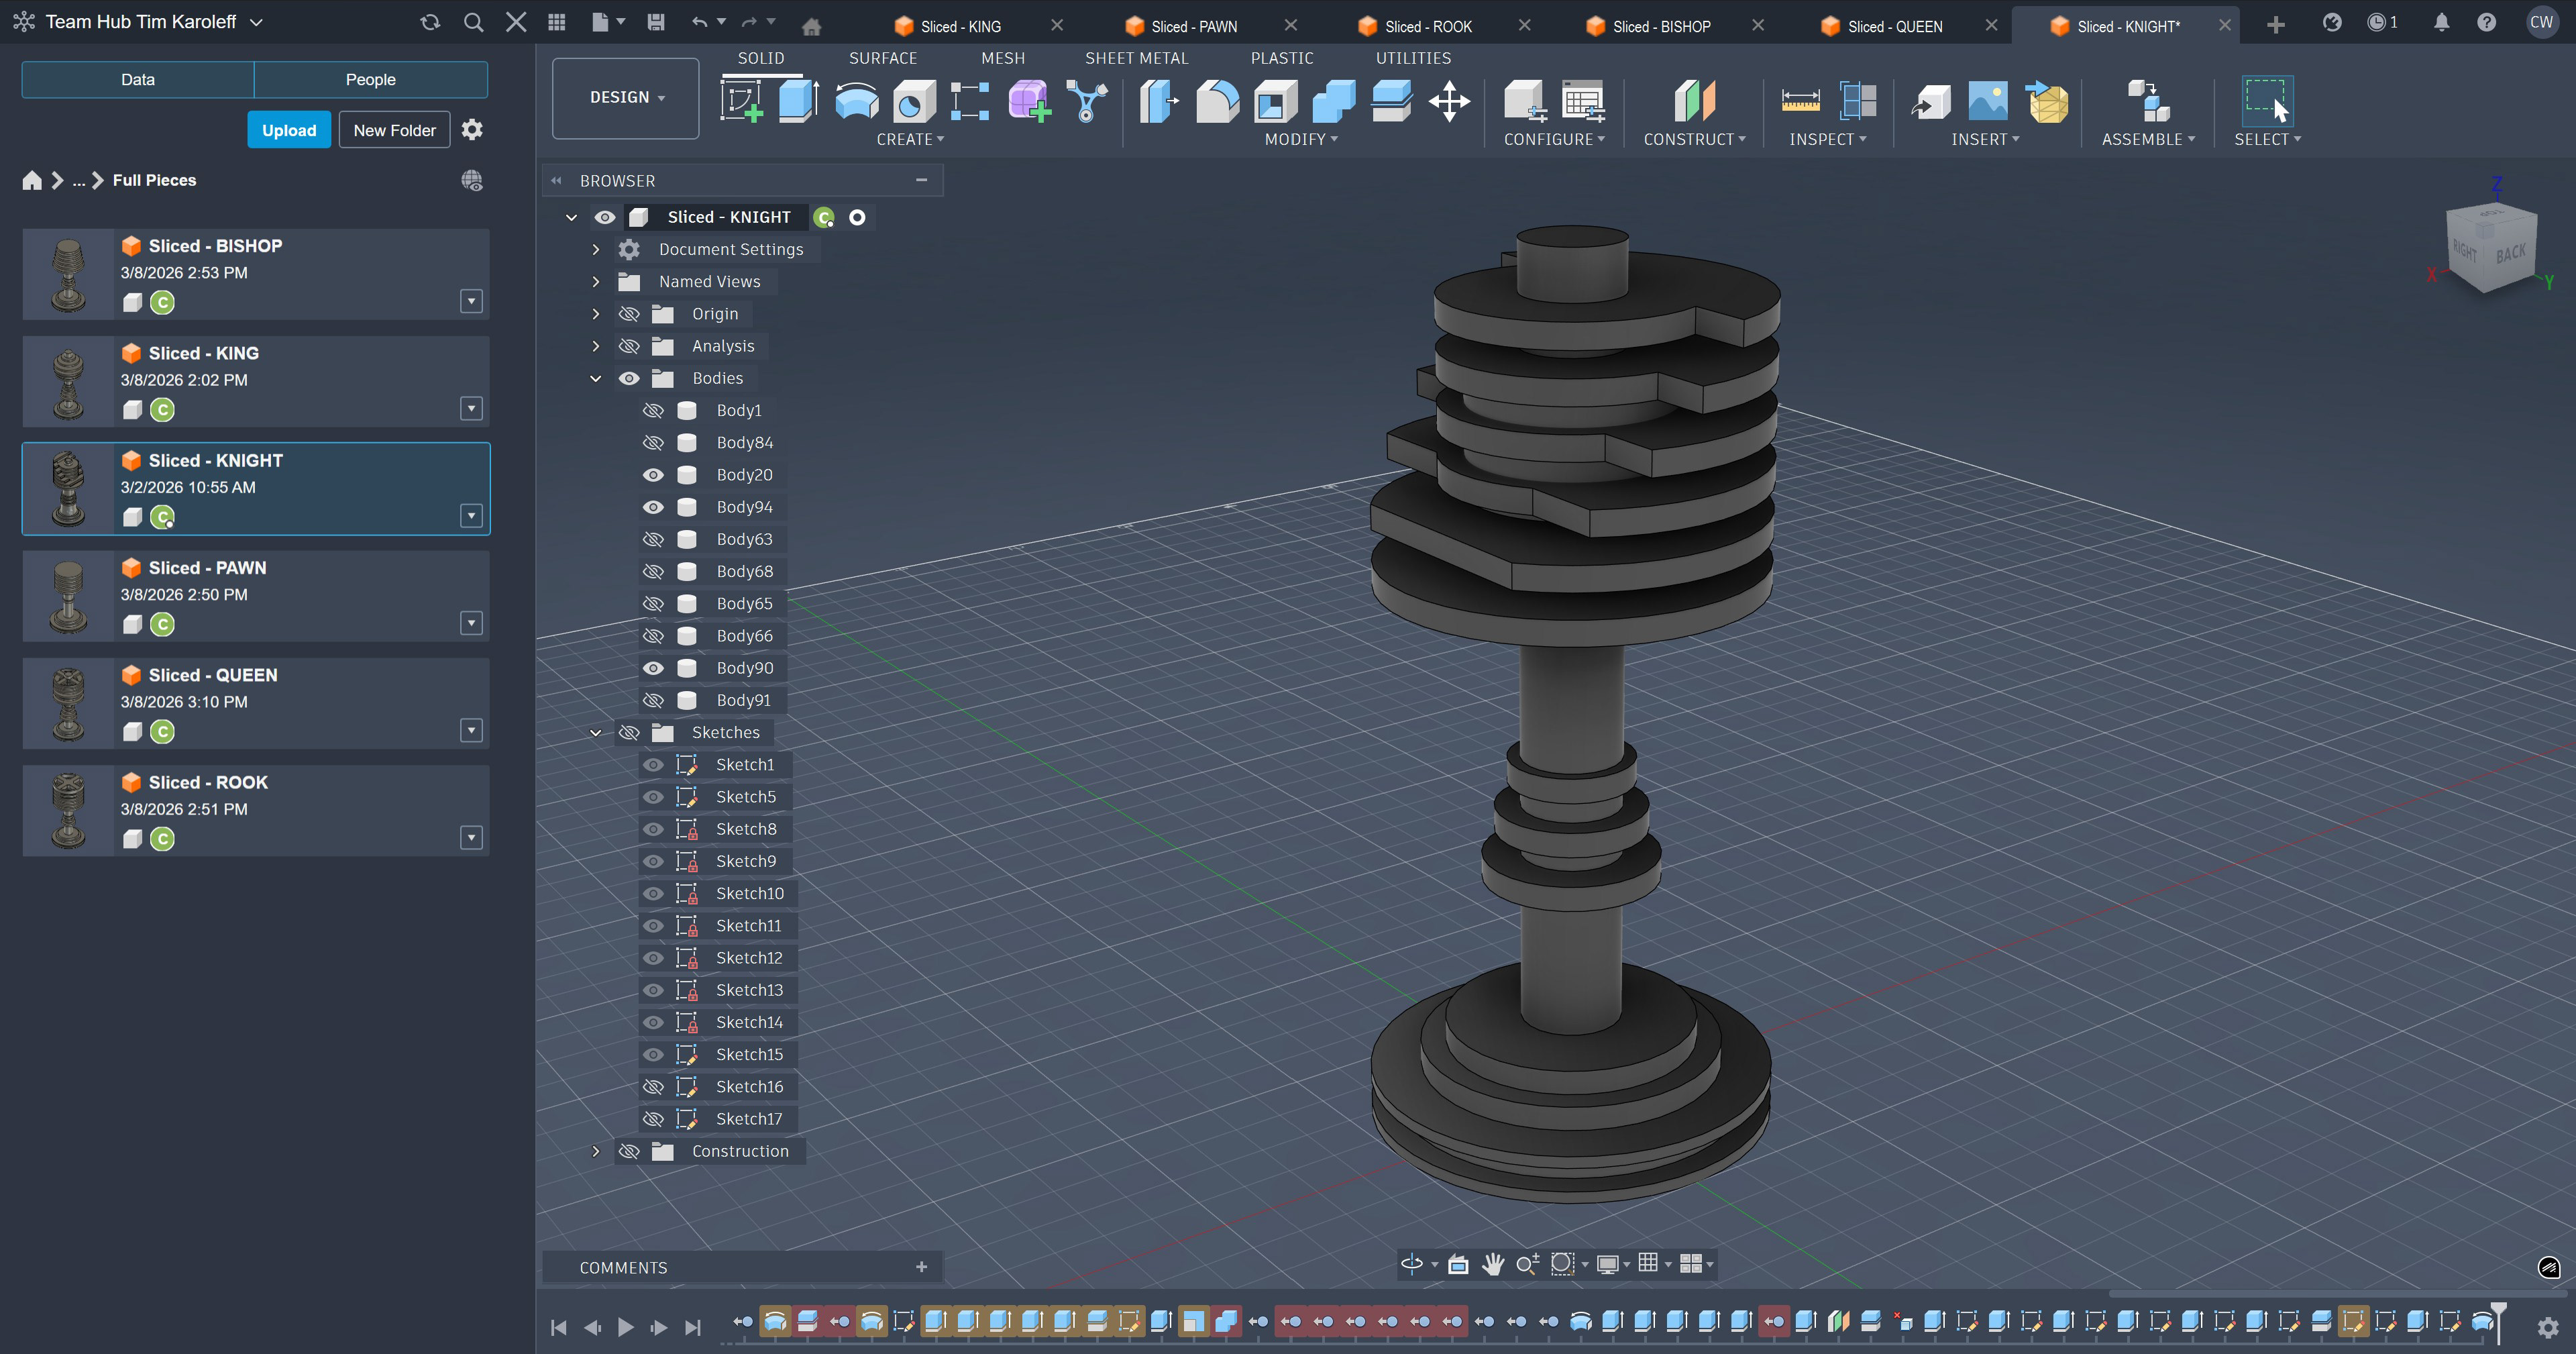
Rook
Knight
Bishop
King
Queen
Pawn
With my low and medium fidelity models, as well as all exploratory sketches and imagery thus far, I presented my project to department faculty and upperclassmen for review and feedback before producing final models. The idea was received very well, and I received much helpful feedback for improving visual interest and balance, as well as about production feasibility.
Low and Mid-fidelity Models on Display for Critique
I initially intended to have the tops of the pieces down to where the stem meets the base CNC lathed from aluminum round stock, with the base being cast pewter. Upon exploring machining options online and at UC facilities, this proved to be too costly and untimely. This led me to pivot to laser-cut aluminum discs arranged on threaded rod and placed into cast pewter bases, which required me to adjust the mid-fidelity designs by increasing spacing between layers, increasing layer thickness, and reducing finishing elements such as chamfers and fillets. Each layer from the models was cut and sent to me through Send Cut Send.
Bishop
King
Rook

Pawn
Knight
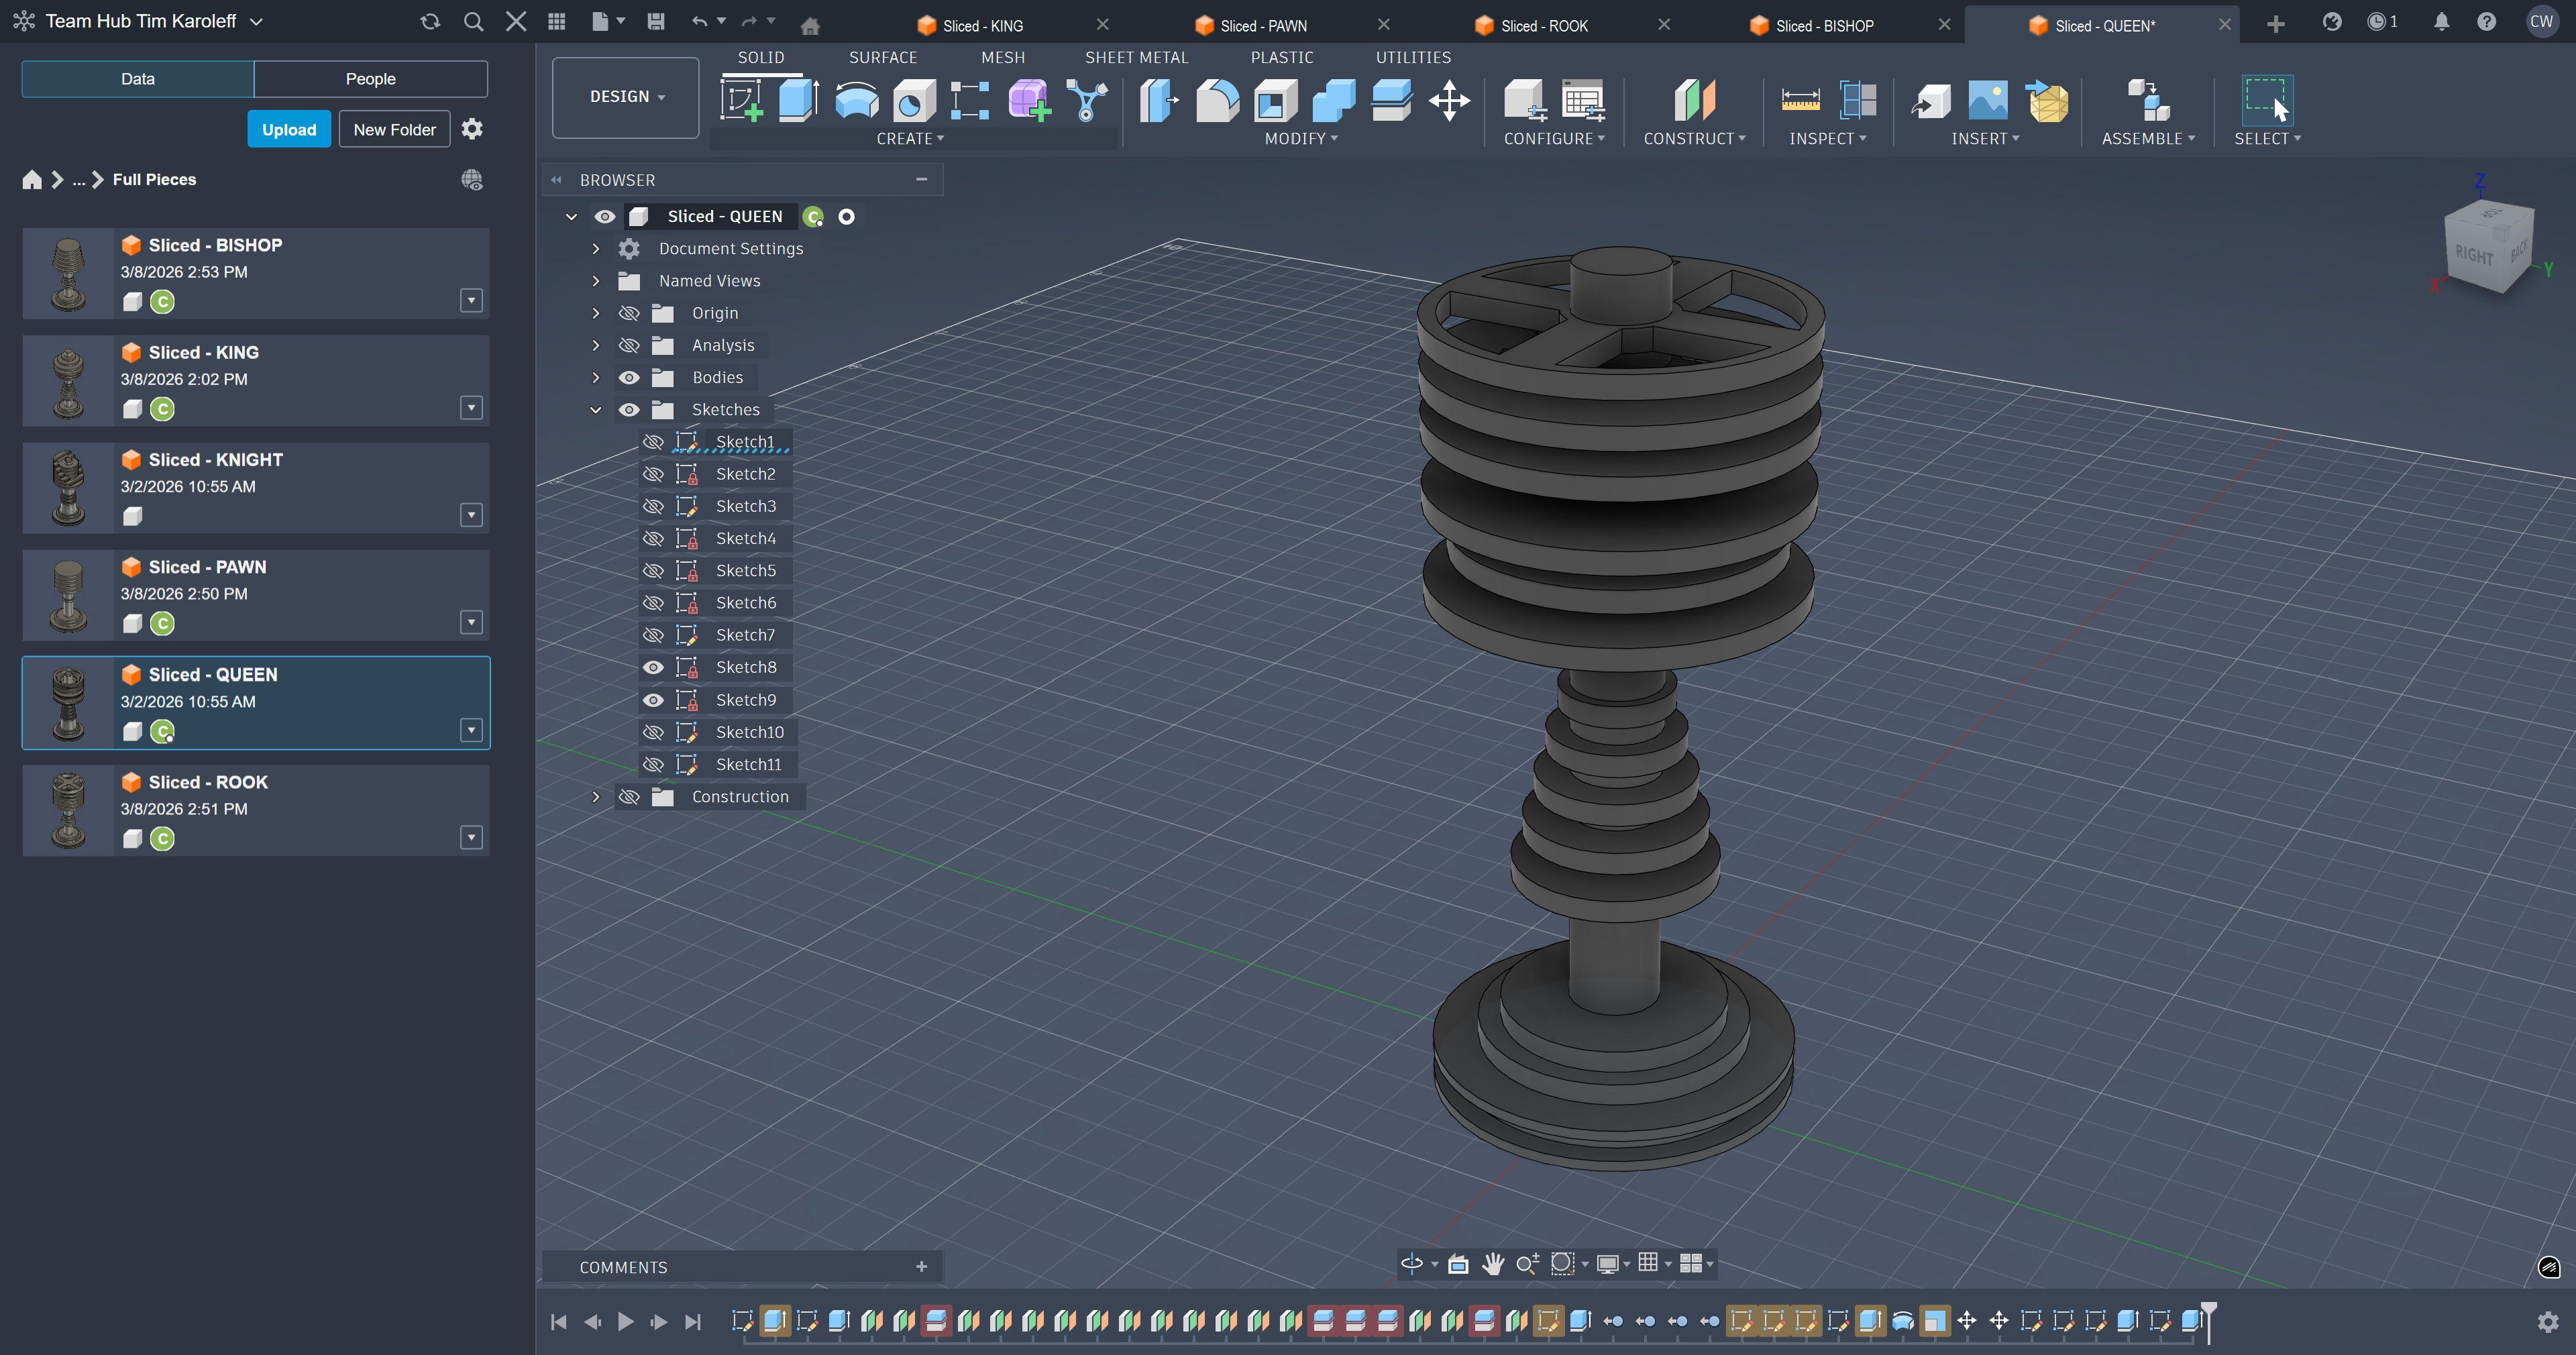
Queen
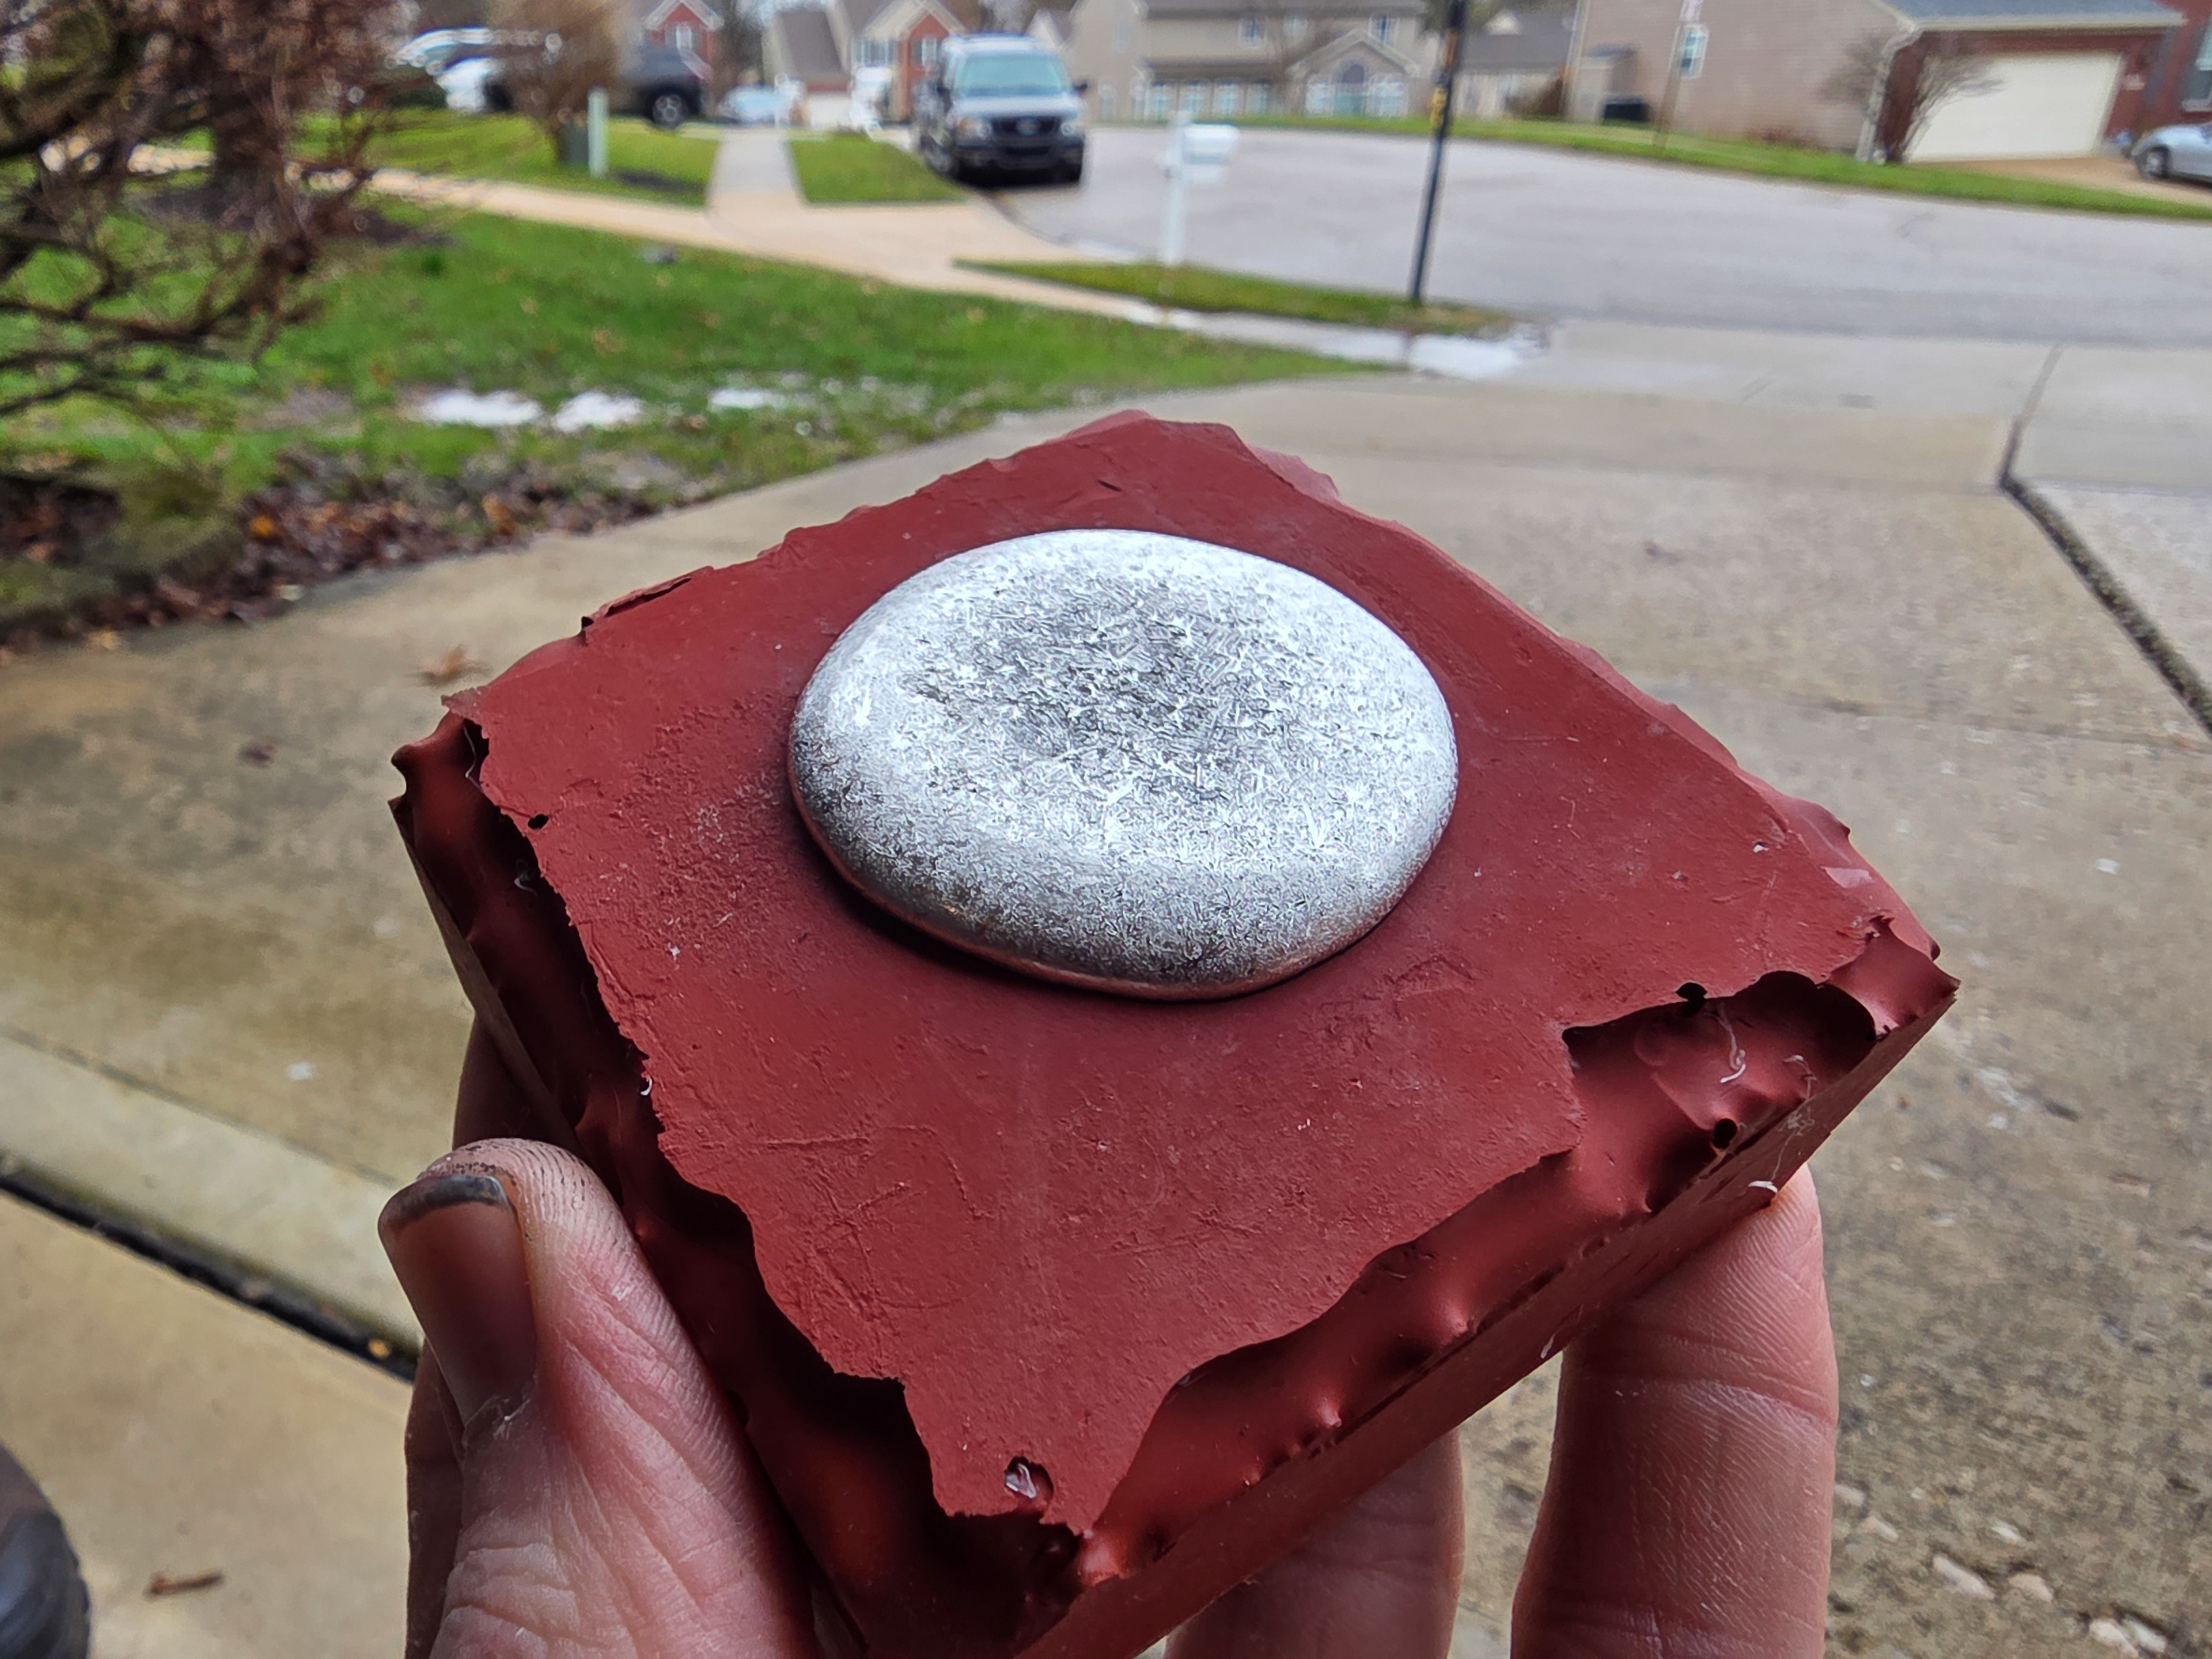
First Pewter Pour
I used Mold Max 60 silicone to make an open top mold from a 3D resin printed model of the base. I then melted raw pewter with a blow torch and successfully poured six good bases with this single mold.
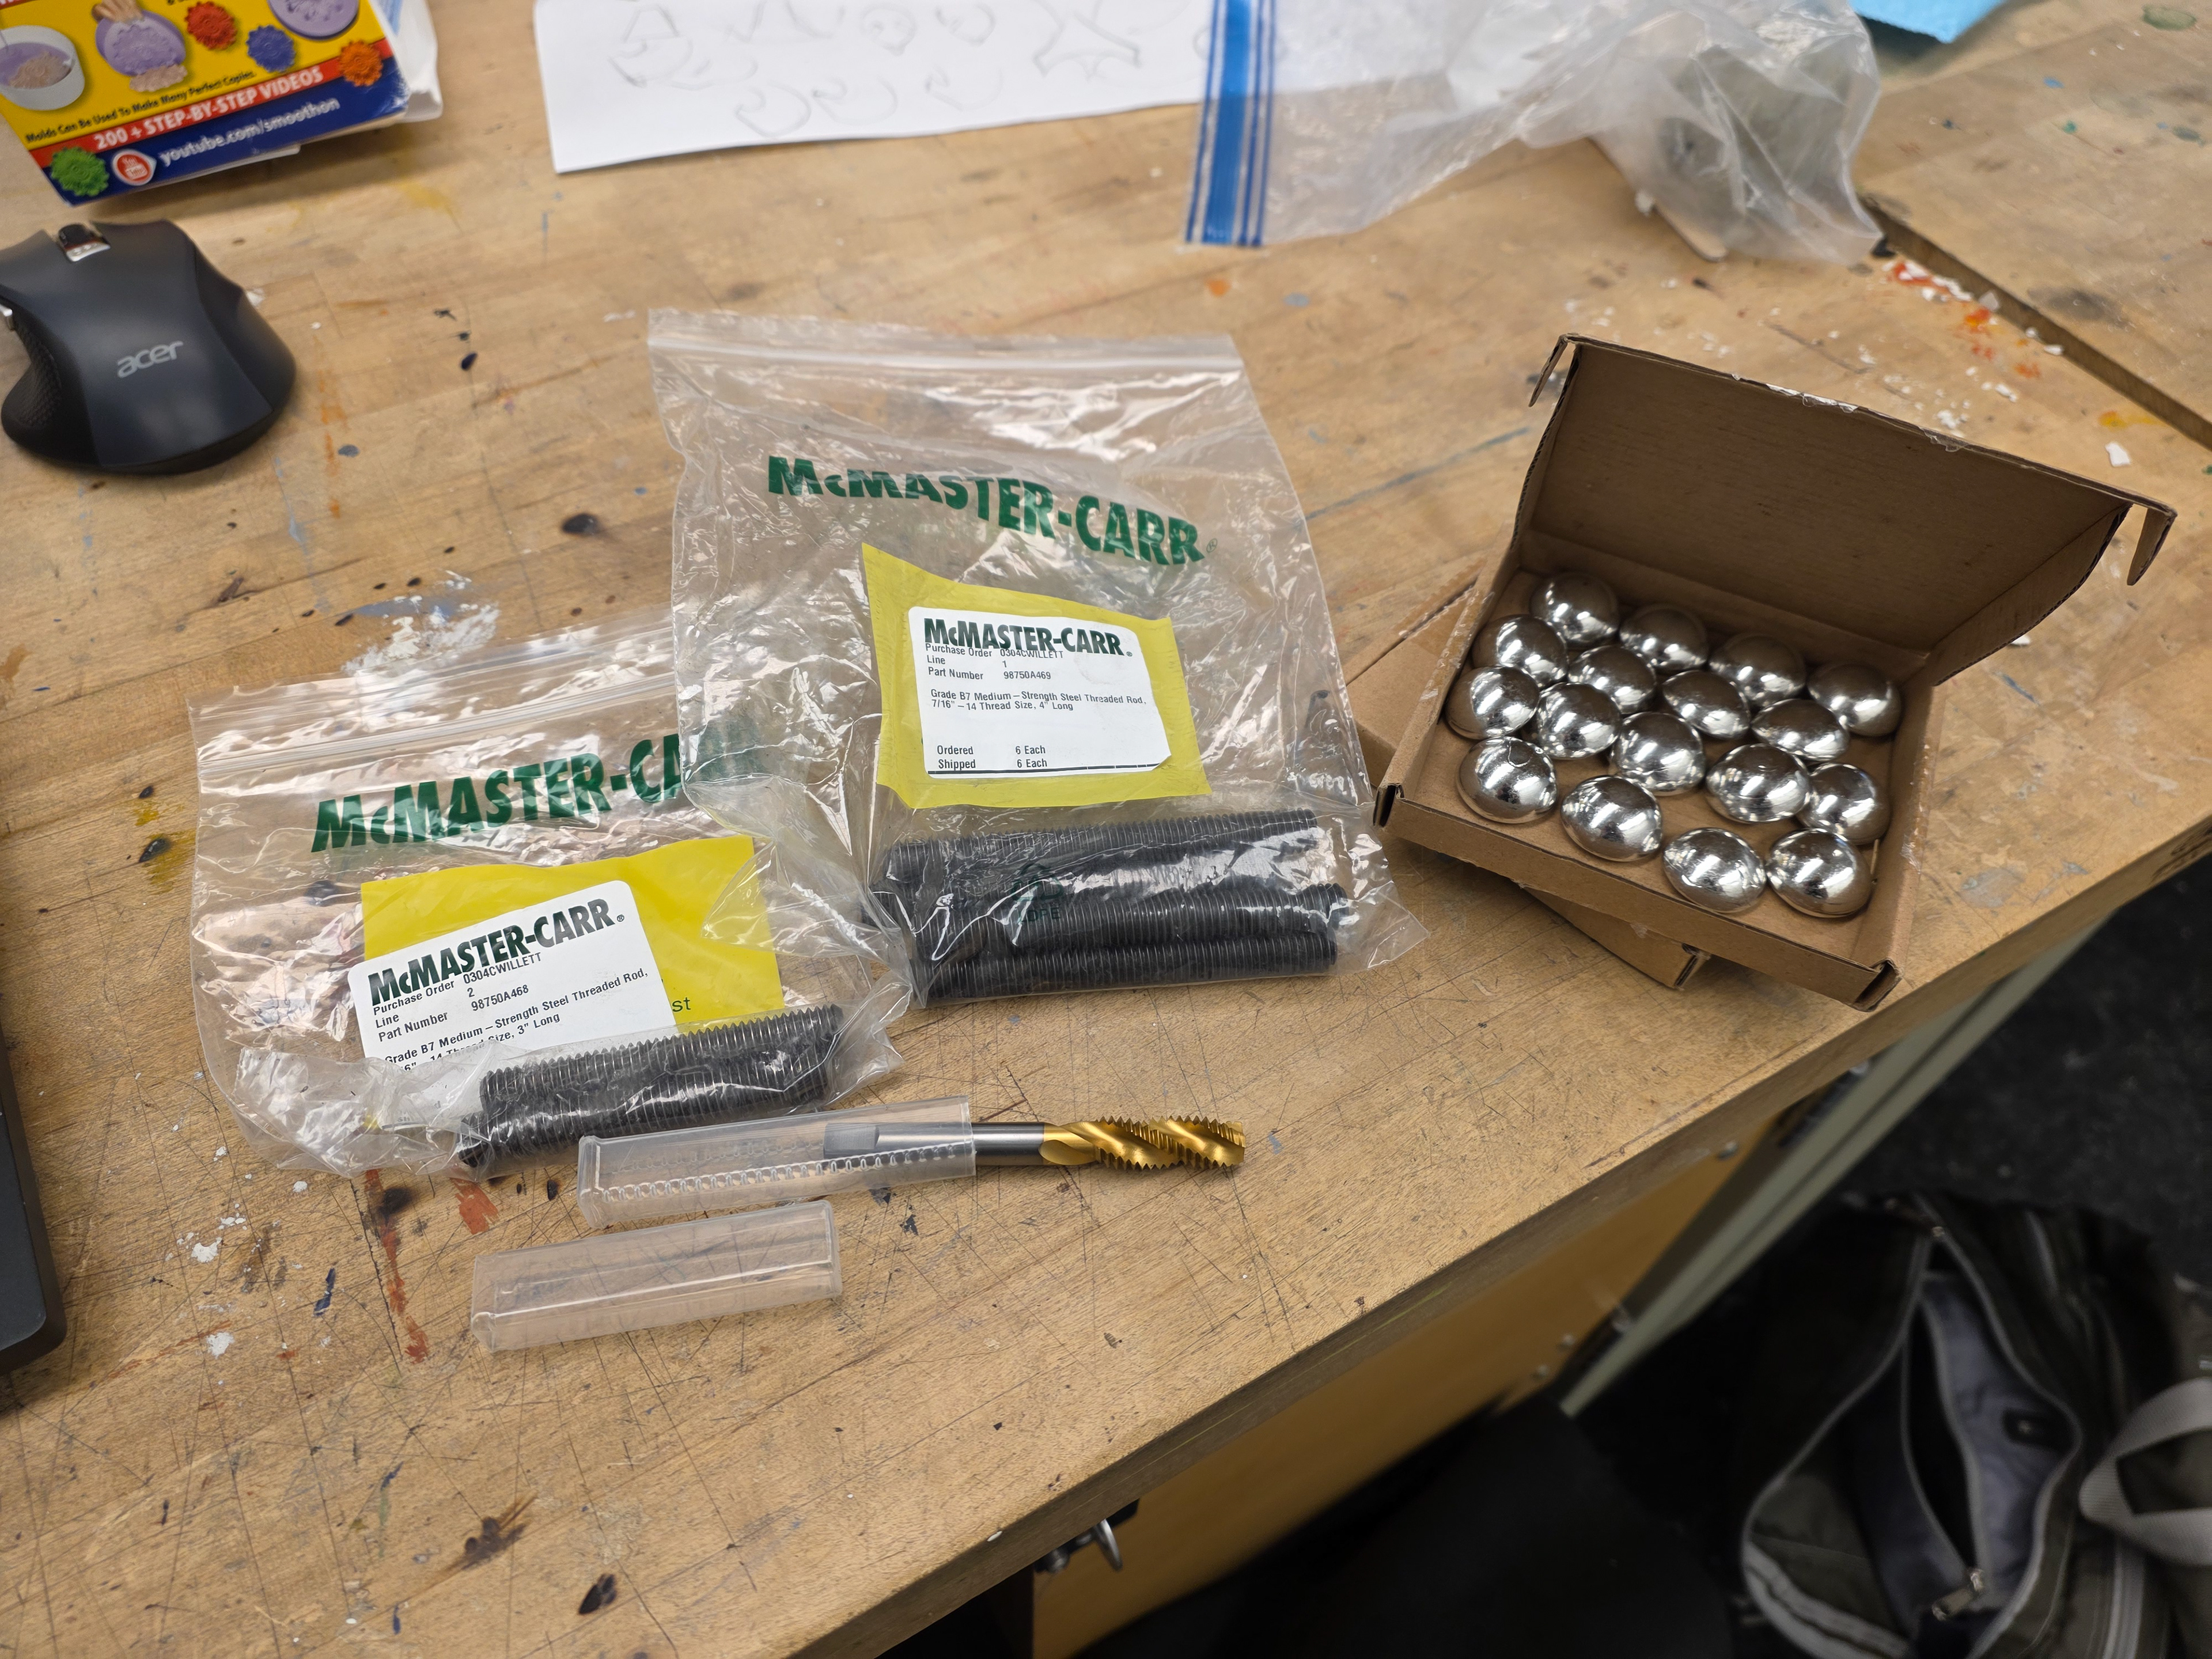
Ordered Materials Arrived
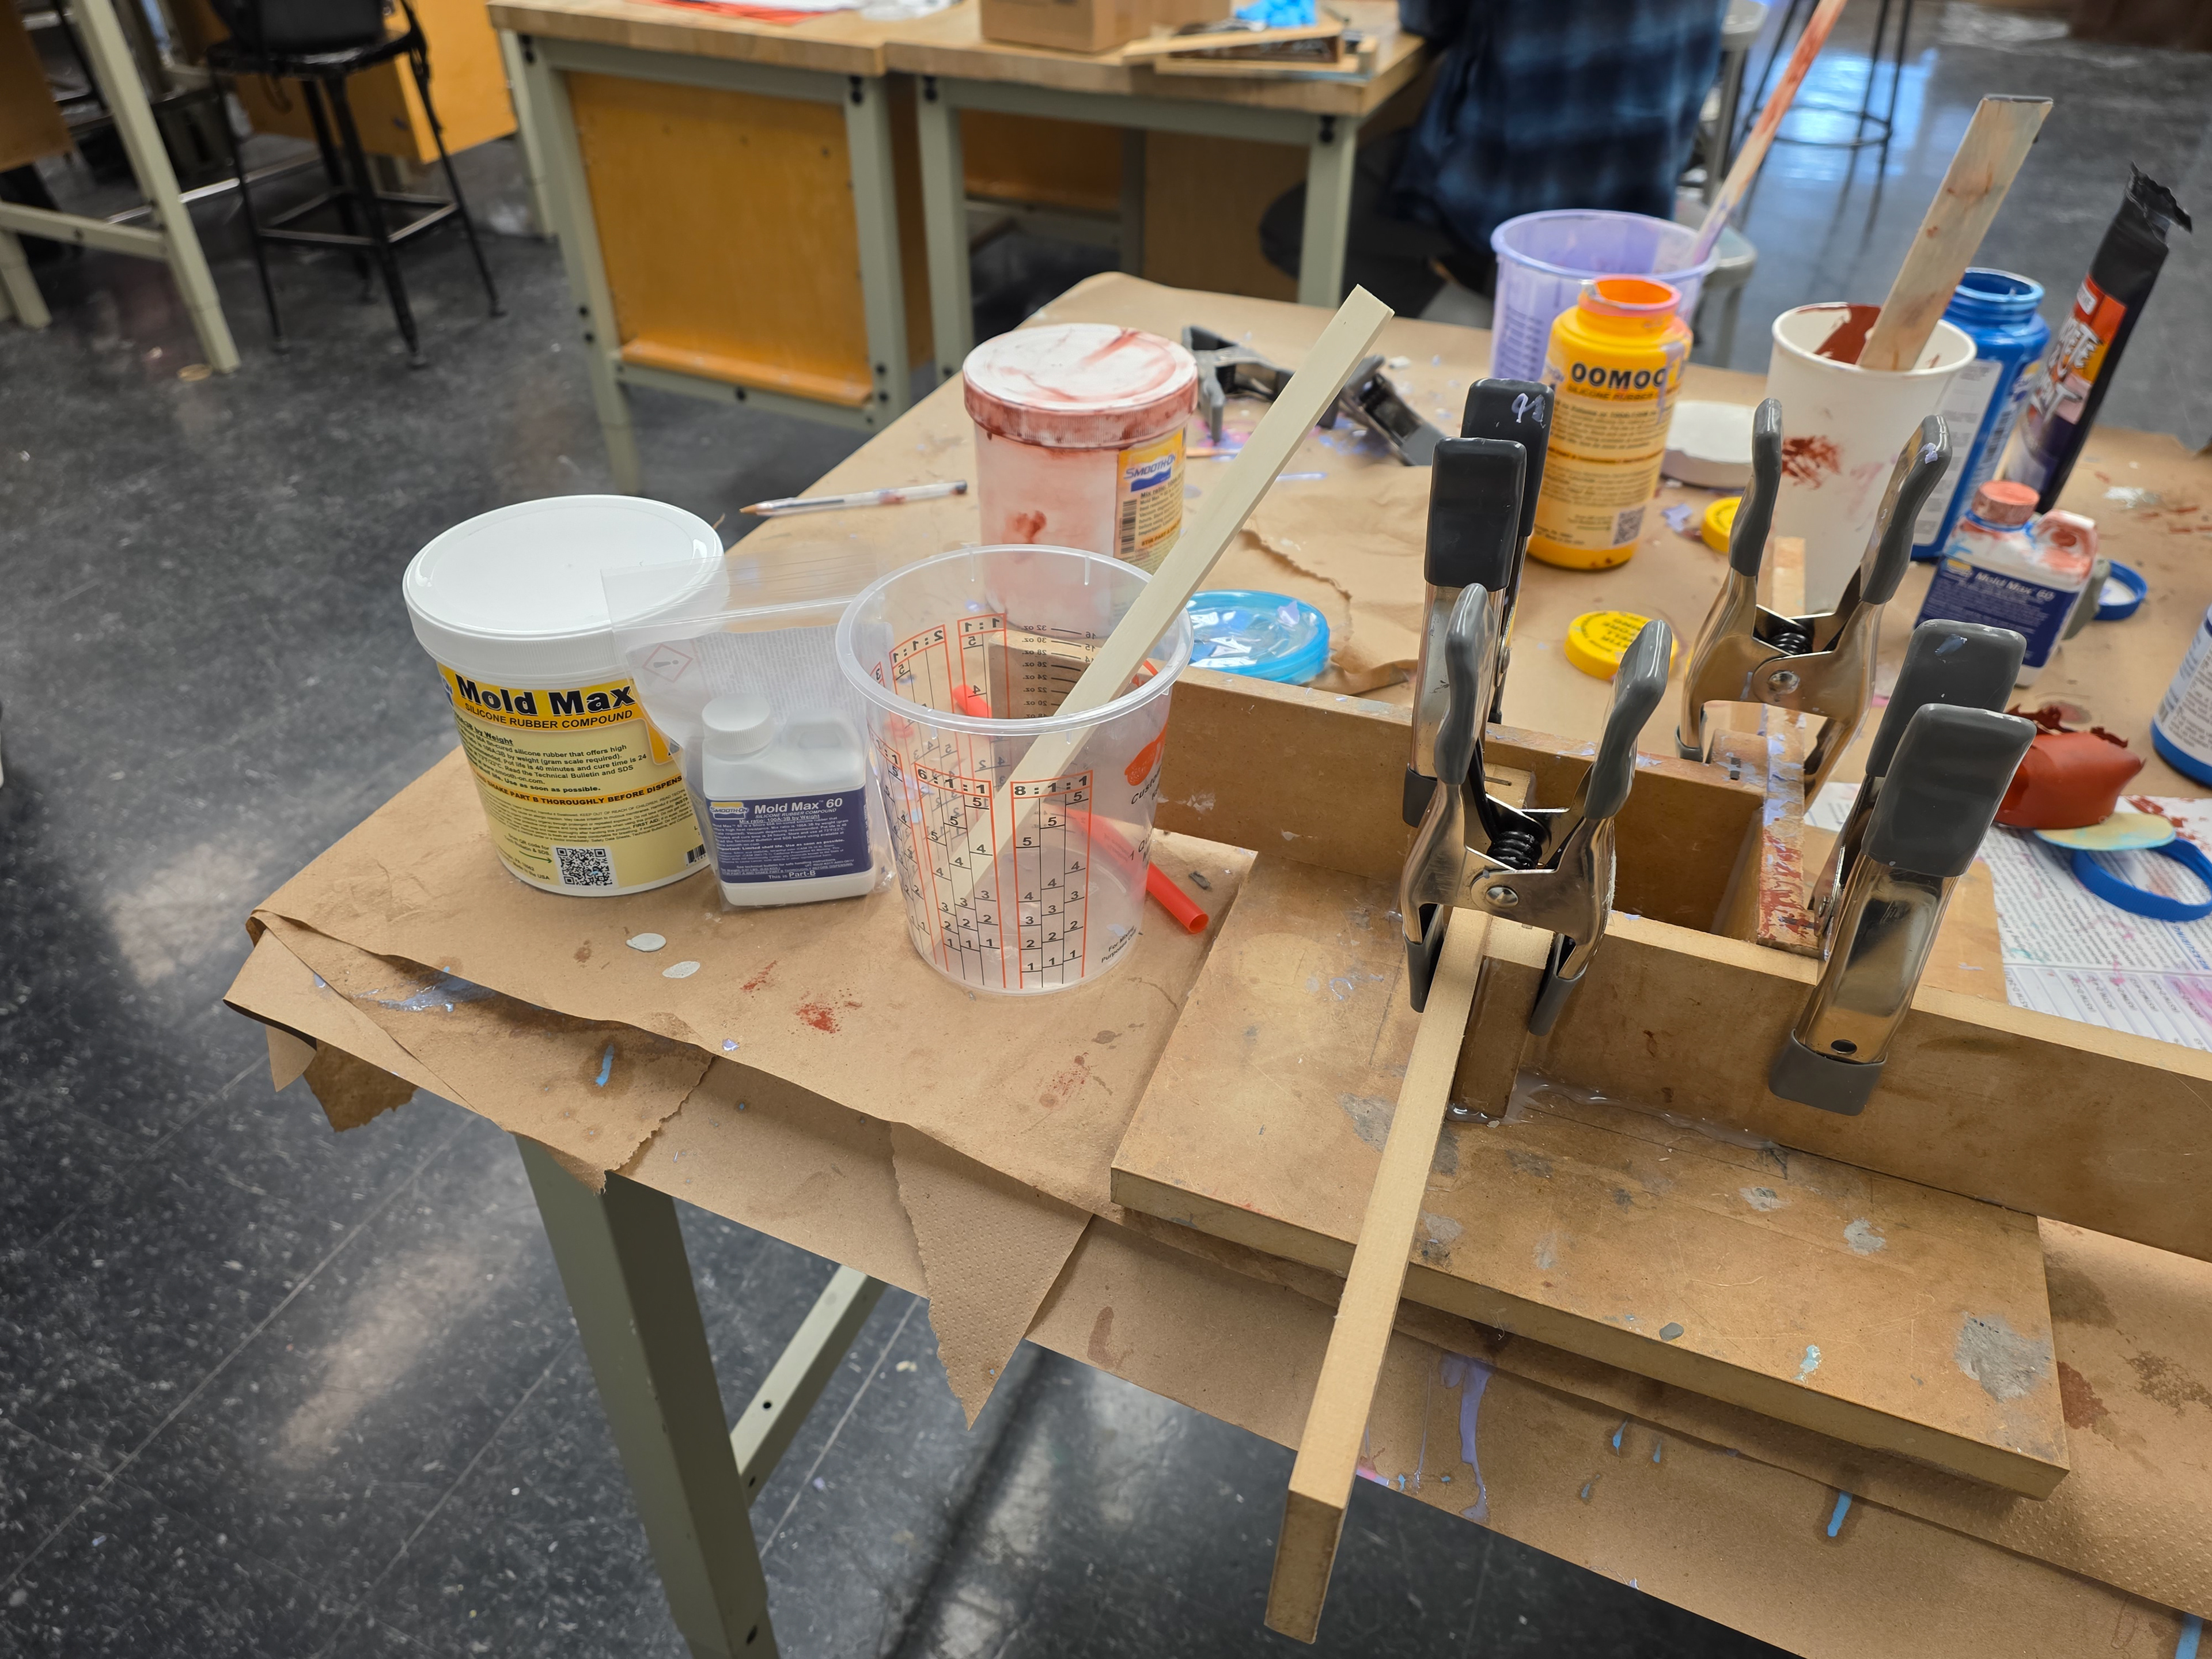
Preparing Mold Box
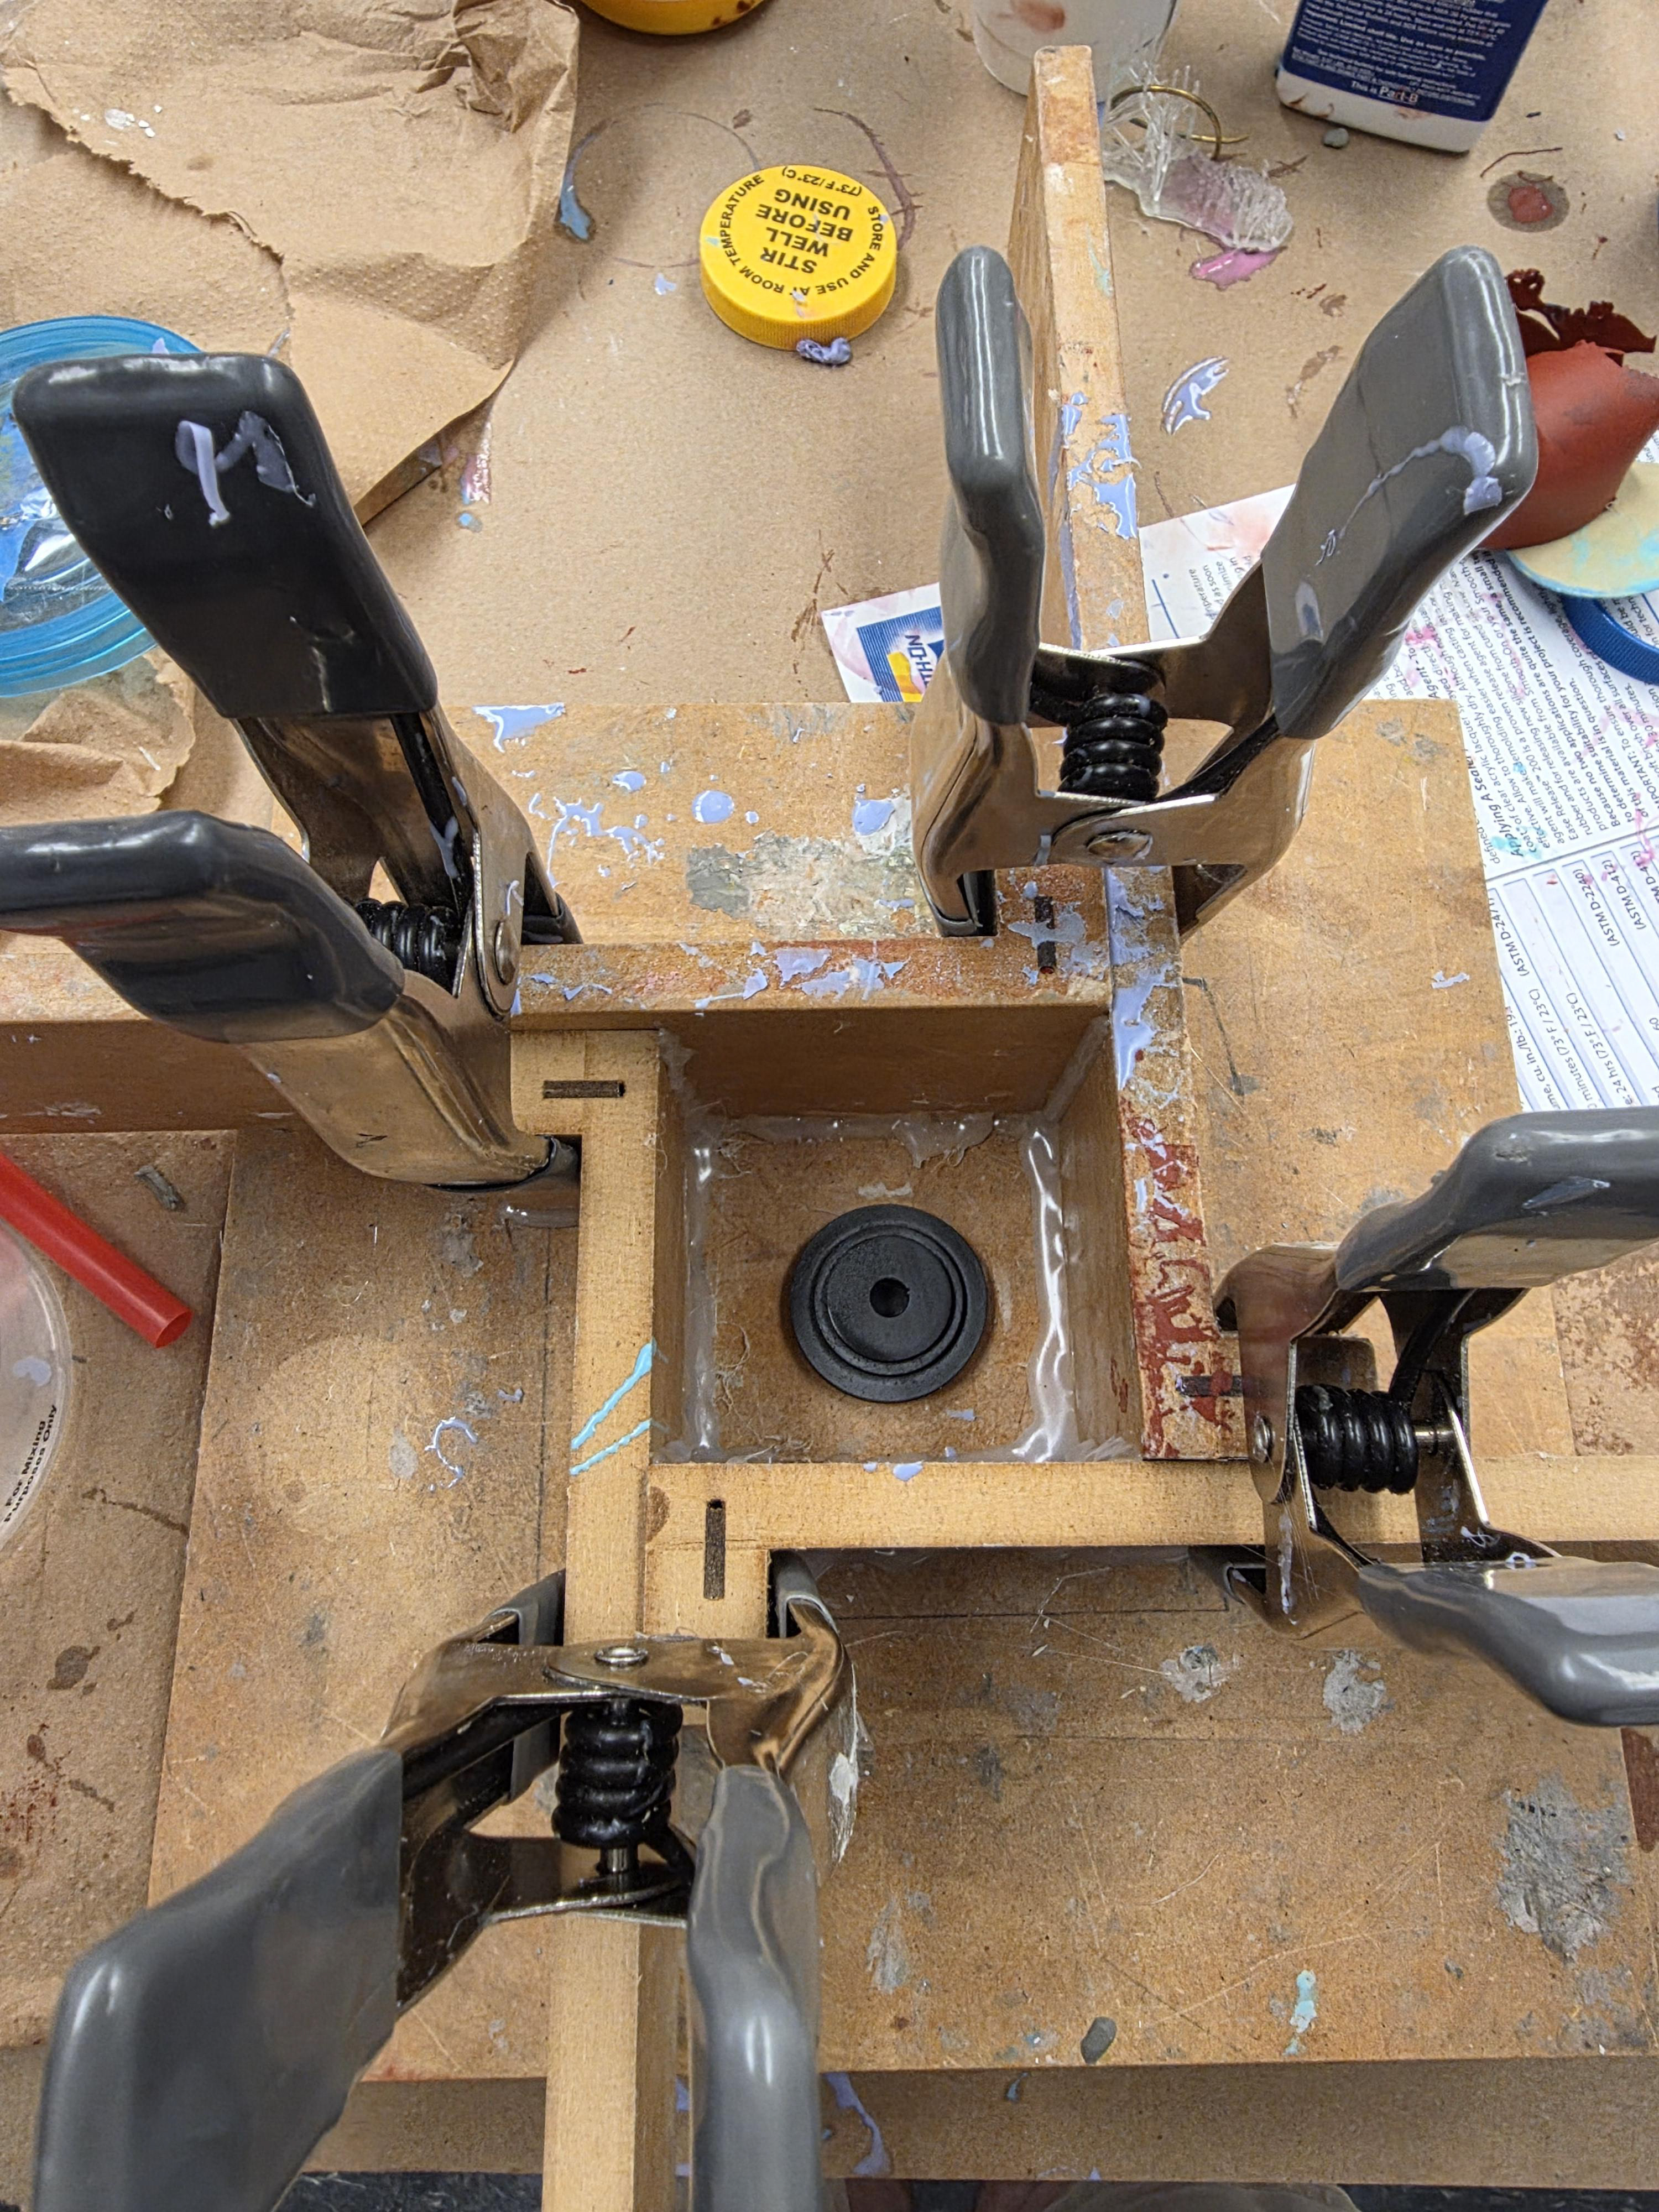
3D Resin Printed Model Arranged in Mold Box
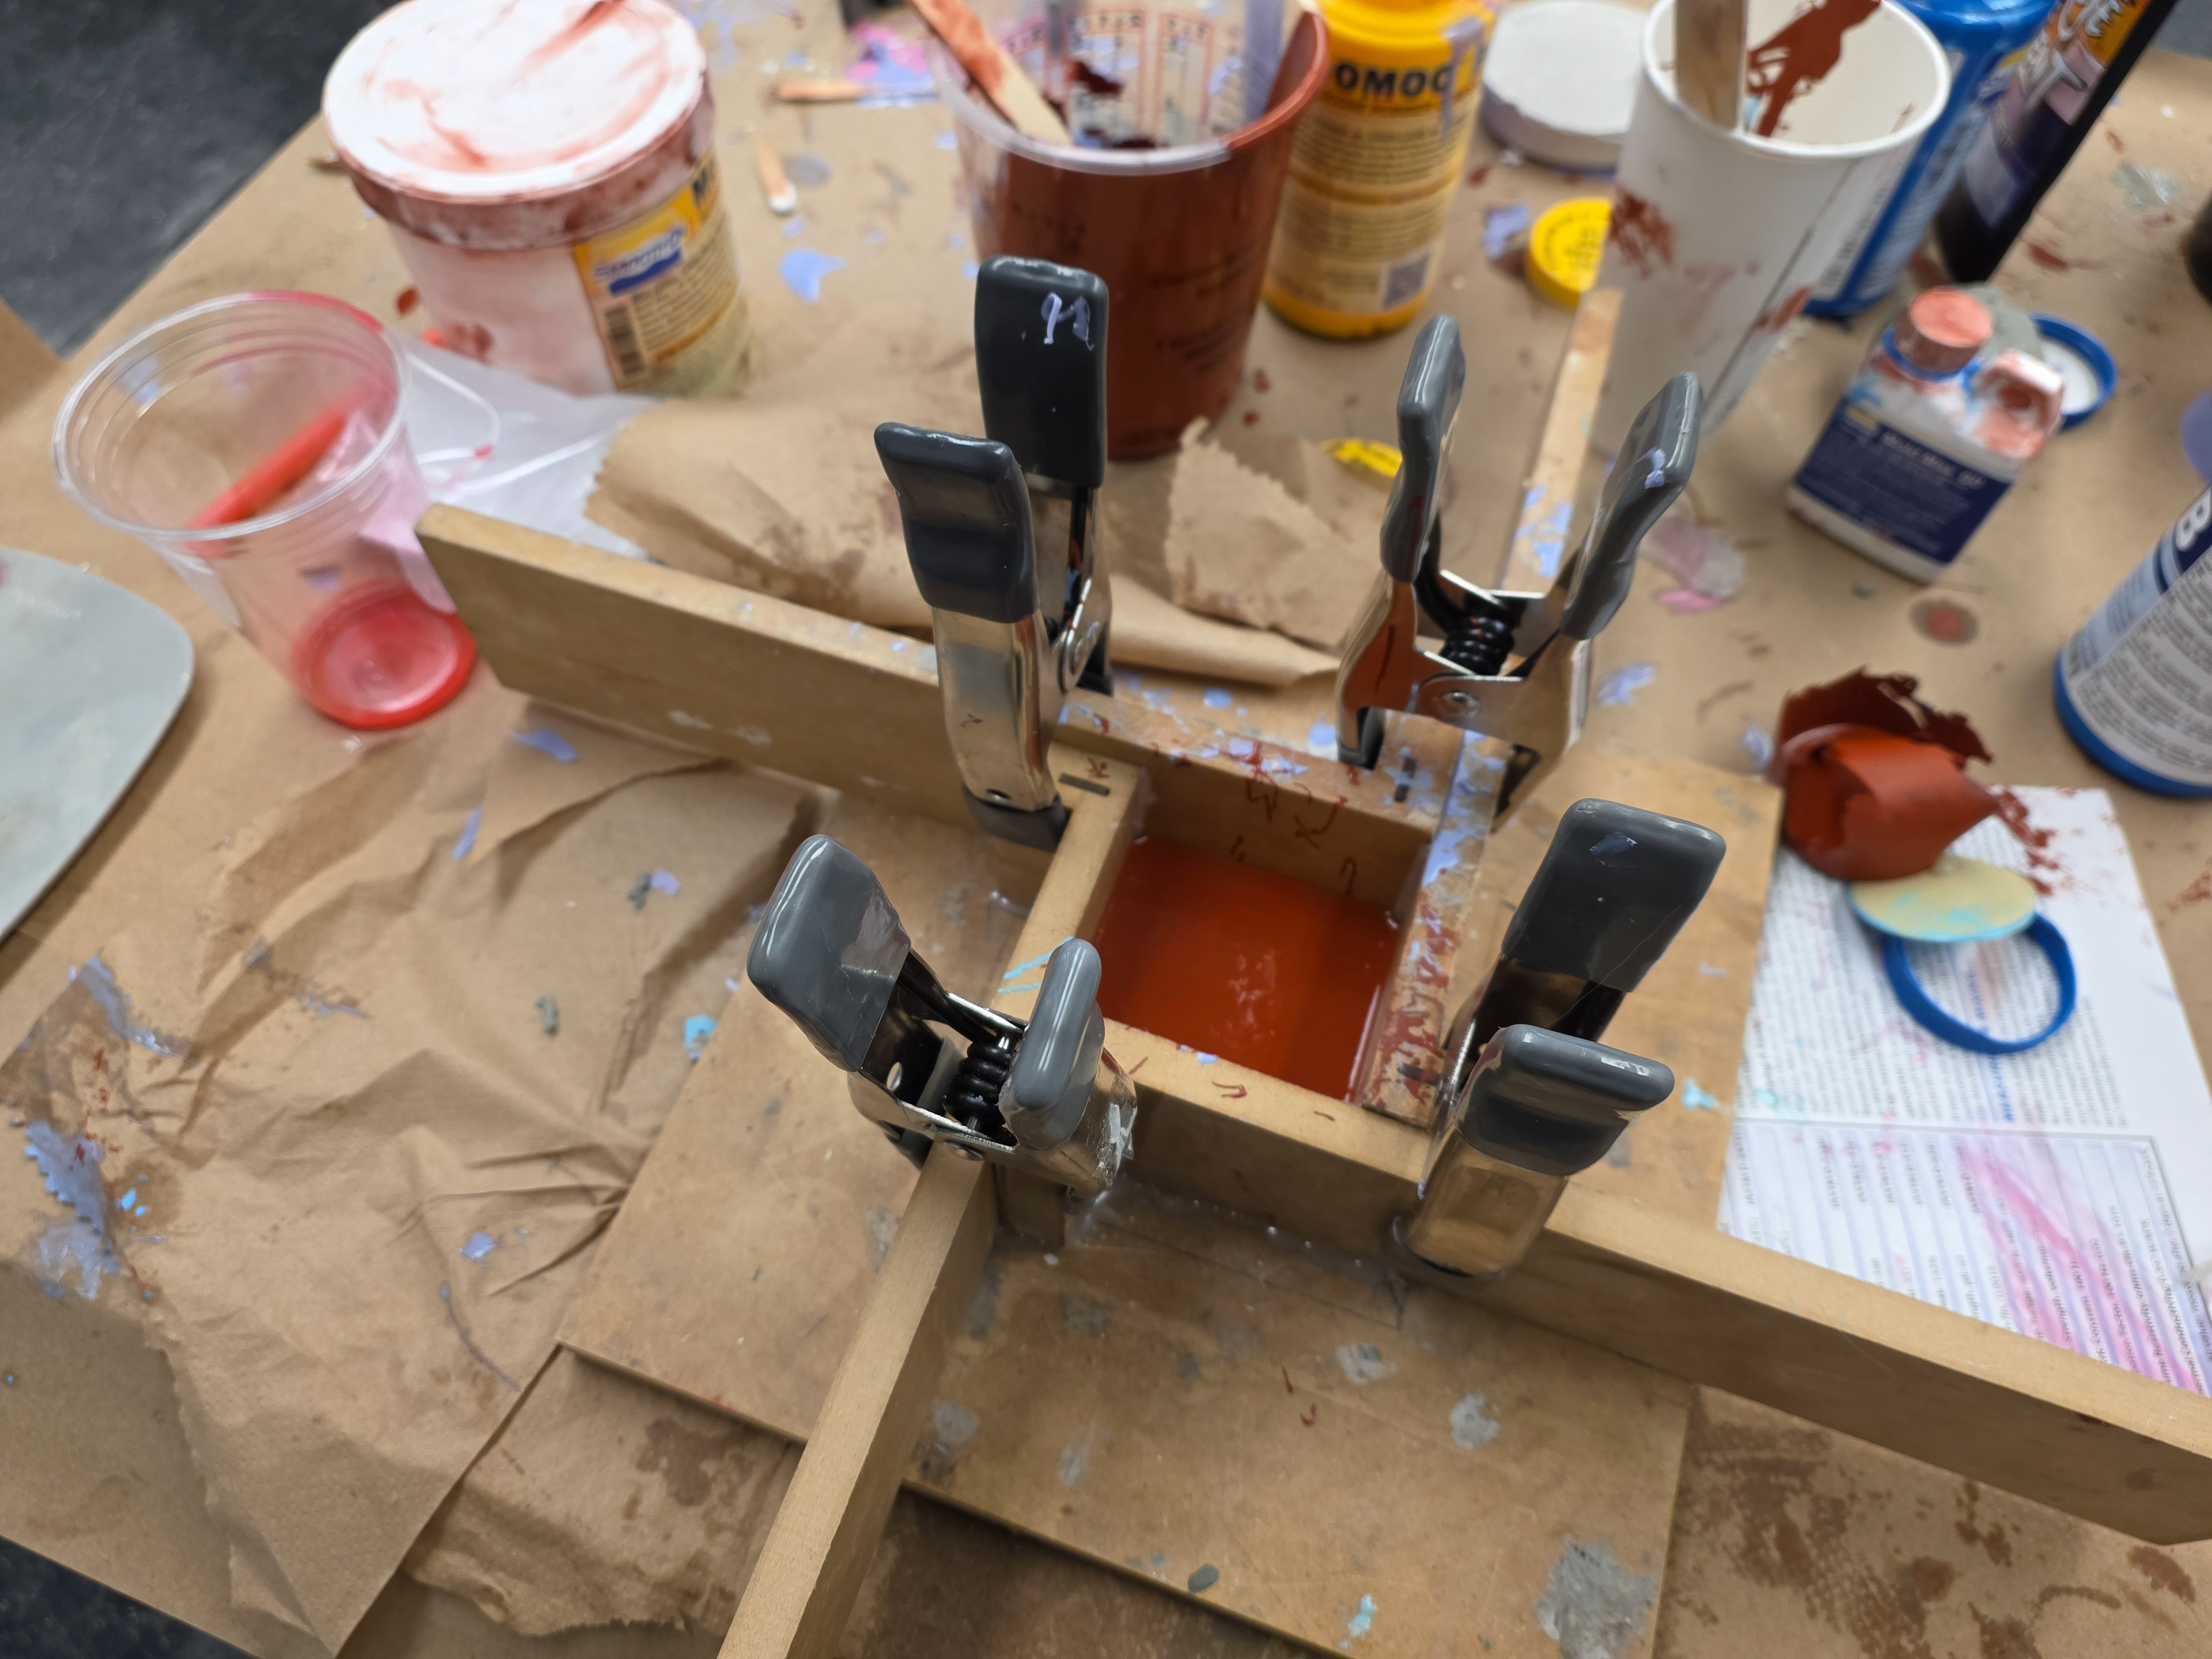
Silicone Poured
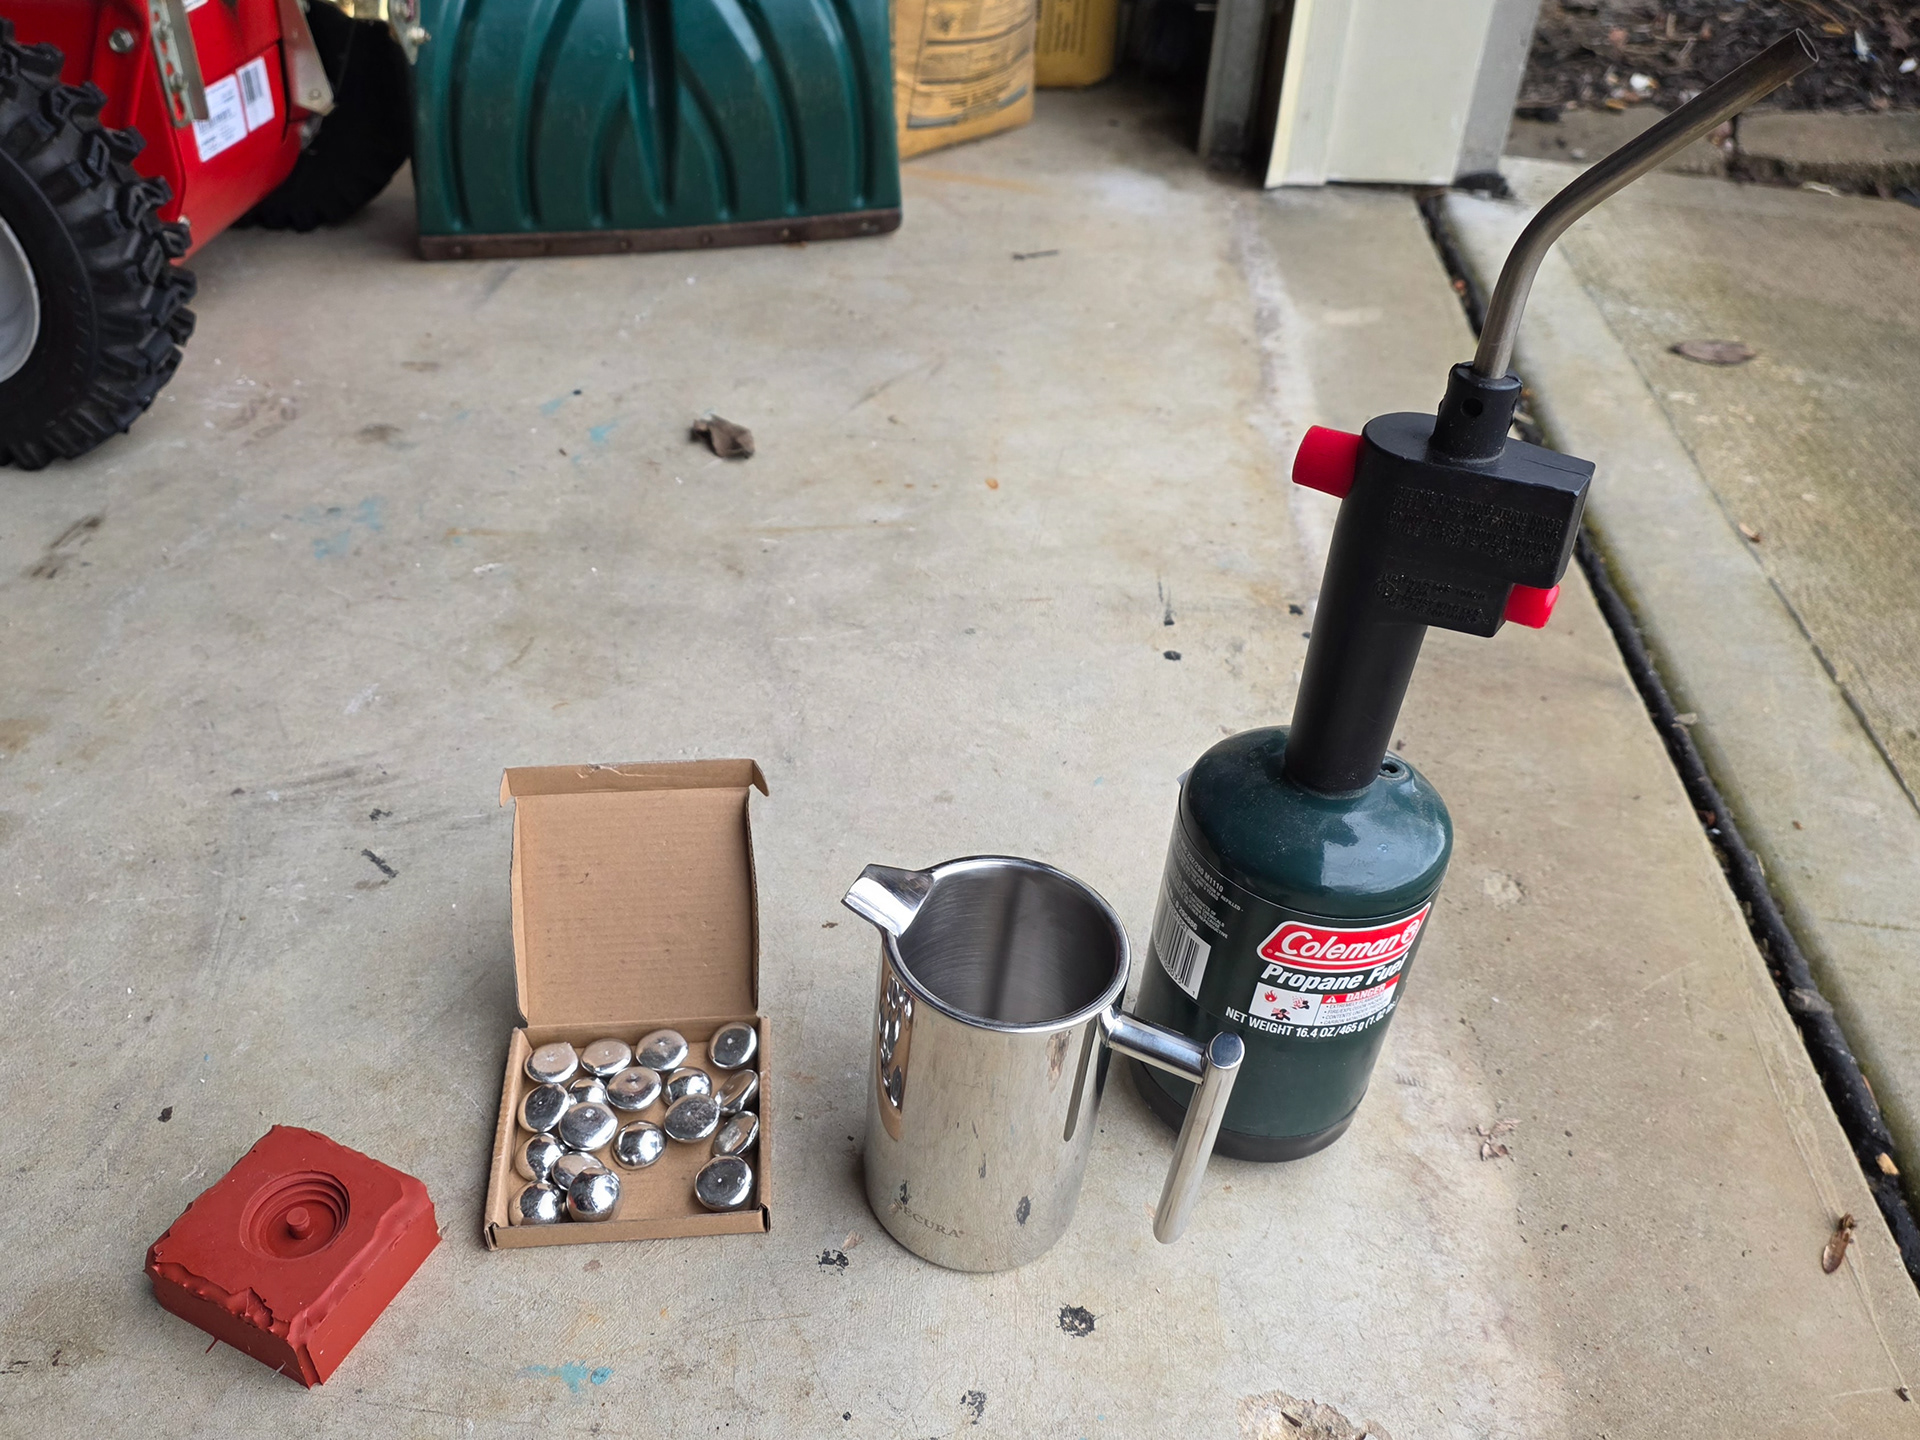
Preparing to Pour First Pewter Cast

First Bases Successfully Cast
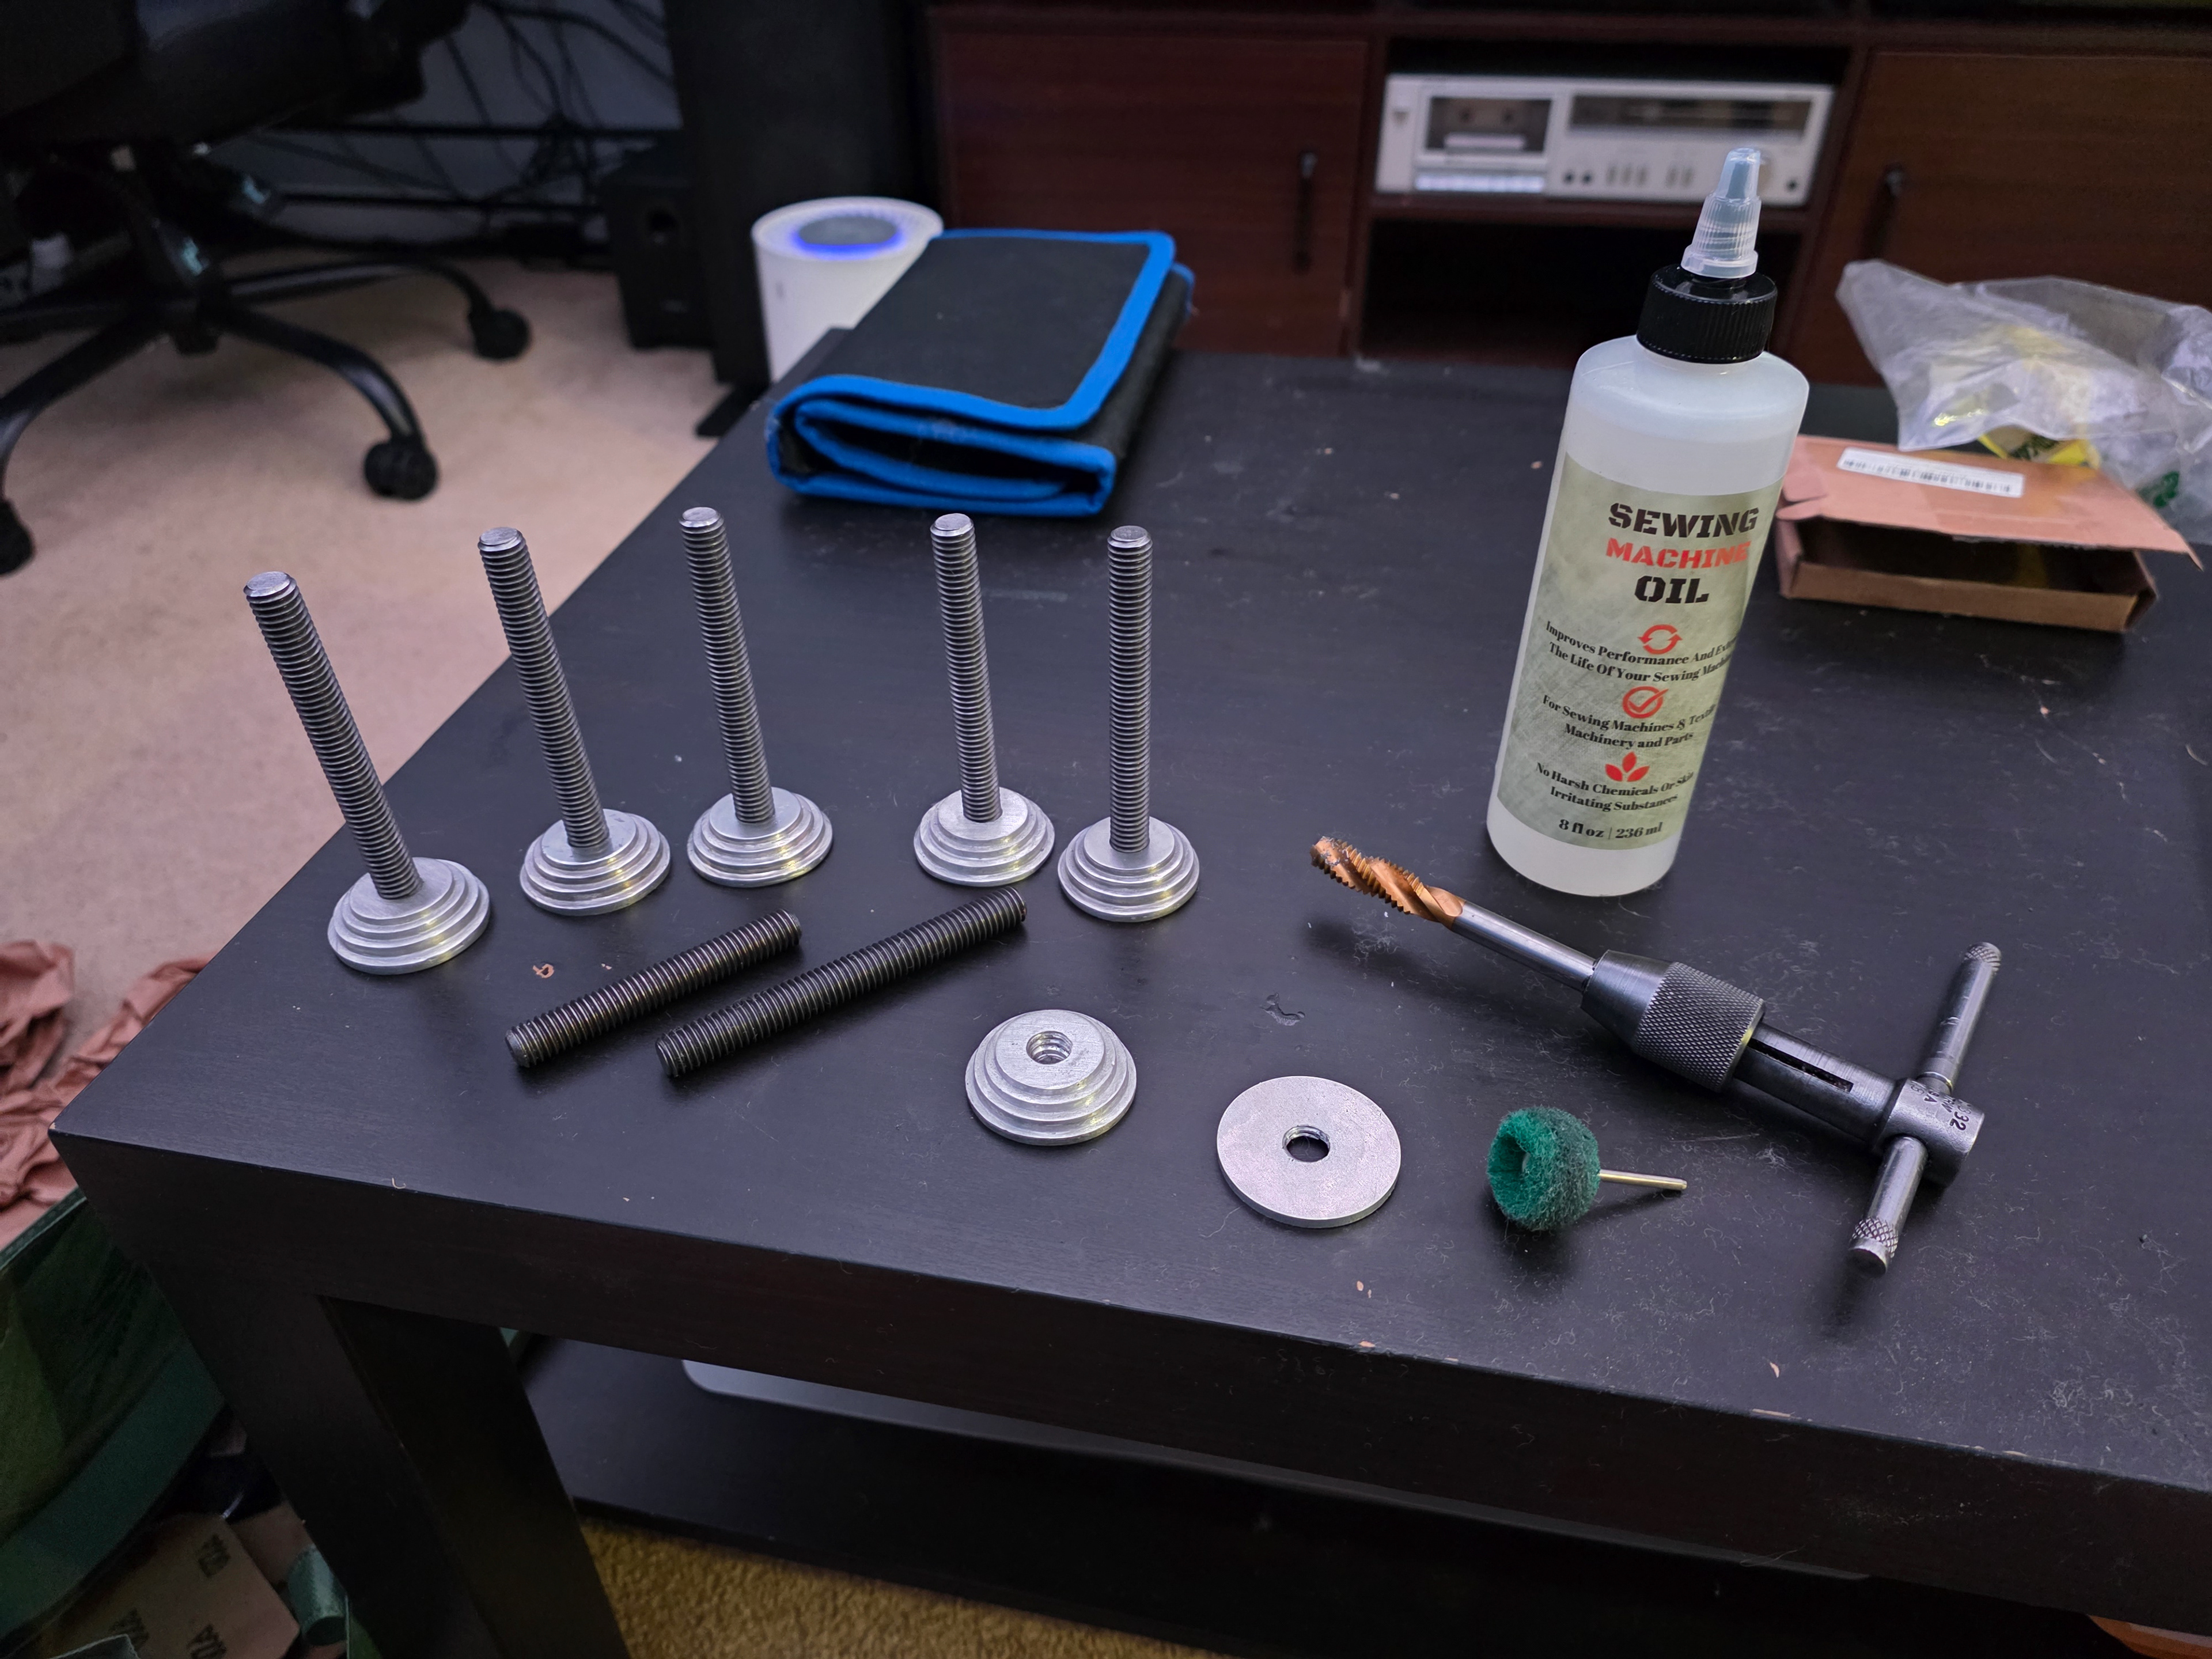
After receiving the layer parts from Send Cut Send, I hand-tapped all of them, as well as the cast bases, with a 7/16-14 spiral tap, a vice, and lots of light machine oil. This was a difficult and lengthy process, followed by many hours of sanding out imperfections, improving threads, and layering parts tightly, but I was successful. I then assembled the final pieces on threaded rod from McMaster Carr, spacing each layer out with flat washers and keeping it together with blue Loctite and a few nuts on some pieces. I finished the pieces with a fine polishing compound and a Dremel.
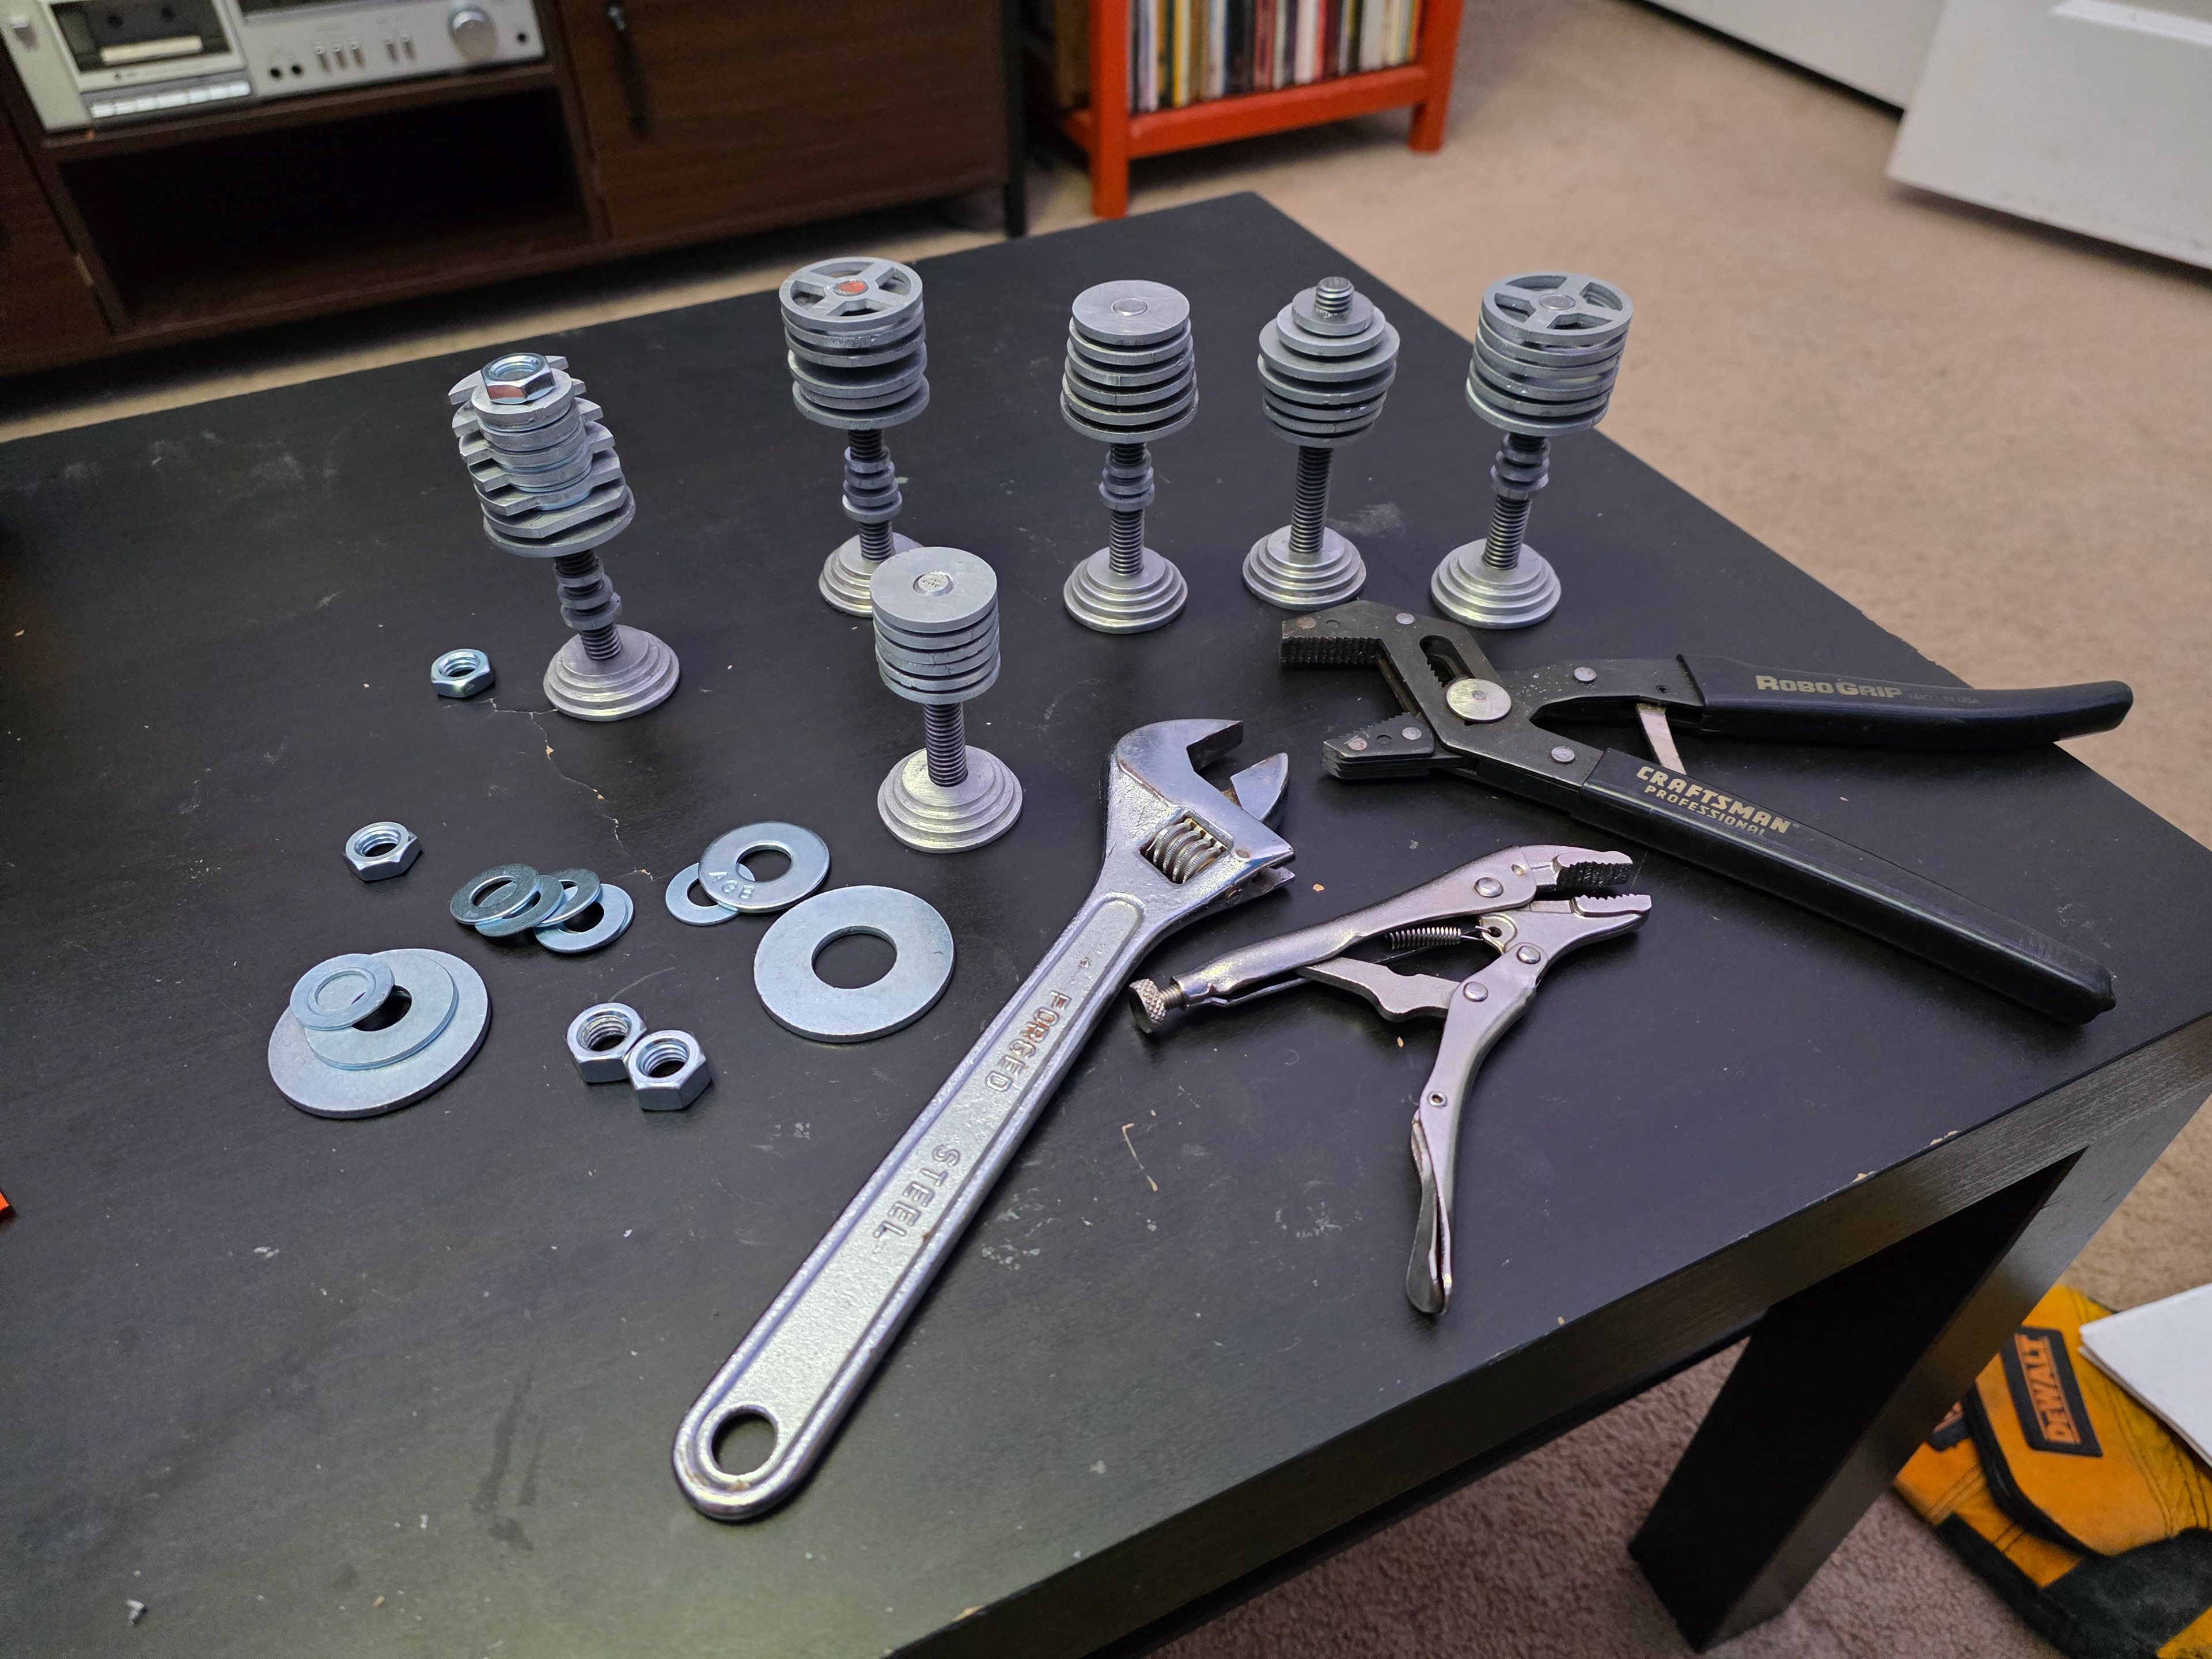
Assembling Final Pieces
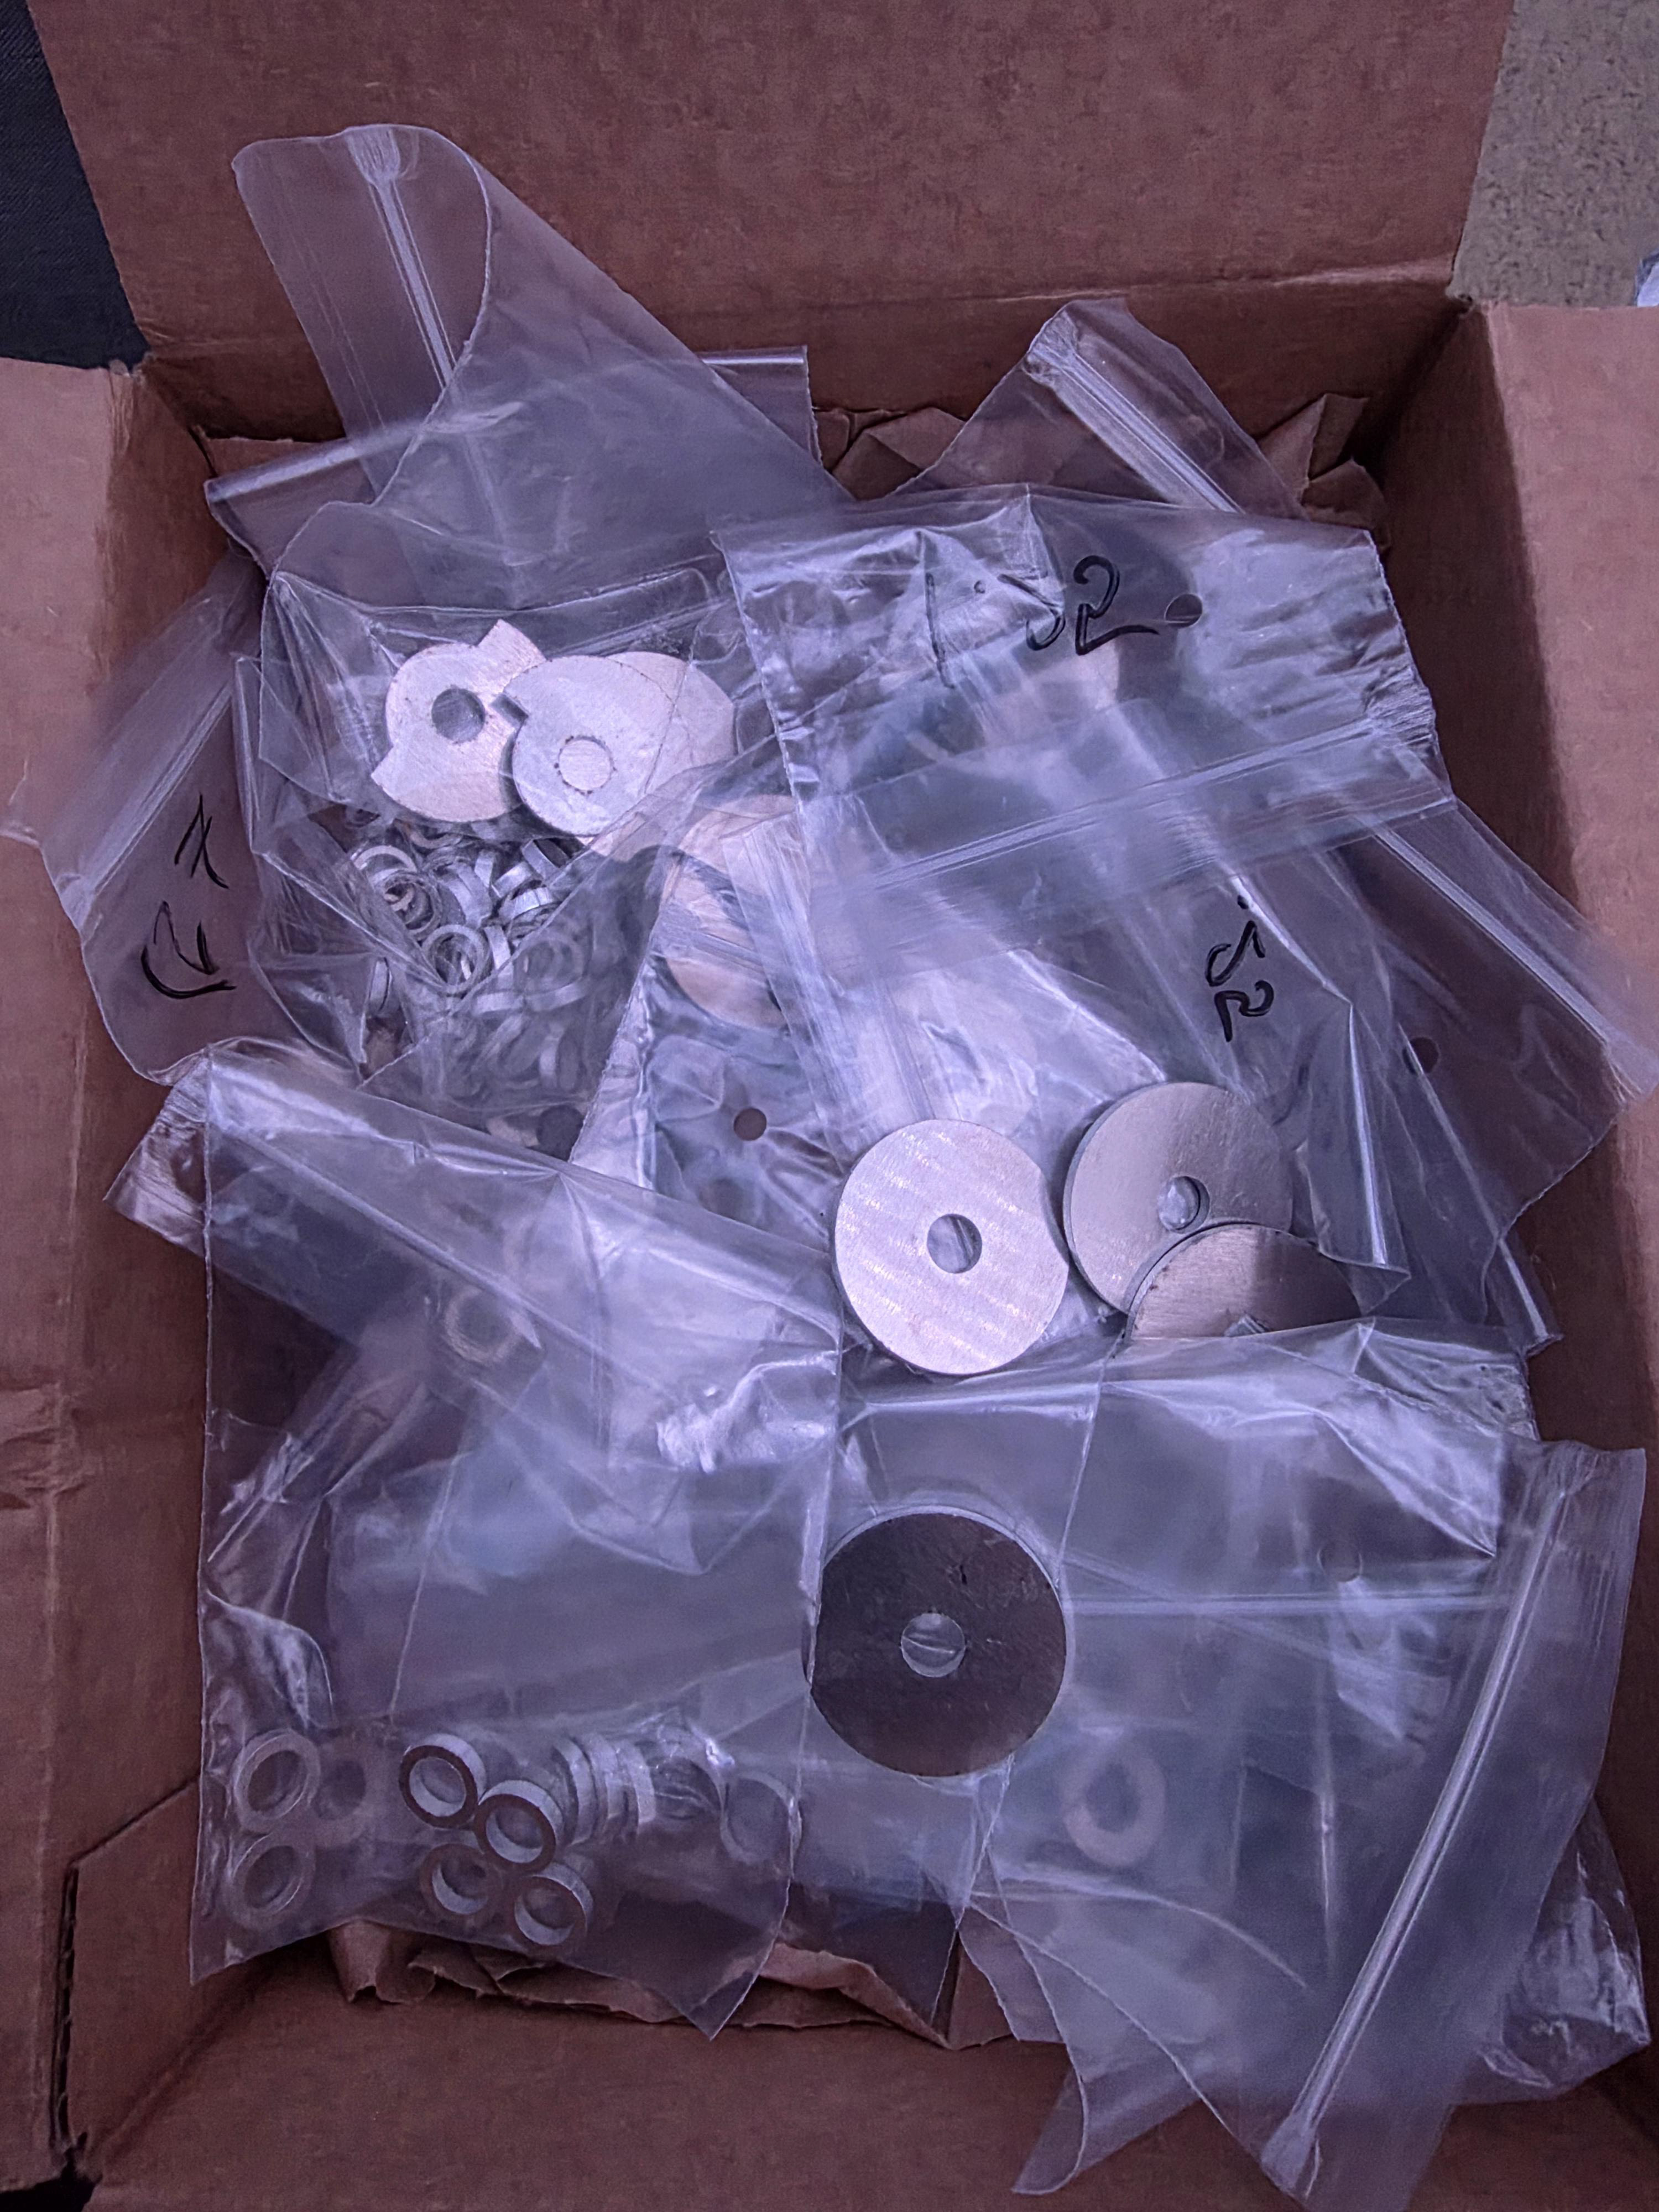
Parts Arrived from SendCutSend
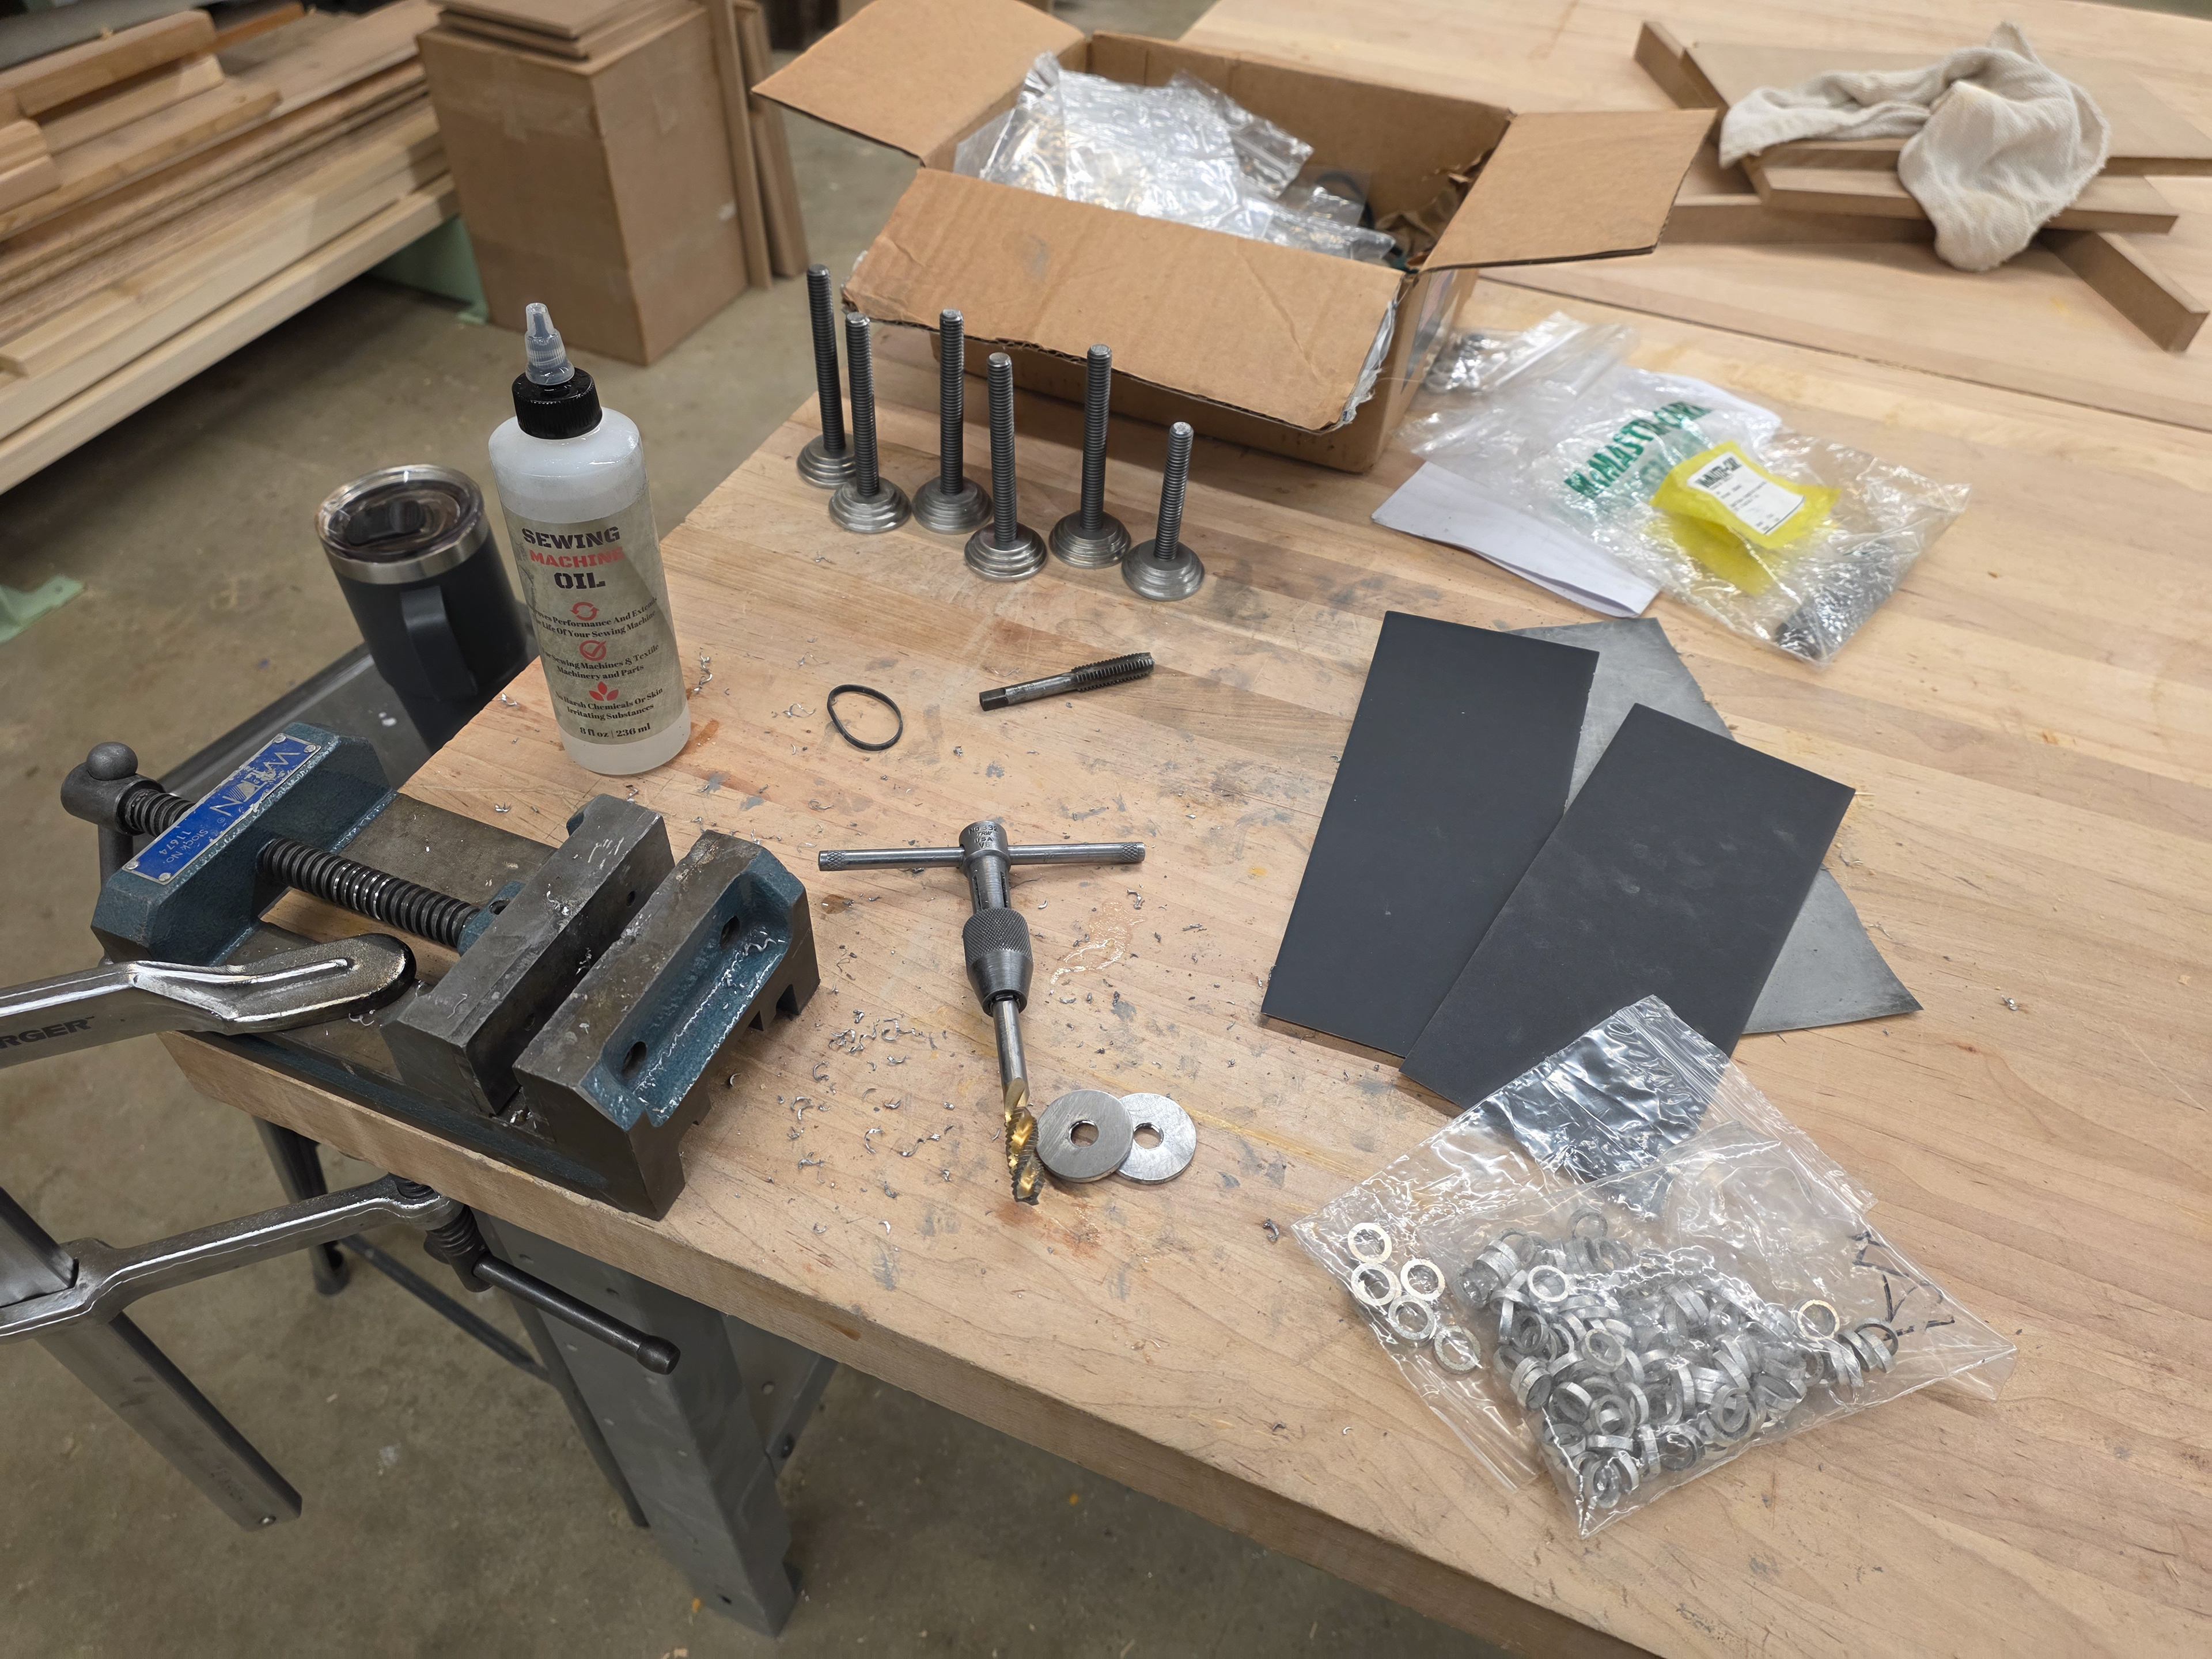
Tapping Parts
Initial Assembly onto Pewter Bases
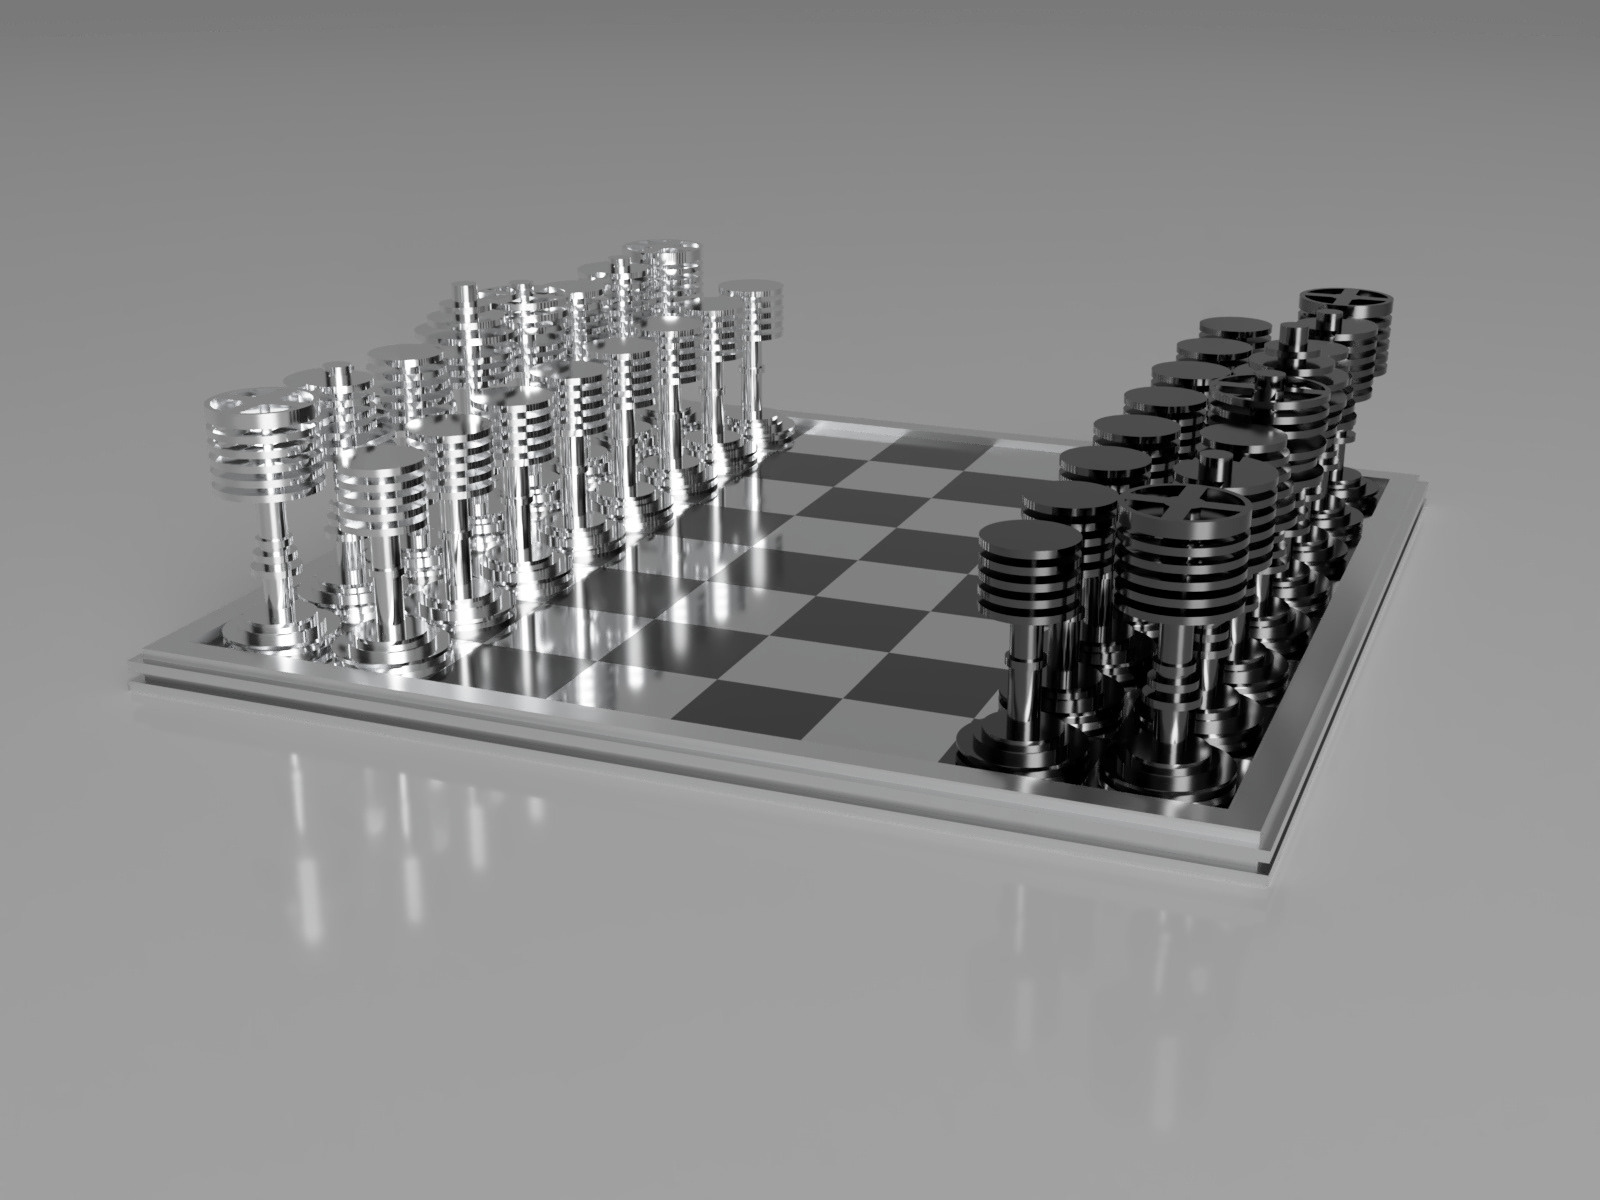
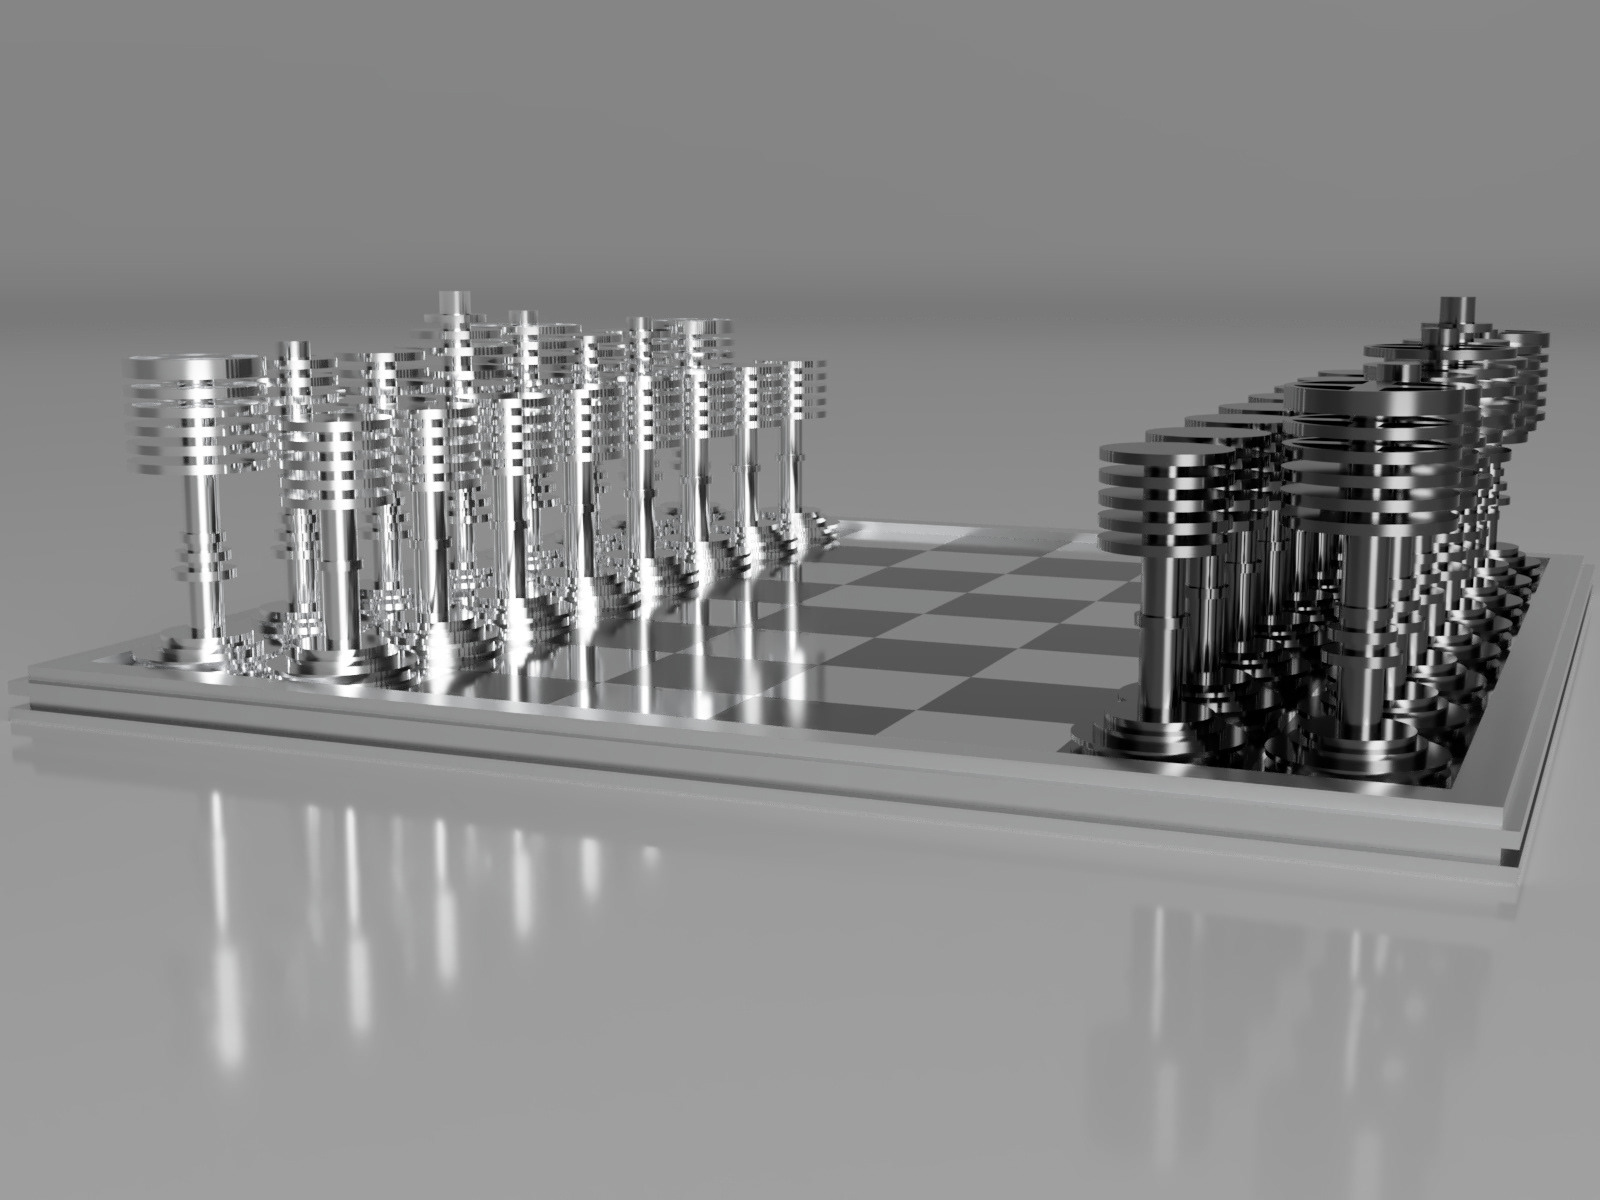
After completing the final iterations of my pieces, I created digital renderings on AutoDesk Fusion 360 of what a full set, opposing side, and board might look like.

I made it through the long haul and gathered my six finished pieces to present to my peers. The pieces were very well recieved, and I couldn’t be more pleased with the result given the challenges I faced throughout this process.

This project was supported by my ID Studio 1 professor, Tim Karoleff, as well as the faculty and staff of the College of Design, Architecture, Art, and Planning (DAAP).
Additional support came from the DAAP Build, Student Technology, and Rapid Prototyping Labs, my peers in UC Industrial Design’s Class of 2030, Send Cut Send, and UC’s 1819 Innovation Hub.